Protect Azure resources from accidental deletion with Azure Resource Locks
Azure Resource Locks can be used to easily and effectively protect Azure subscriptions, resource groups or individual resources from accidental deletion. The lock overrides any user permissions.
This guide shows how to enable Azure Resource Locks and which properties can be configured.
Prerequisites and Licensing
The Azure Resource Locks feature does not require a paid license.
“Azure Resource Locks” is a component of
- Azure AD Free
This license is part of every Microsoft Tenant.
Enable Azure Resource Locks
In the Azure Portal (https://portal.azure.com), the Azure Resource Locks function can be enabled from the respective menu “Locks” for Azure subscriptions, resource groups and individual resources:

Click “Add” to create a new lock.
- “Lock Name” shows a meaningful name.
- “Lock Type” defines how the lock should behave.
There are two different options- Read-Only
Authorized users can read a resource but cannot delete or update it. Be careful with this setting, some resources require write permissions to run, for example a virtual server restart. - Delete
Authorized users can read, write and modify resource, but not delete it.
- Read-Only

In this tutorial, the deletion of resources is to be prevented, which is why the “Delete” option is selected.
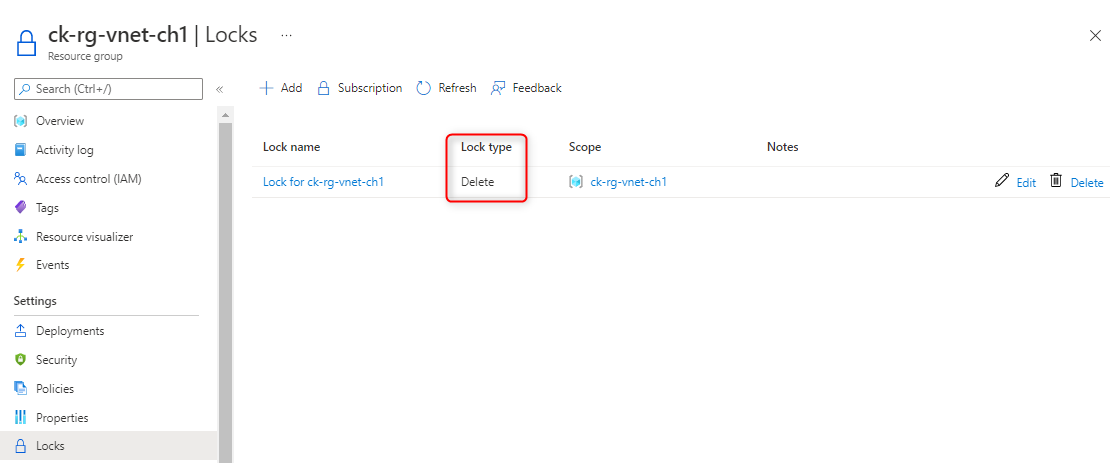
The resource is now protected from accidental deletion.
The lock is inheritable and is thus activated on all underlying resources as well. This also applies if a new resource is added at a later time (inheritance).
Verify configuration
A resource protected from accidental deletion with Azure Resource Locks can now no longer be deleted. This also applies to all underlying resources (inheritance).


When trying to delete the resource protected from accidental deletion, the following error message appears:
“The resource … is locked and can’t be deleted”

Fresh content, explained with practical relevance. Stay up to date via LinkedIn and Bluesky.


No marketing. No noise. Just content.
If this post was helpful, a coffee brings back the rich aroma behind the writing.