Securing Identities: Microsoft Authenticator Passkey in Microsoft Entra
Last Updated on 21. March 2026
A device-bound passkey is a FIDO2-based, phishing-resistant authentication credential where the device generates the private key and stores it securely. Microsoft Entra supports the use of a Microsoft Authenticator passkey. During sign-in, no password is transmitted. Instead, the Authenticator responds to a cryptographic challenge. The private key never leaves the device.
Advantages of device-bound passkeys:
- Phishing-resistant: The sign-in process is protected against traditional phishing attacks
- Device-bound: The private key is stored only on the registered device and never leaves the device
- No passwords required: With passkeys, users do not need to enter complex passwords during sign-in
- Cost-efficient: Native support for Microsoft Authenticator passkeys is available in Microsoft Entra
This article explains the required configuration steps in Microsoft Entra to enable a Microsoft Authenticator passkey, allow users to register it, and use it for passwordless sign-in.
Prerequisites and Licensing
Licenses
Using Microsoft Authenticator device-bound passkeys in Microsoft Entra does not require a paid license. A Microsoft Entra ID Free license is sufficient and included in every Microsoft tenant.
User Account Requirements
The user account that registers the passkey must have multifactor authentication enabled.
Supported Devices
- iOS 17 or later
with the latest version of the Microsoft Authenticator app
If Microsoft Authenticator is not the primary password manager on the device, iOS 18 is recommended. This version allows multiple password managers to be used at the same time. - Android 14 or later
with the latest version of the Microsoft Authenticator app
Roles
The following role is sufficient to enable the Passkey (FIDO2) authentication method following the principle of least privilege:
| Role | Permission |
| Authentication Policy Administrator | Configure authentication methods policies |
Enable Passkey (FIDO2) Authentication Method
The Passkey (FIDO2) authentication method for Microsoft Authenticator is configured in the Microsoft Entra admin center.
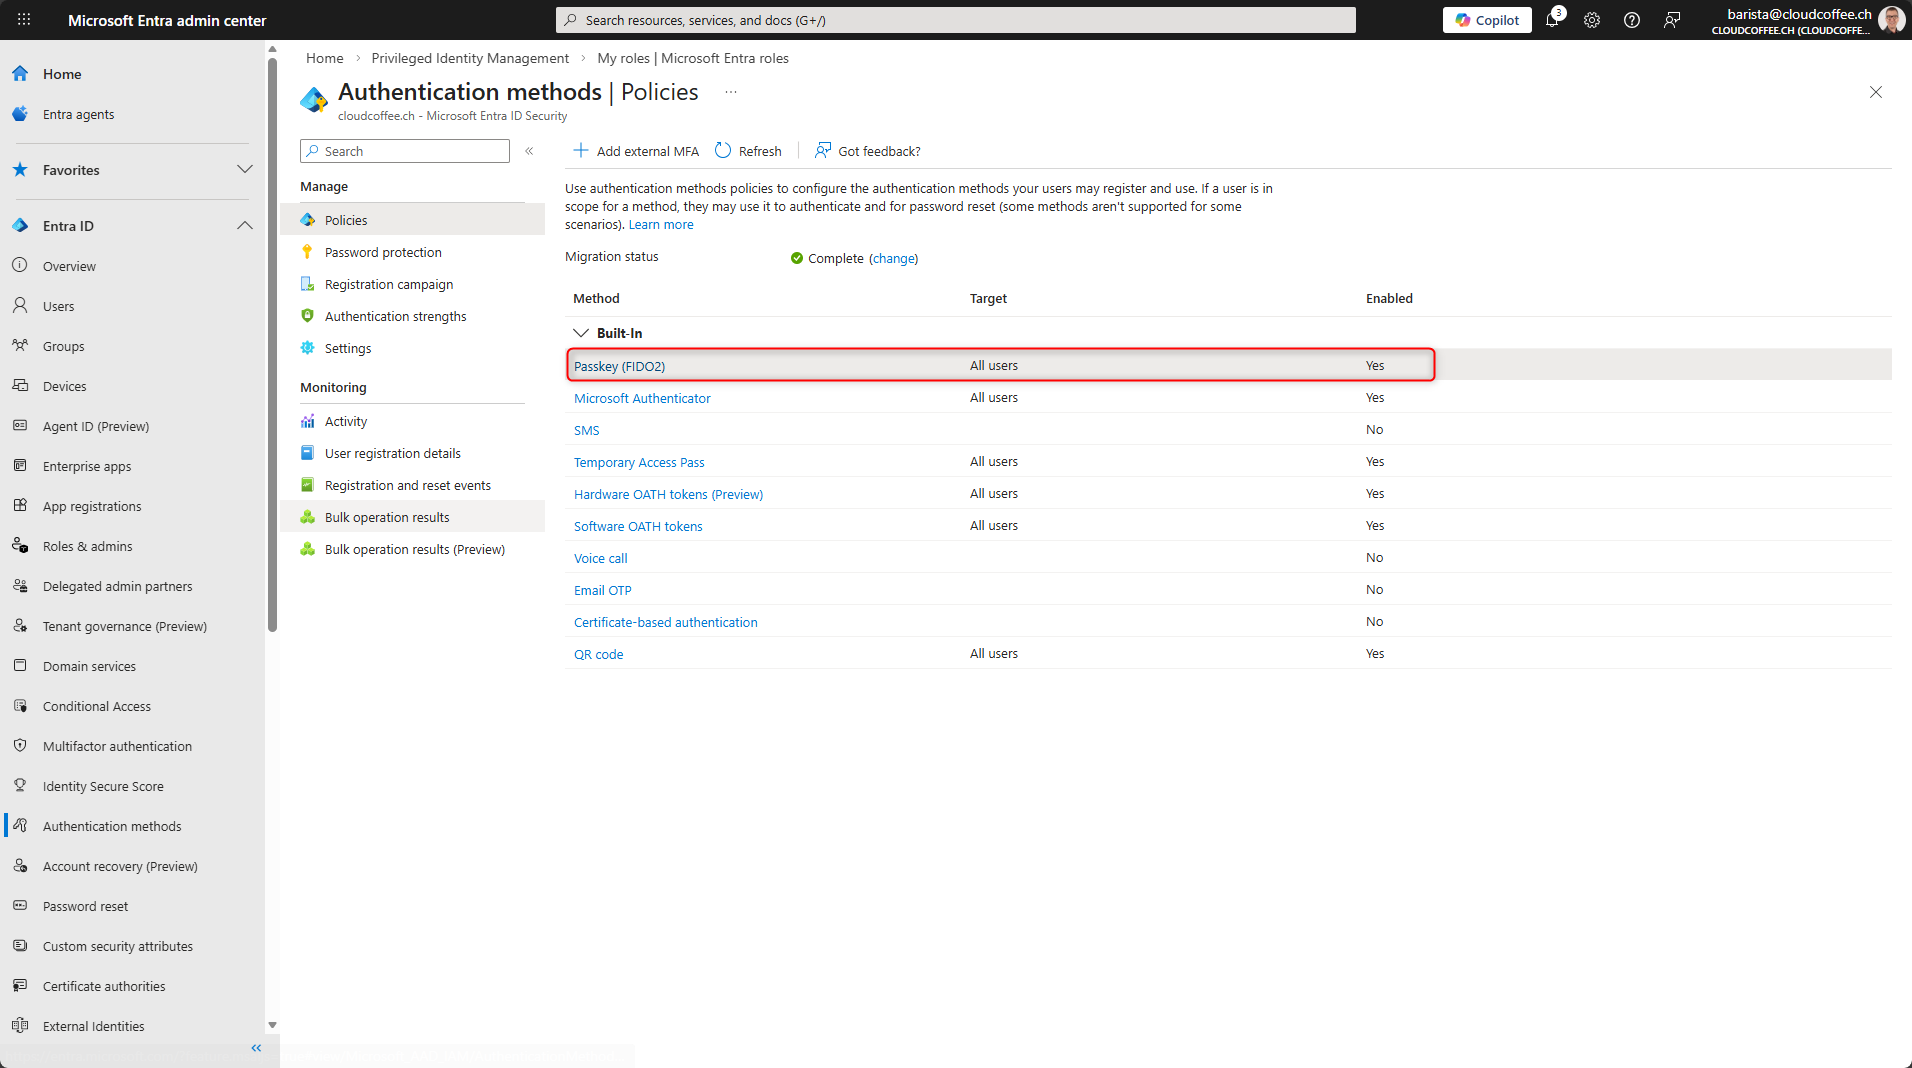
After signing in to the Microsoft Entra admin center (https://entra.microsoft.com/), go to Entra ID > Authentication methods > Policies and select Passkey (FIDO2).

In the Enable and Target tab, turn on Enable and select All users.
Alternatively, specific groups can be assigned.

The following options can be configured in the Configure tab:
Allow self-service setup
Allows users to register passkeys.
Enforce attestation
Requires a valid authenticator attestation during passkey registration so that Microsoft Entra can verify the manufacturer and device type. This allows key restriction policies and allowed AAGUID lists to be enforced, which is especially important in enterprise and high-security scenarios.
Enforce key restrictions
Forces the use of the configured key restriction policy. When key restrictions are not enabled, Microsoft Entra accepts all compatible FIDO2 and passkey authenticators regardless of the manufacturer. An overview of common AAGUIDs is provided by Clayton Tyger in the Entra Compatible Attestation FIDO Key Explorer.
Restrict specific keys
Determines whether the configured list of AAGUID entries is used as an allow list or block list. When set to Allow, only the listed authenticators are permitted, while Block allows all devices except those explicitly blocked.
The Microsoft Authenticator option adds the following AAGUID entries for Microsoft Authenticator passkeys:
Authenticator for iOS: 90a3ccdf-635c-4729-a248-9b709135078f
Authenticator for Android: de1e552d-db1d-4423-a619-566b625cdc84
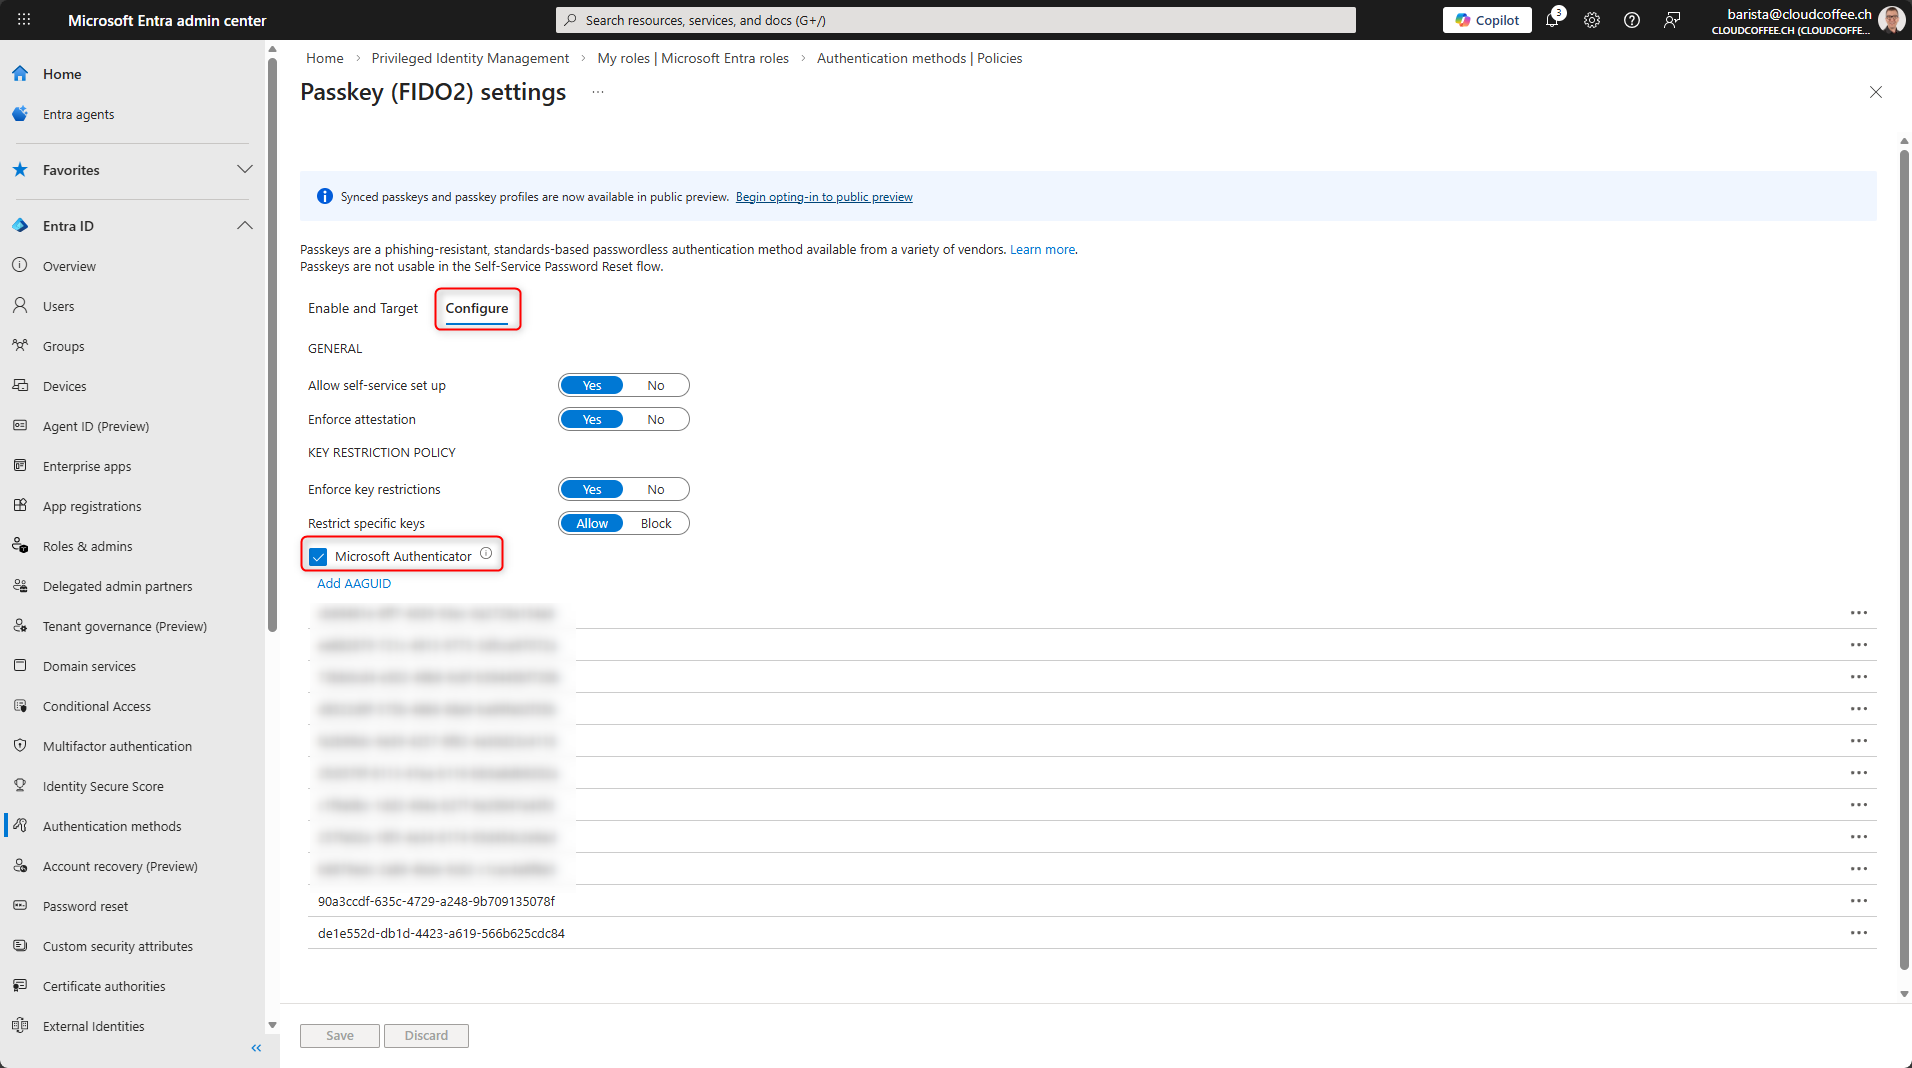
Select Save.
Users can now register device-bound passkeys using Microsoft Authenticator.
Register Microsoft Authenticator Passkey in Microsoft Entra
The Microsoft Authenticator passkey is registered by the user.
The following steps show how to register a Microsoft Authenticator device-bound passkey on an Apple iPhone. The process on Android is similar.
Prepare the Apple iPhone
Install the latest version of Microsoft Authenticator on iOS 17 or later. iOS 18 is required to use multiple password managers simultaneously.
On an Apple iPhone running iOS 18, configure the following settings under Settings > General > AutoFill & Passwords:
- Enable AutoFill Passwords and Passkeys
- Source: Authenticator

After preparing the Apple iPhone, the Microsoft Authenticator passkey can be set up.
Register a Passkey on the Apple iPhone
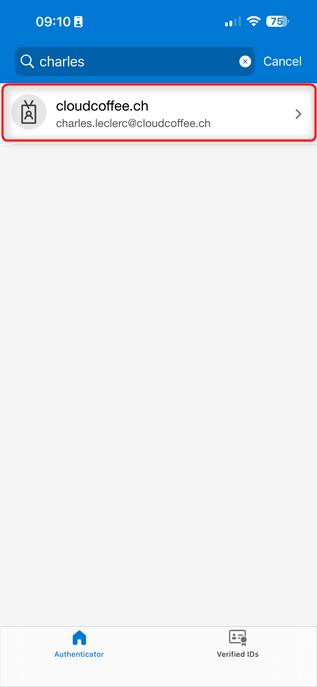
Open Microsoft Authenticator and select the correct account.
Select Create a passkey
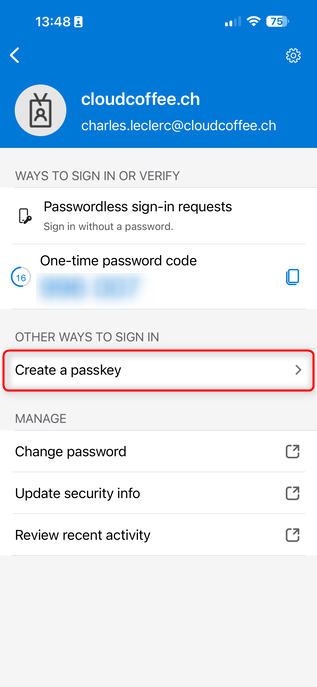
Select Sign in
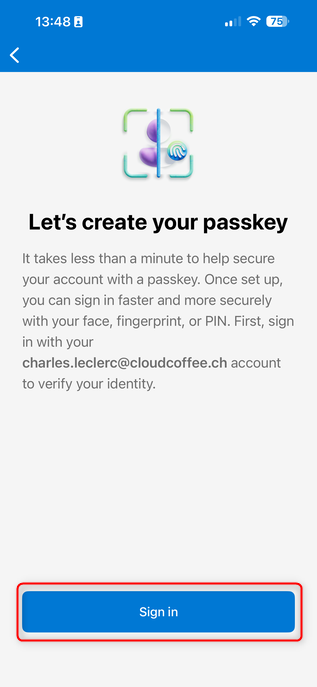
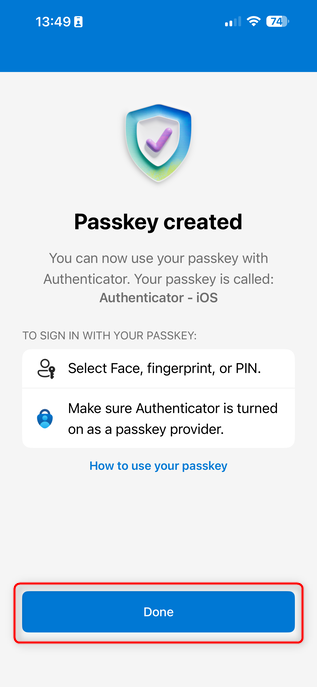
Complete the sign-in. After a moment, the device-bound passkey is registered.
Sign In with a Microsoft Authenticator Passkey
On the sign-in page for Microsoft Azure, Microsoft 365, or Enterprise Applications that use Microsoft Entra ID authentication, select Sign-in options.
For example: https://aka.ms/mysecurityinfo

Select Face, fingerprint, PIN, or security key

Select iPhone, iPad, or Android device
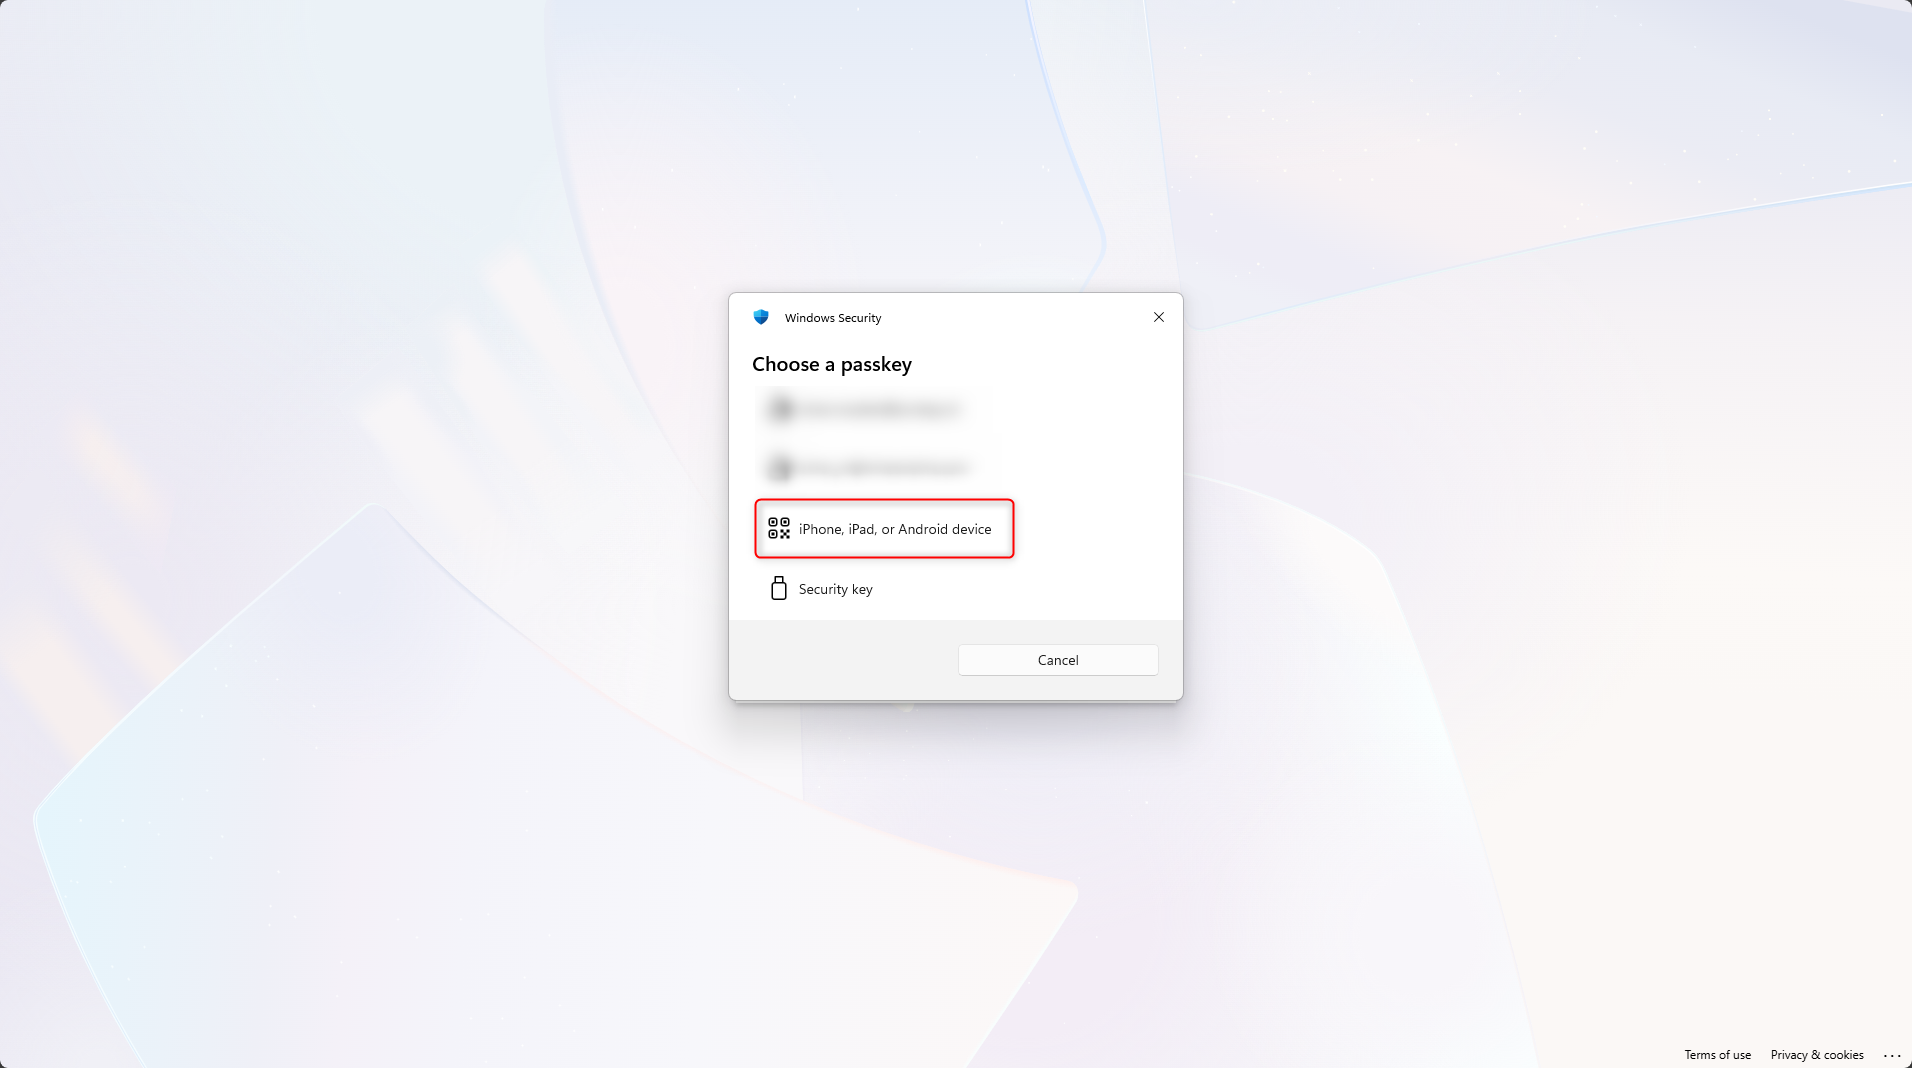
Scan the QR code using the iPhone camera.

Confirm the sign-in on the mobile device by selecting Continue.
If multiple passkeys are stored in Microsoft Authenticator, select the correct account.
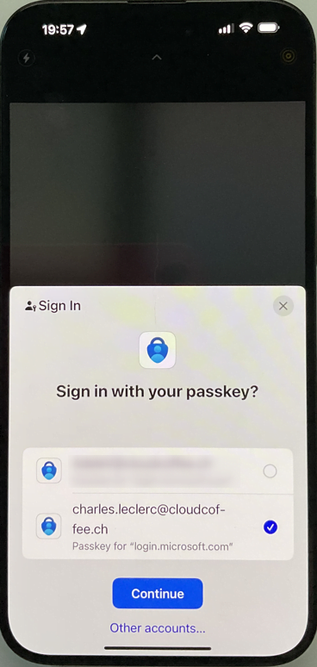
The sign-in with the Microsoft Authenticator device-bound passkey at https://aka.ms/mysecurityinfo was successful.
Delete a Passkey
A Microsoft Authenticator passkey can be removed either on the registered device or through the Security info page. Both methods are shown below.
Delete a Passkey When the Device Is Available
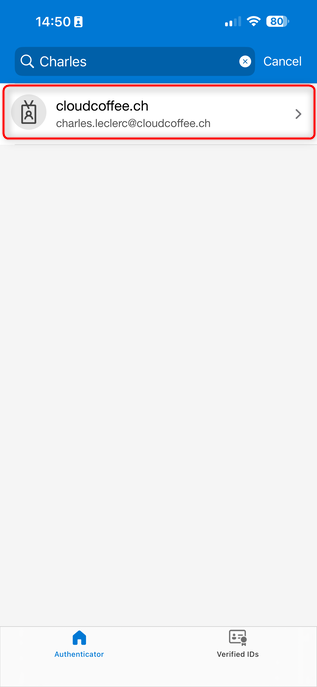
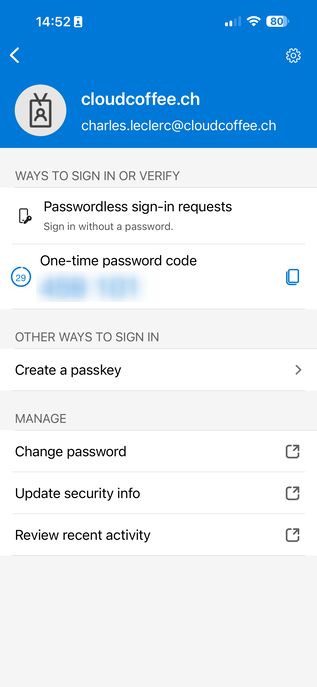
Open Microsoft Authenticator and select the account that contains the passkey to be deleted.
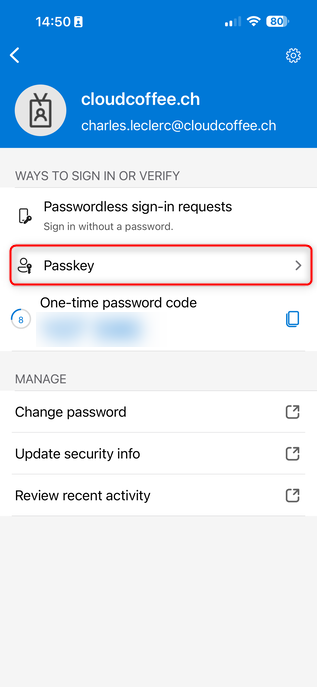
Select Passkey
Select the Delete icon.
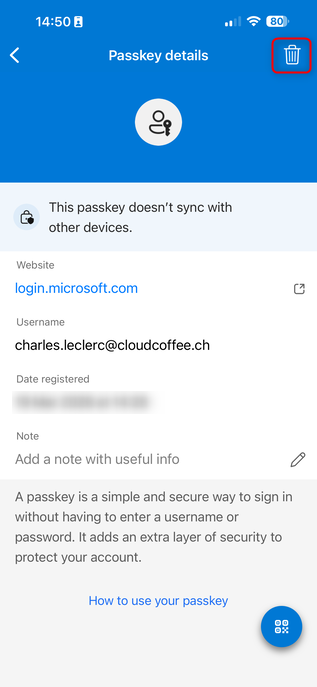
Select Delete and complete the sign-in.
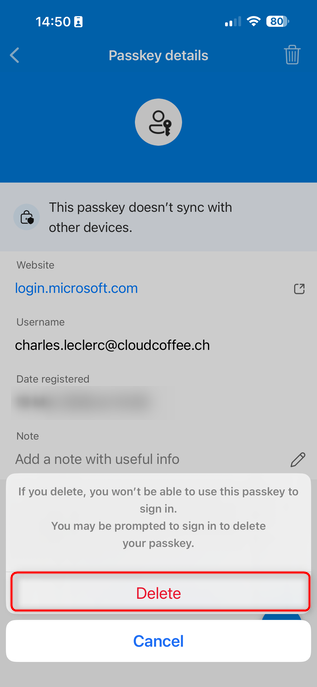
The device-bound passkey was deleted.
Delete a Passkey When the Device Is Not Available
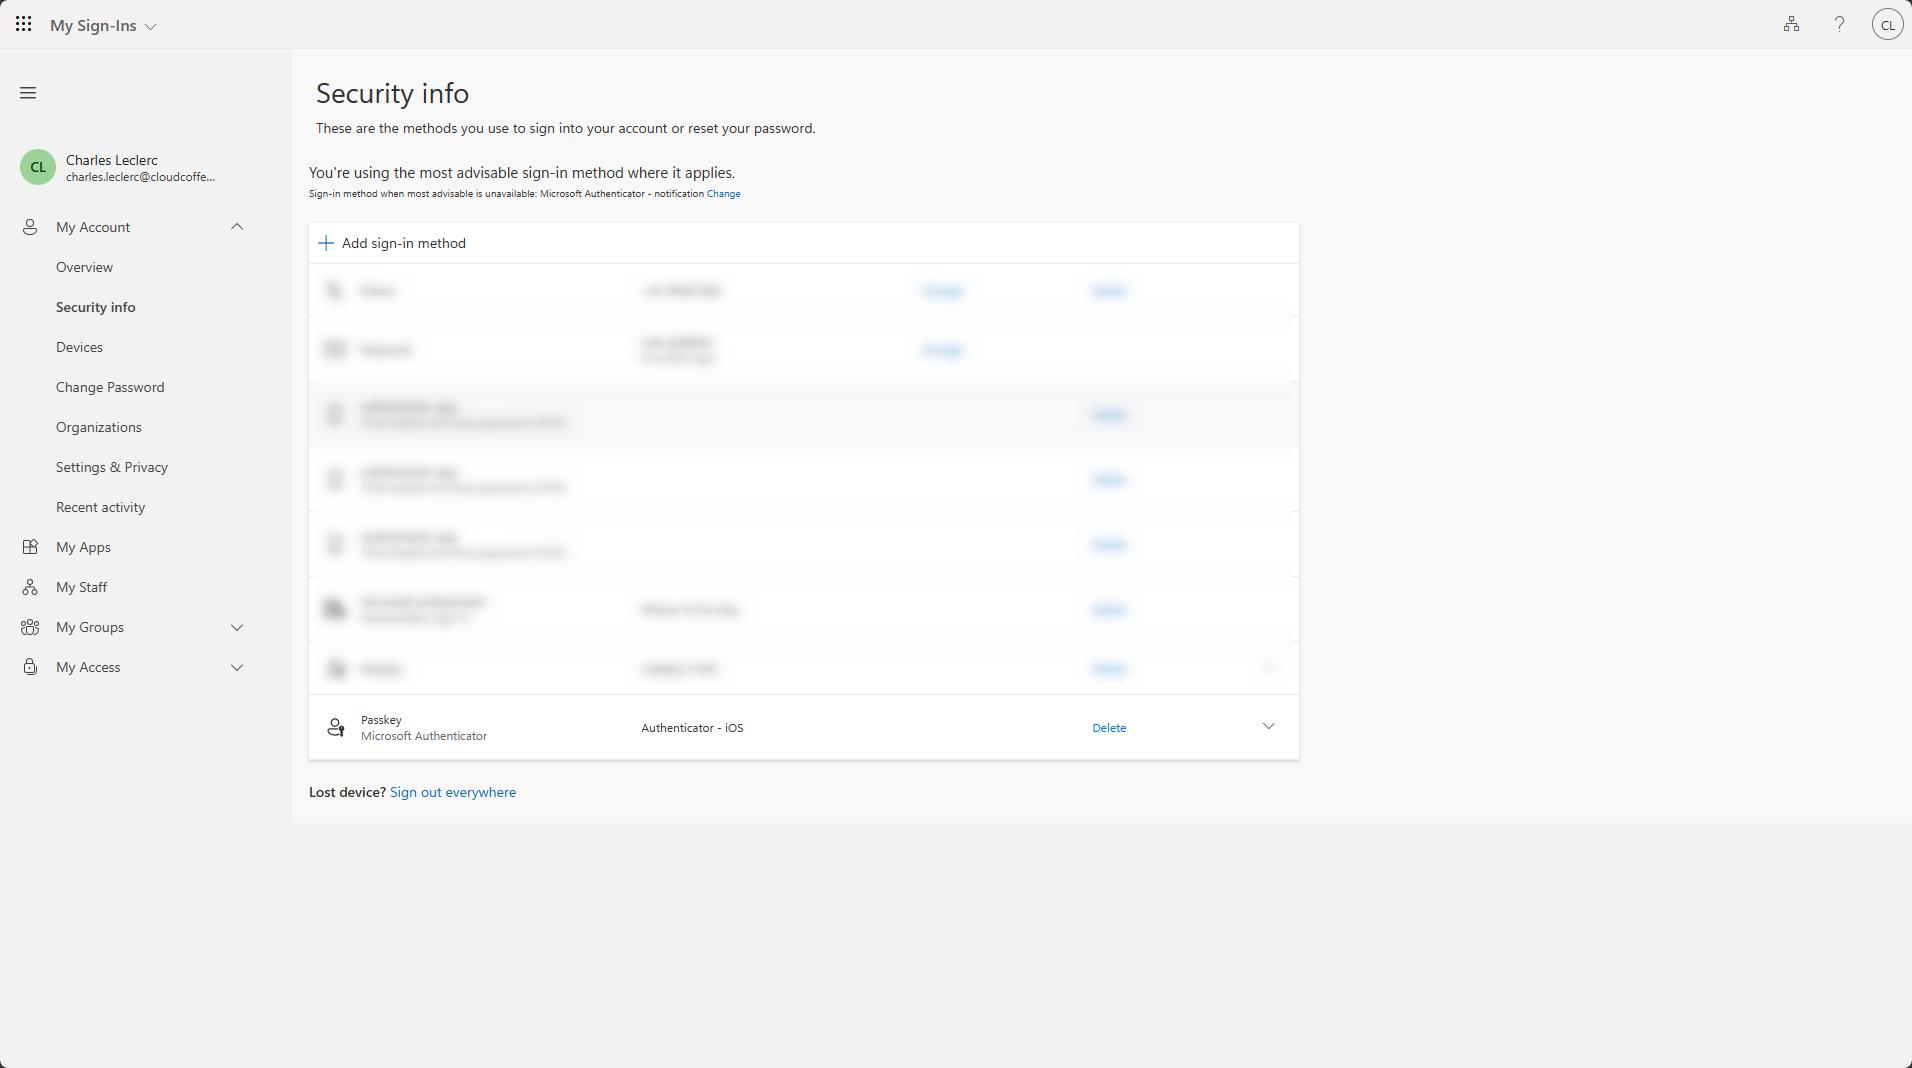
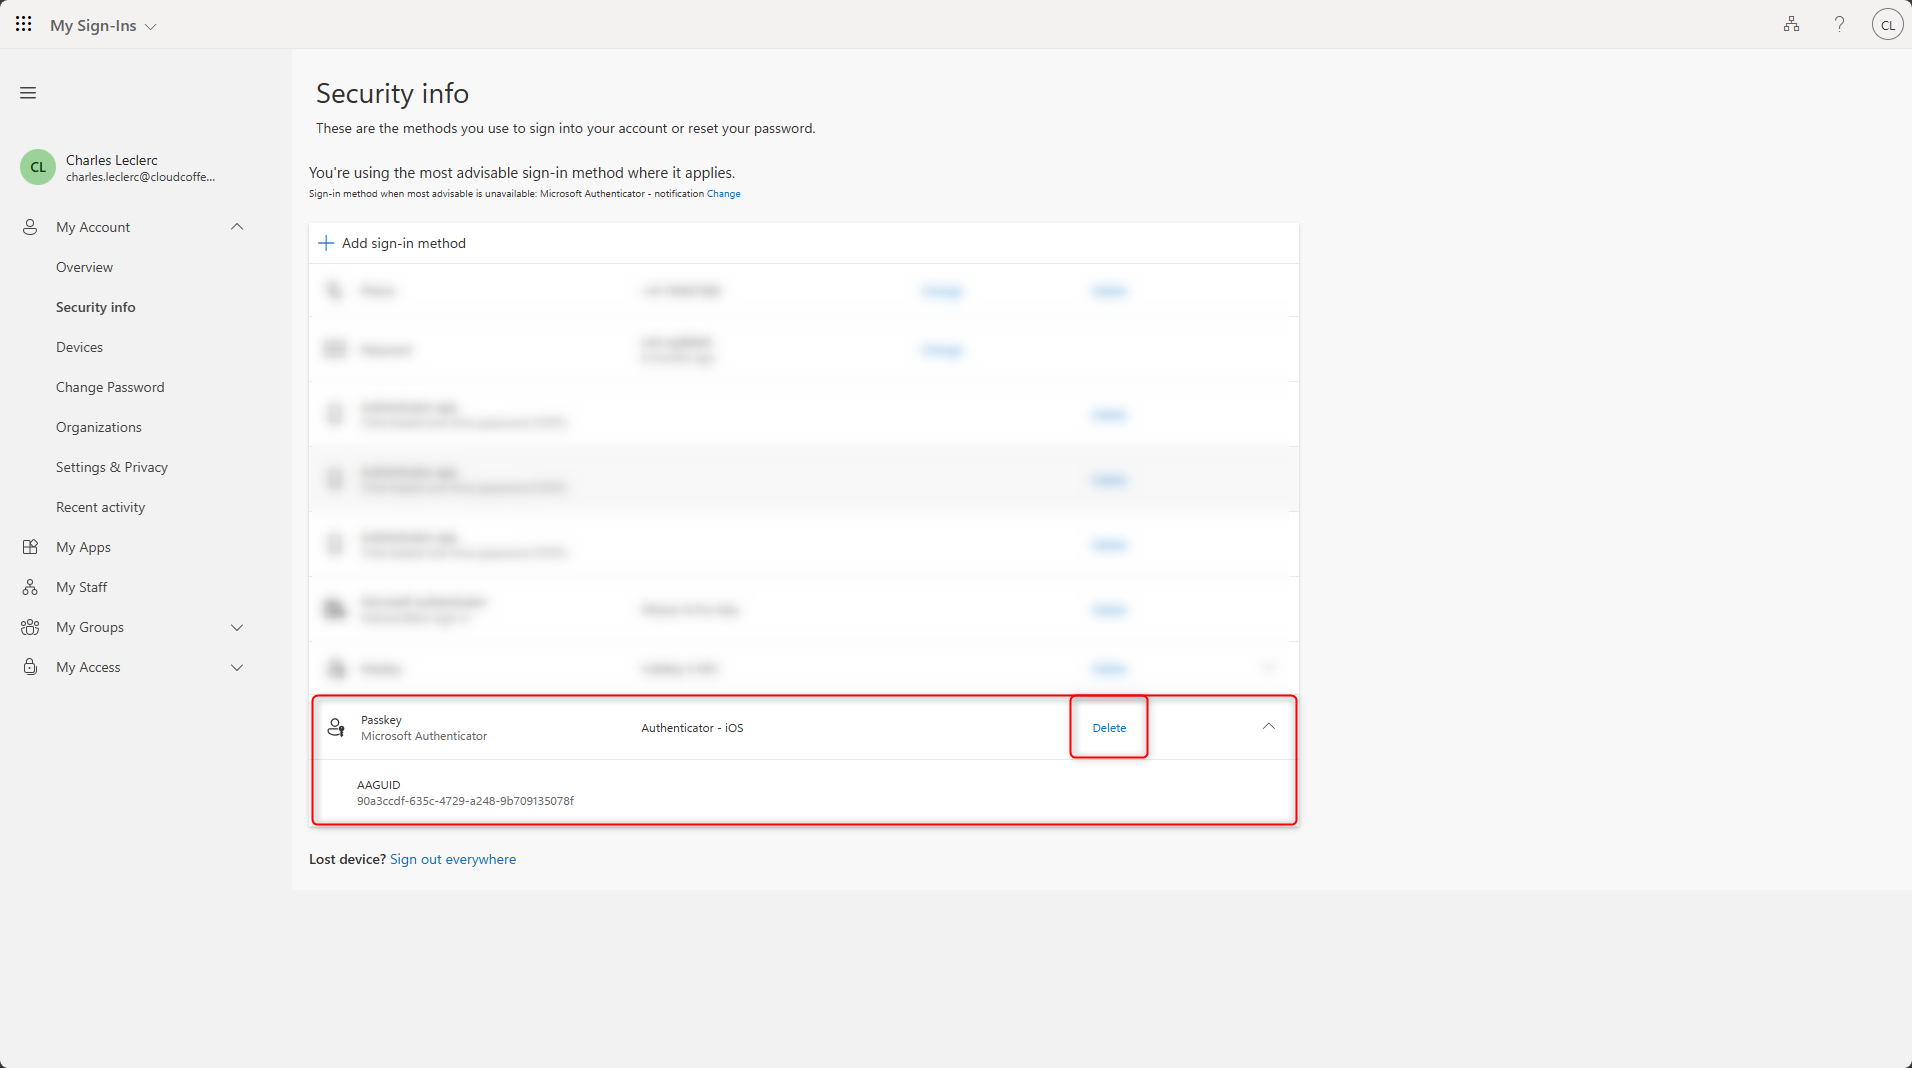
If the device with the Microsoft Authenticator device-bound passkey is no longer available, the passkey can be removed from the Security info page.
Sign in to https://aka.ms/mysecurityinfo and go to Security info > Passkey > Delete.
Conclusion
Device-bound passkeys in Microsoft Authenticator enable phishing-resistant, passwordless sign-in in Microsoft Entra. The private key remains on the device. Because no additional hardware such as FIDO2 security keys is required, Microsoft Authenticator provides a cost-effective way to implement secure passwordless sign-in.
Fresh content, explained with practical relevance. Stay up to date via LinkedIn and Bluesky.


No marketing. No noise. Just content.
If this post was helpful, a coffee brings back the rich aroma behind the writing.