Microsoft Entra Private Access gives users secure access to the internal network and cloud-based services from anywhere in the world. Setting up and maintaining (complex) VPN connections is now a thing of the past. Microsoft Entra Private Access is part of Microsoft Global Secure Access, which includes a range of identity and network access security products. The service is based on the SASE framework (Secure Access Service Edge), which combines WAN functions and zero-trust network access (ZTNA) in a cloud-based platform.
This blog post shows the configuration steps for Microsoft Entra Private Access for using local resources such as Remote Desktop Services (RDS) or SMB file sharing.
Prerequisites and Licensing
Licences
For Microsoft Entra Private Access, each user requires one of the following licenses:
- Microsoft Entra Suite
- Microsoft Entra Private Access
Detailed information and pricing for the various plans are clearly presented on the Microsoft product webpage: Microsoft Entra Plans and Pricing | Microsoft Security
Roles
Setting up and managing Microsoft Entra Private Access requires the Global Secure Access Administrator role.
Registering the Application Proxy Connector requires the Application Administrator role.
Devices
The following requirements apply to the devices:
- Operating system Windows 10, Windows 11 or Android
- iOS and MacOS available as preview
- Windows Devices must be either Microsoft Entra joined or Microsoft Entra hybrid joined, Microsoft Entra registered devices aren’t supported
Onboard Microsoft Entra Private Access
Enable Microsoft Entra Private Access
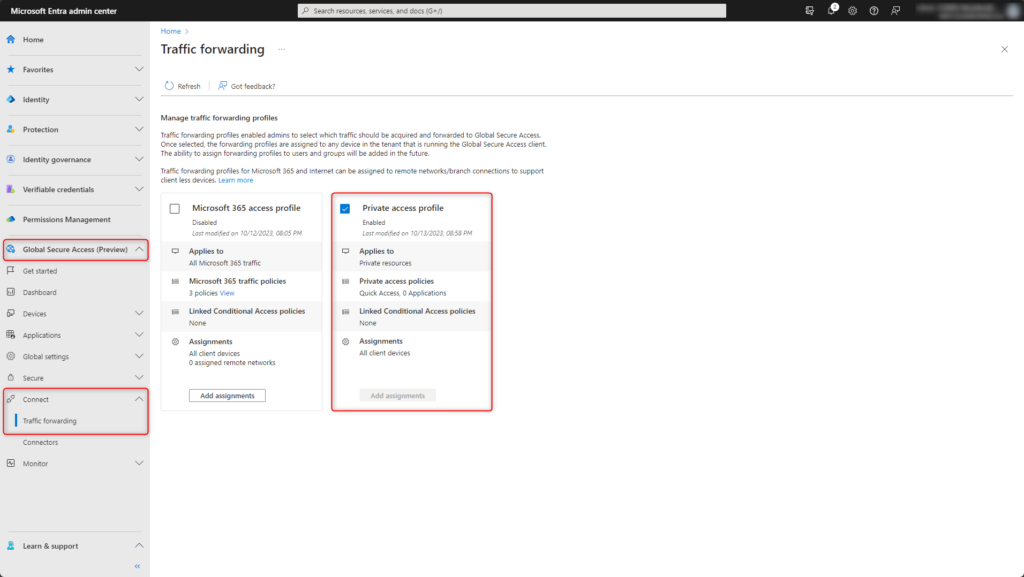
Microsoft Entra Private Access is activated in the traffic forwarding, for this sign in to the Microsoft Entra Admin Center (https://entra.microsoft.com).
Enable Private access profile under Global Secure Access > Connect > Traffic forwarding
Installation Application Proxy Connector
Microsoft Entra Private Access requires an Application Proxy Connector on a local Windows server to establish secure connection from the internal network to Microsoft Entra.
Download Application Proxy Connector Global Secure Access > Connect > Connectors > Download connector service > Accept terms & Download.
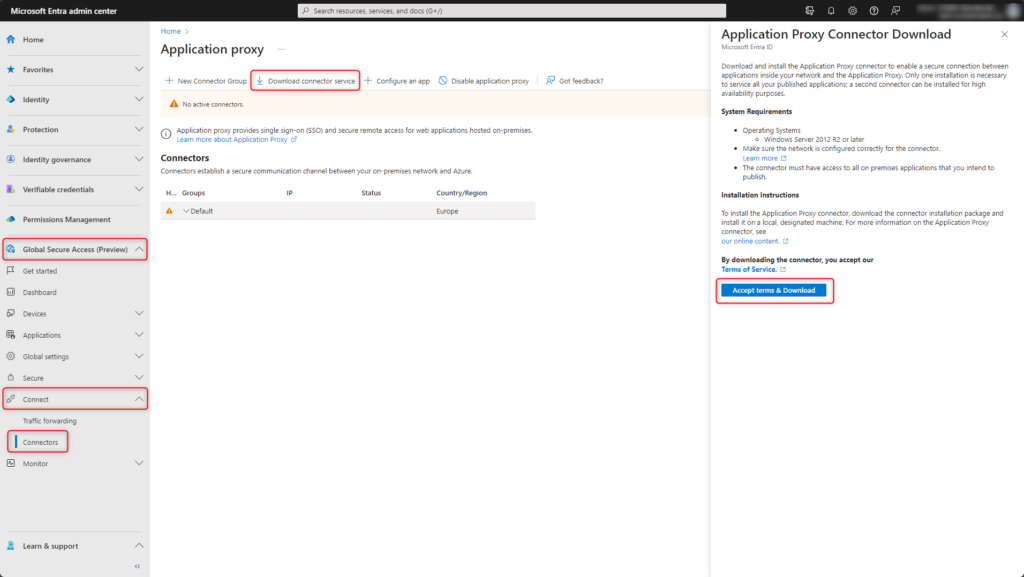
Copy the downloaded file AADApplicationProxyConnectorInstaller.exe to the Windows Server 2016 or higher. The Application Proxy Connector must be installed on a server which has access to all internal applications which should be published.
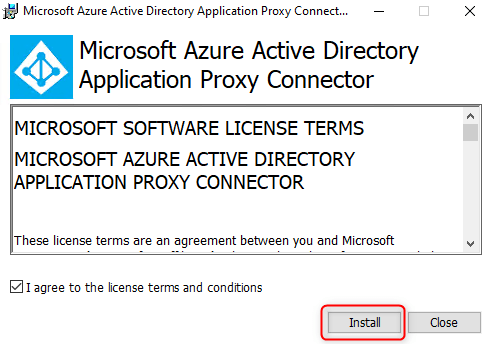
Start installation with Install
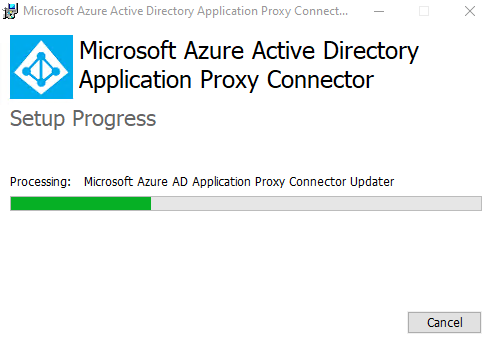
The installation is in progresss.
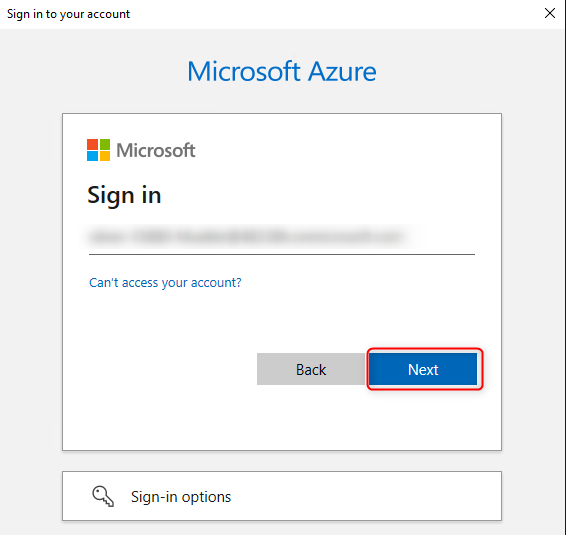
To register the Application Proxy Connector, you must sign in with an account that has the Application Administrator role assigned.
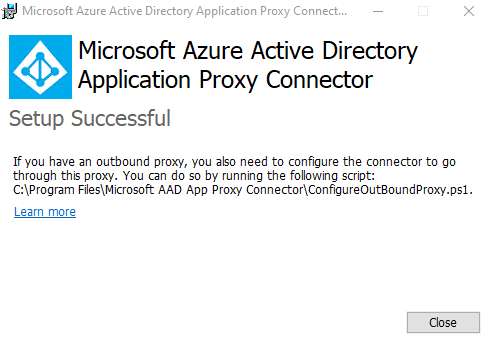
The Application Connector Proxy is installed.
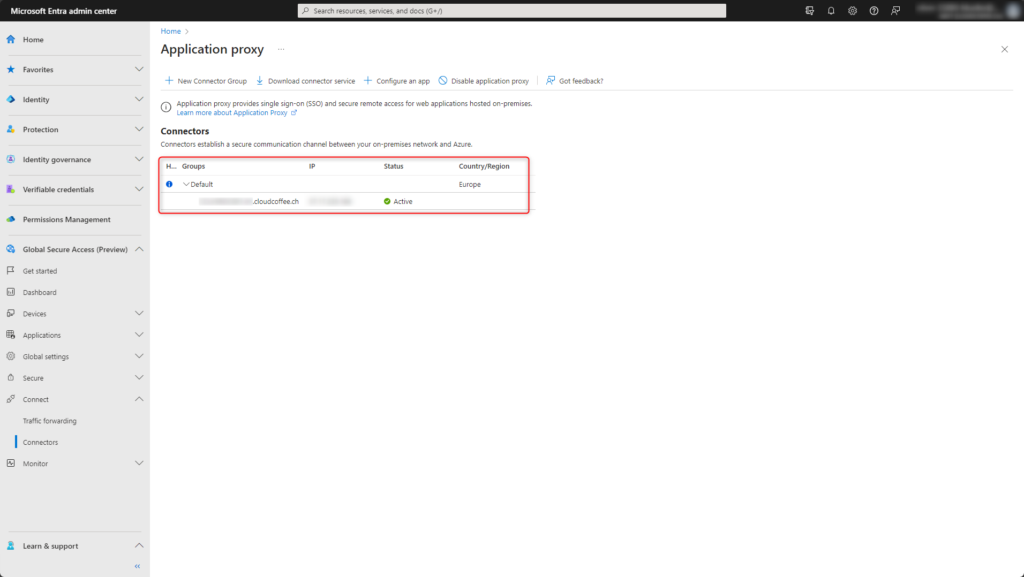
The secure connection between the internal network and Microsoft Azure is now set up and established with status Active.
Configuration Quick Access
Quick Access provides secure access to internal resources.
This blog post looks at the configuration for accessing Remote Desktop Services (RDS) and SMB file sharing in a local Active Directory domain.
Application settings
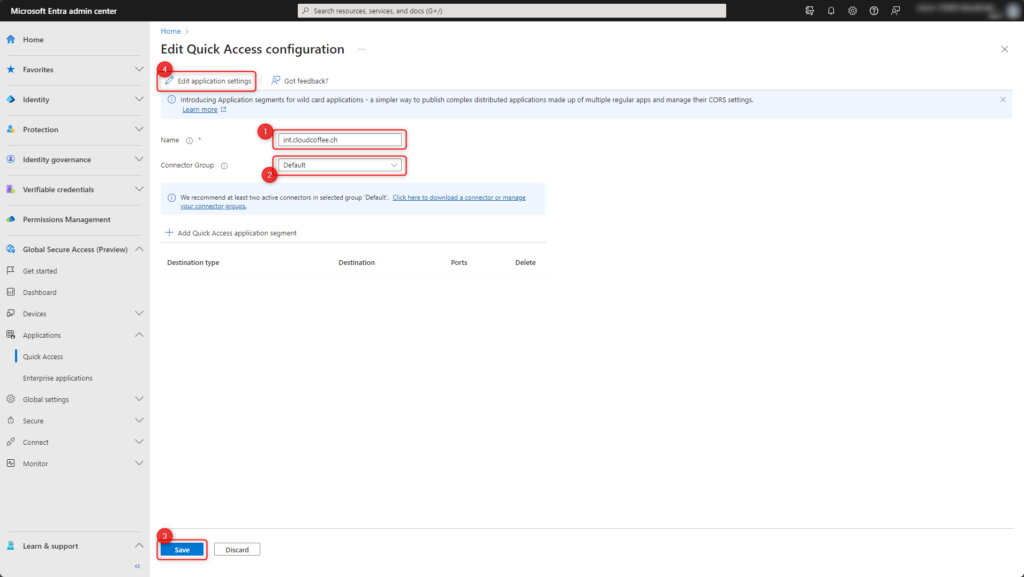
An enterprise application is created for Quick Access.
This is configured in two steps.
- Enter the application name, e.g. int.cloudcoffee.ch
- Select the connector group to which the Application Connector Proxy will have access to the resources.
- Click Save
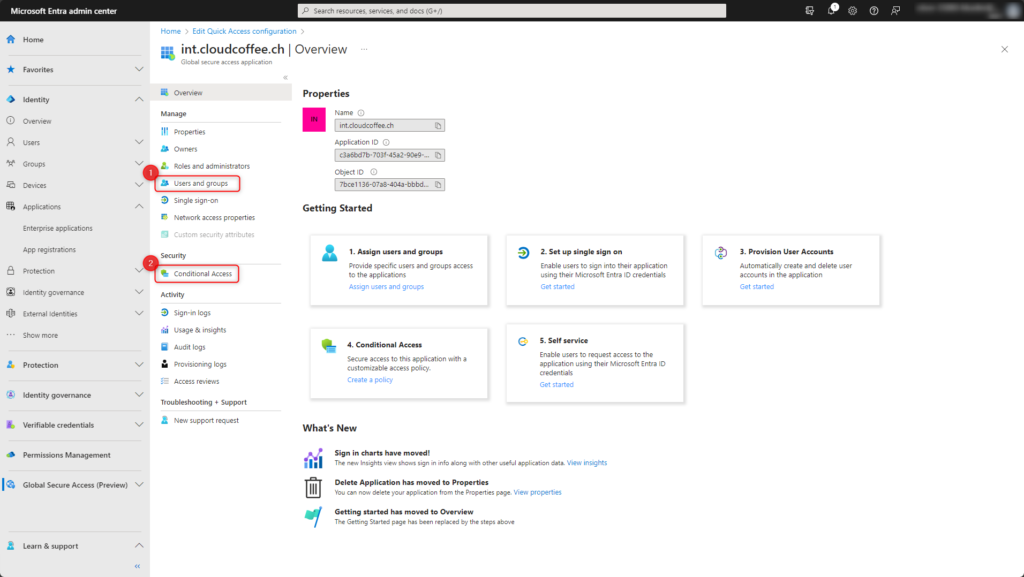
- Open Enterprise Application with Edit application settings
The application settings are made using the familiar setting options of an enterprise application.
The following configuration settings should be mentioned here:
- Users and groups
Define users and groups who will have access to this enterprise application. - Conditional Access
Quick Access supports Microsoft Entra Conditional Access as an enterprise application.
Remote Desktop Services (RDS)
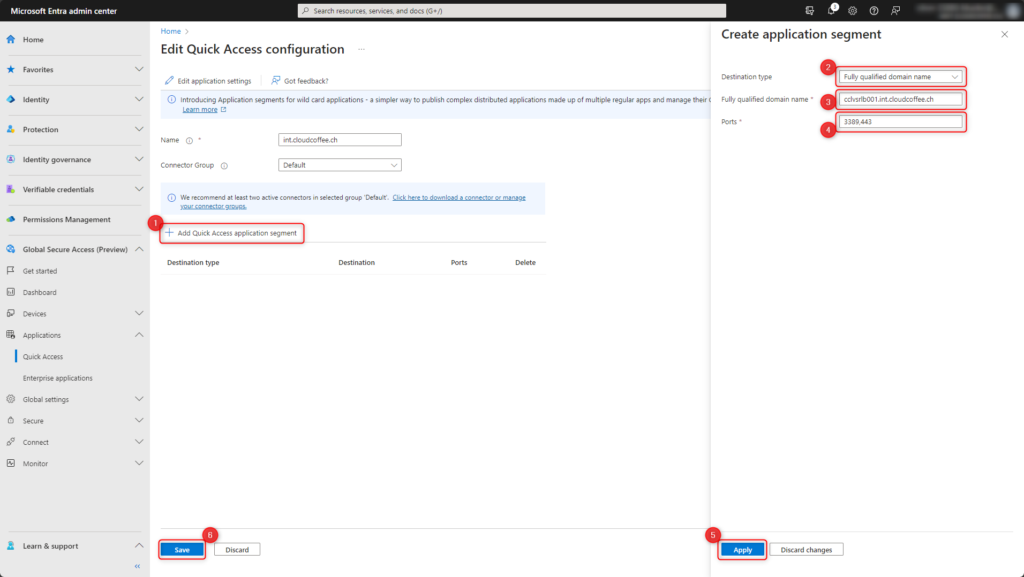
Access to Remote Desktop Services (RDS), e.g. to Remote Desktop Session Collections, requires a working FQDN query. The configuration for this is done in Quick Access.
Global Secure Access > Applications > Quick Access
- Click Add Quick Access application segment anklicken
- Chose Destination type Fully qualified domain name
- Enter FQDN of the target server, e.g. a Microsoft Remote Desktop Connection Broker.
- Enter port 3389 (Remote Desktop Protocol) and 443 (HTTPS)
Multiple ports entered comma separated - Click Apply
- Click Save
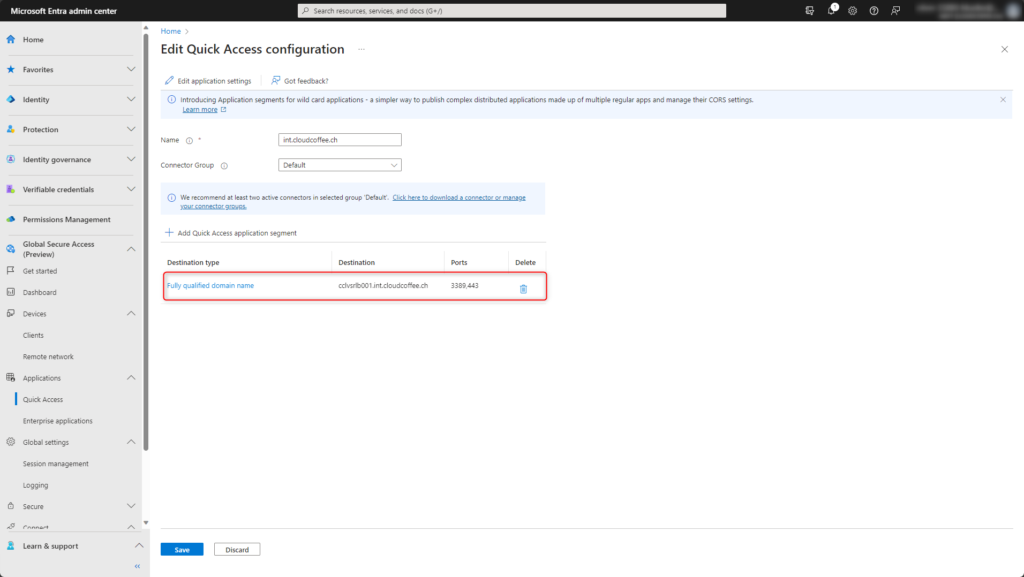
The configuration for accessing the Remote Desktop Services (RDS) is done.
SMB file sharing
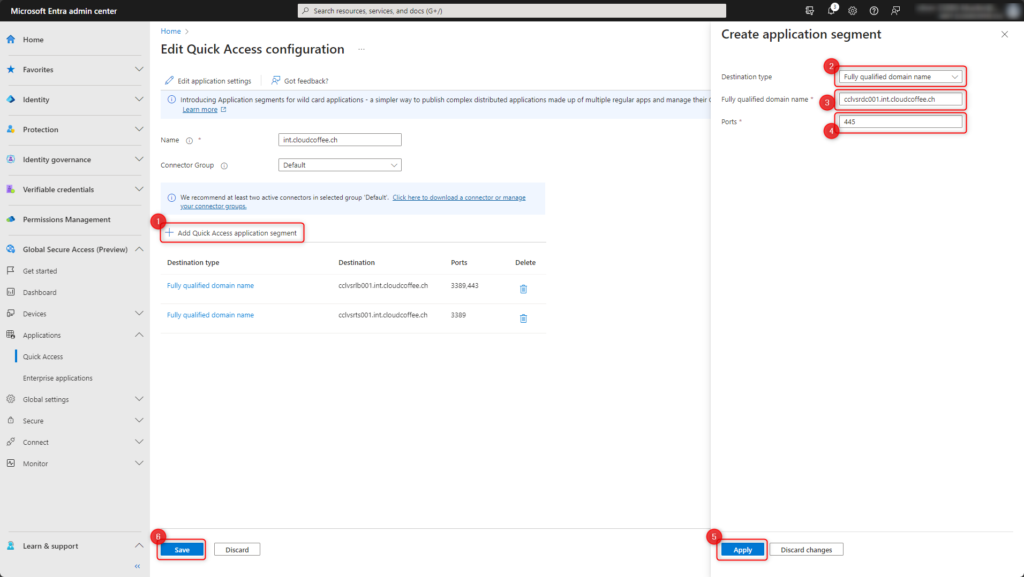
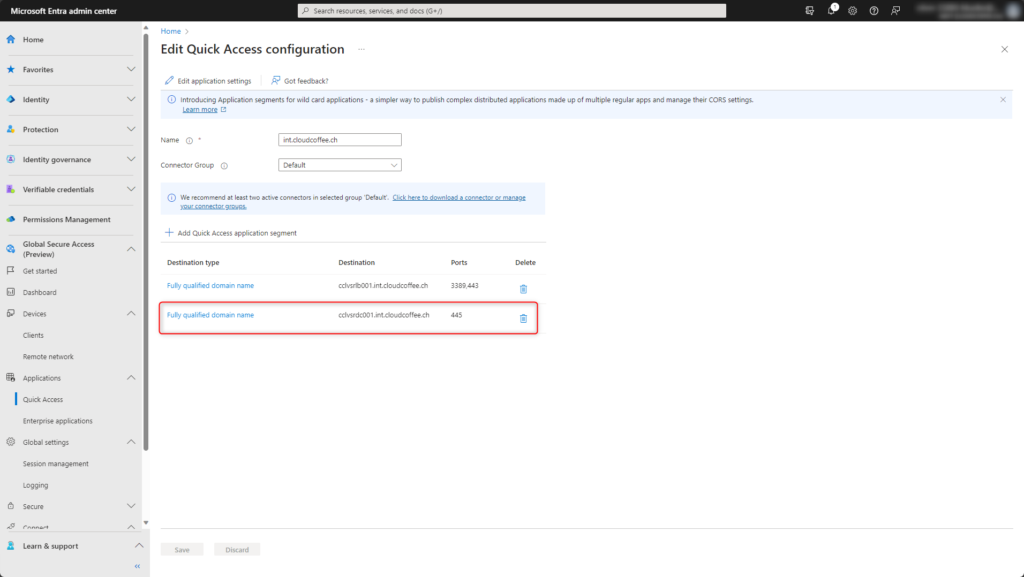
Connections to SMB file shares are made using the Fully qualified domain name (FQDN) of the file server. Configuration is done in Quick Access.
Global Secure Access > Applications > Quick Access
- Click Add Quick Access application segment
- Chose Destination type Fully qualified domain name
- Enter FQDN of the file server
- Enter port 445 (Server Message Block)
- Click Apply
- Click Save
The configuration for accessing SMB file shares are done.
Onboard Clientsoftware
Client for Windows 10 / Windows 11
Download Clientsoftware
Download clientsoftware for Windows 10 or Windows 11
Global Secure Access > Connect > Client Download
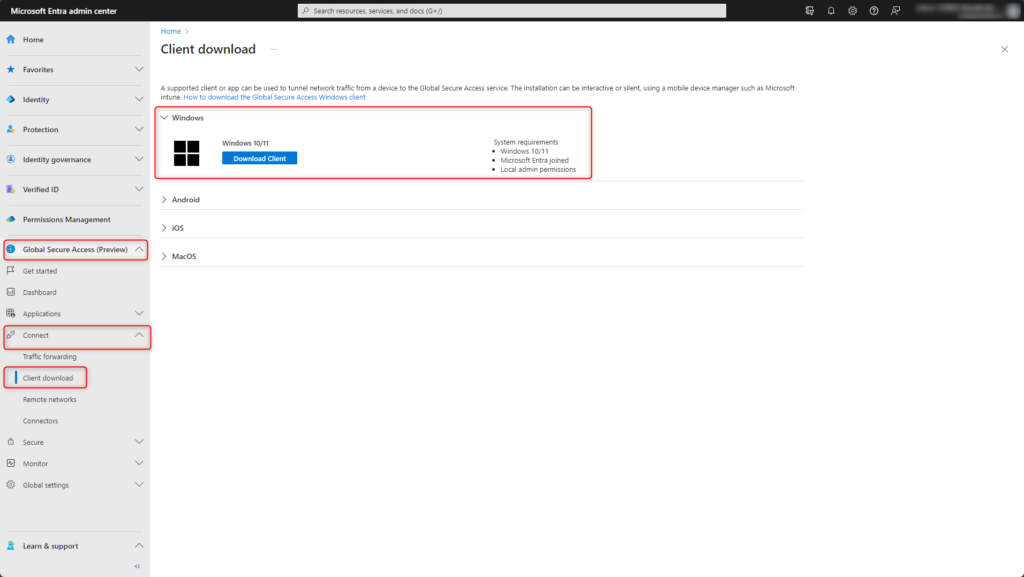
The clientsoftware can be installed using Microsoft Intune or manually.
Deploying clientsoftware by using Microsoft Intune
The downloaded file GlobalSecureAccessClient.exe needs to be converted to the *.intunewin format. For this purpose, the Microsoft Win32 Content Prep Tool is used, which can be downloaded from: https://github.com/microsoft/Microsoft-Win32-Content-Prep-Tool/blob/master/IntuneWinAppUtil.exe
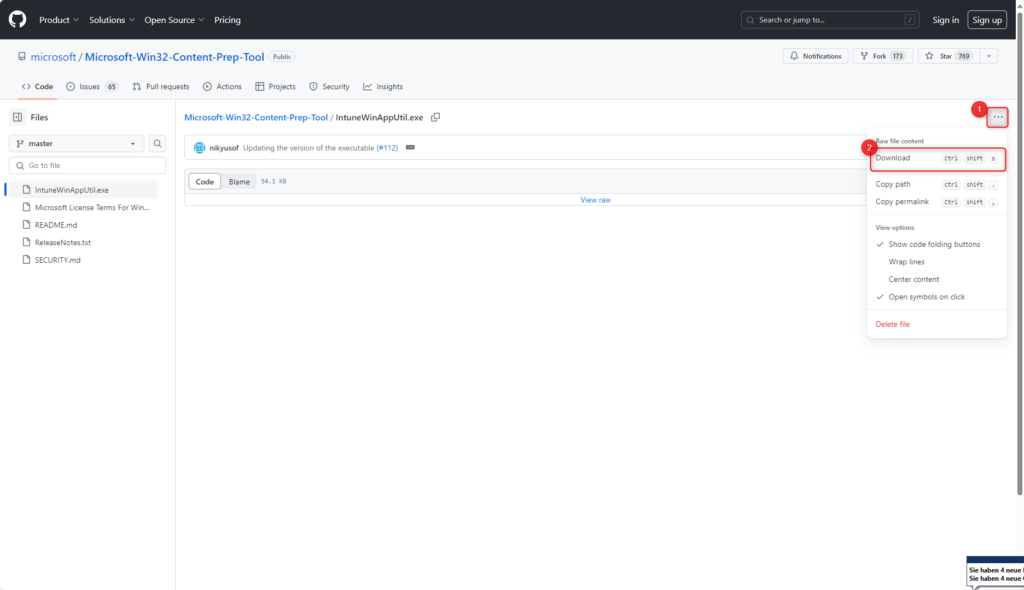
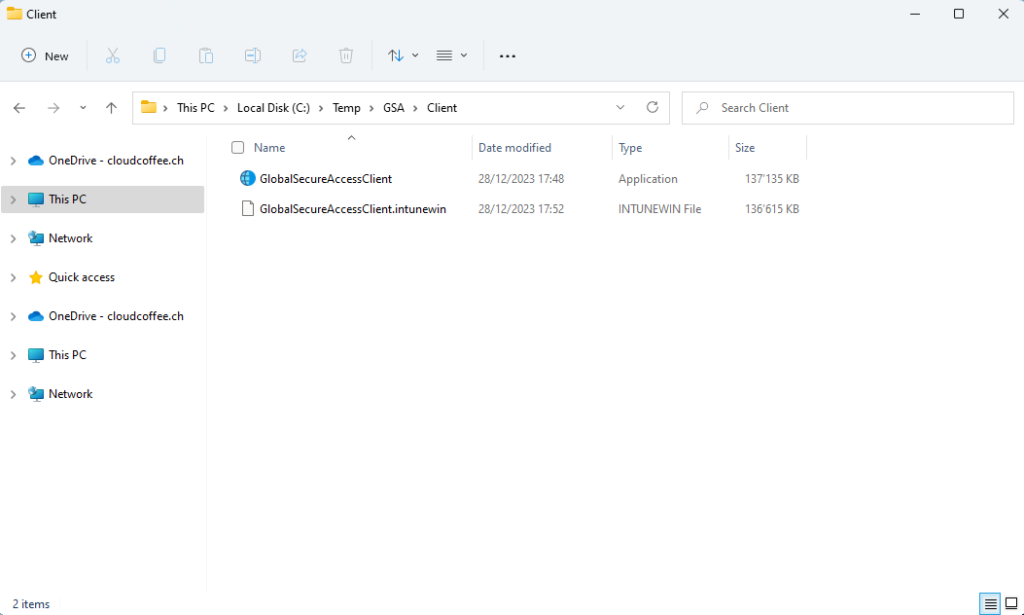
Microsoft Win32 Content Prep Tool requires two folders:
- C:\Temp\GSA
- C:\Temp\GSA\Client
Move the IntuneWinAppUtil.exe file to the C:\Temp\GSA directory.
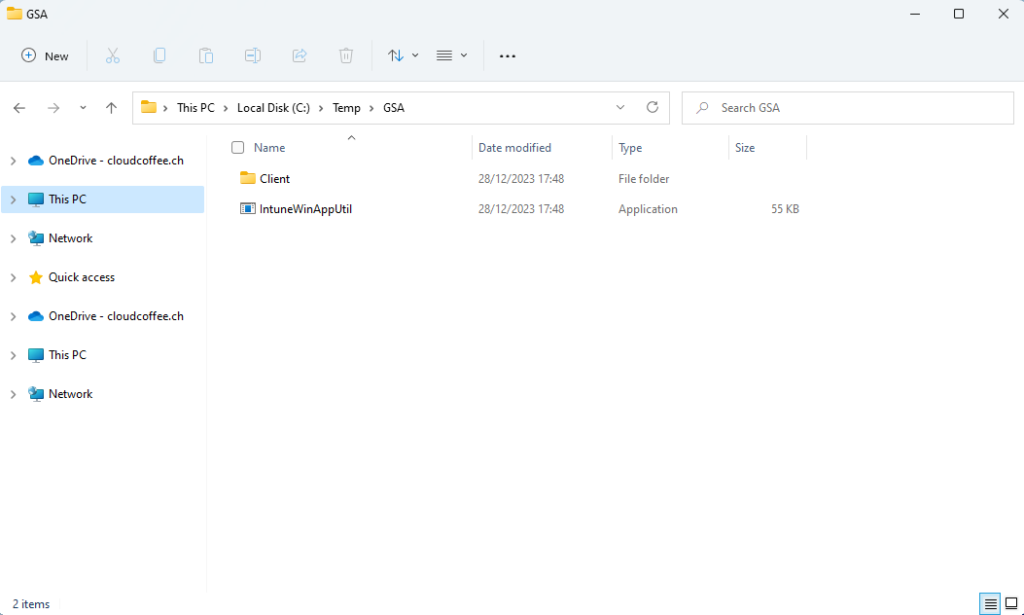
Move the GlobalSecureAccessClient.exe file to the C:\Temp\GSA\Client directory.
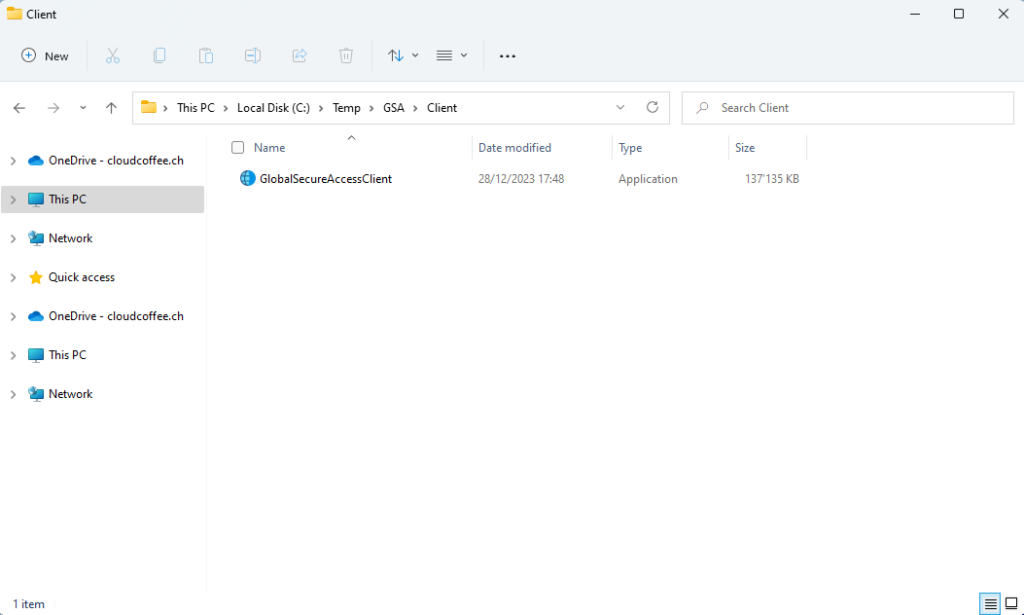
Open PowerShell, change to the directory C:\Temp\GSA and execute IntuneWinAppUtil.exe.
1 2 | cd C:\Temp\GSA .\IntuneWinAppUtil.exe |
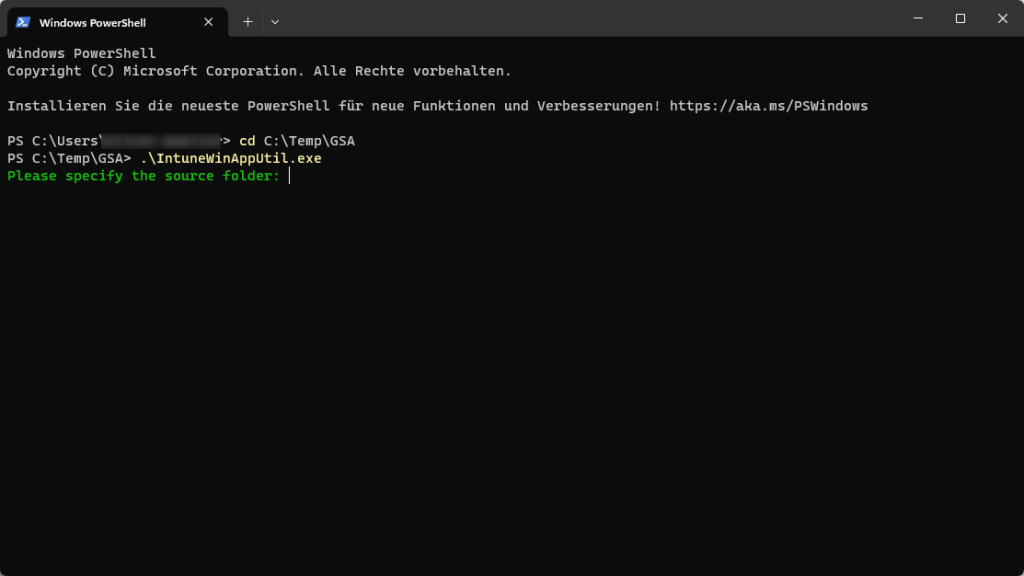
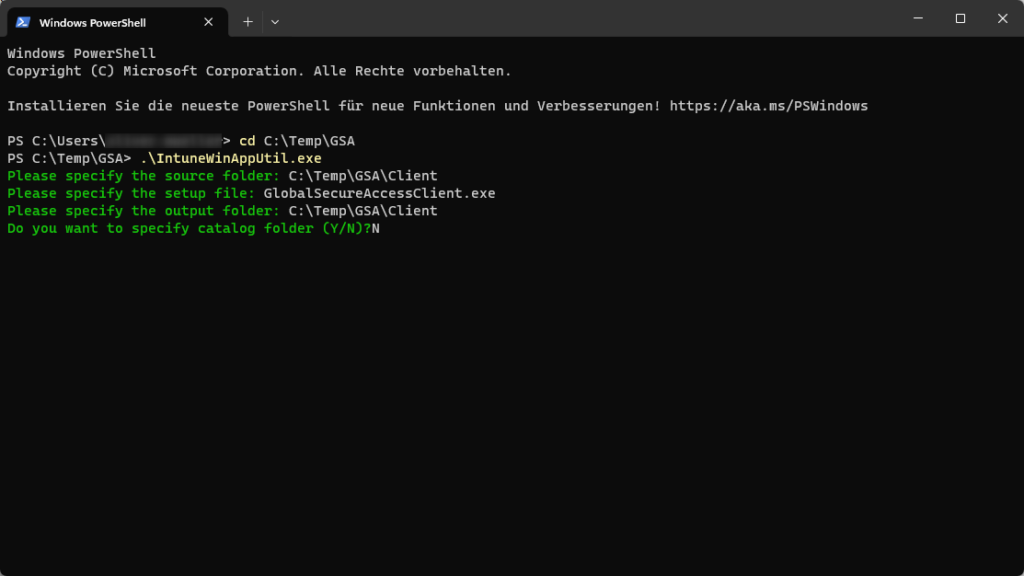
Fill in parameters with the following values:
- Please specify the source folder: C:\Temp\GSA\Client
- Please specify the setup file: GlobalSecureAccessClient.exe
- Please specify the output folder: C:\Temp\GSA\Client
- Do you want to specify catalog folder (Y/N)? N
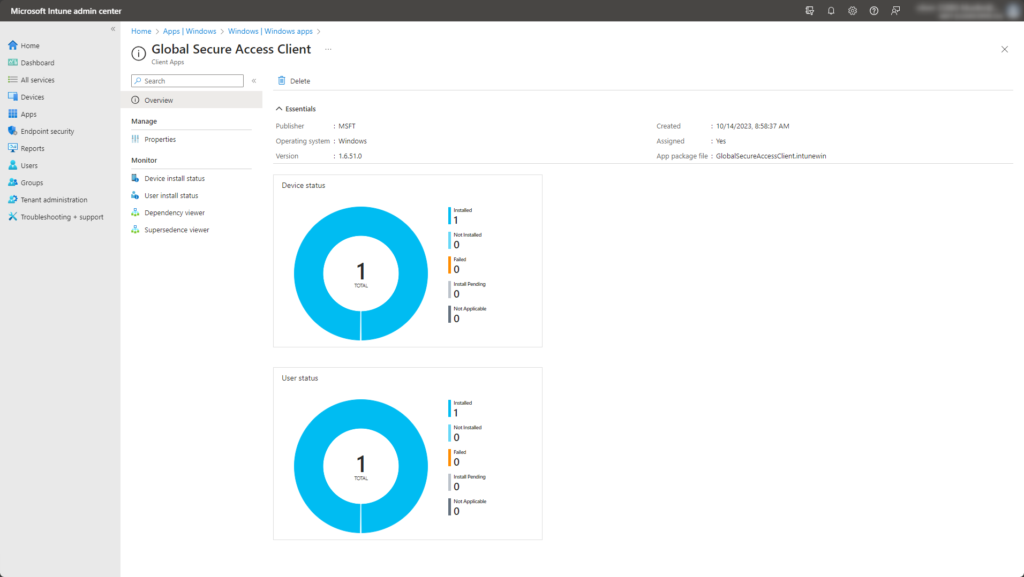
The GlobalSecureAccessClient.intunewin file is created.
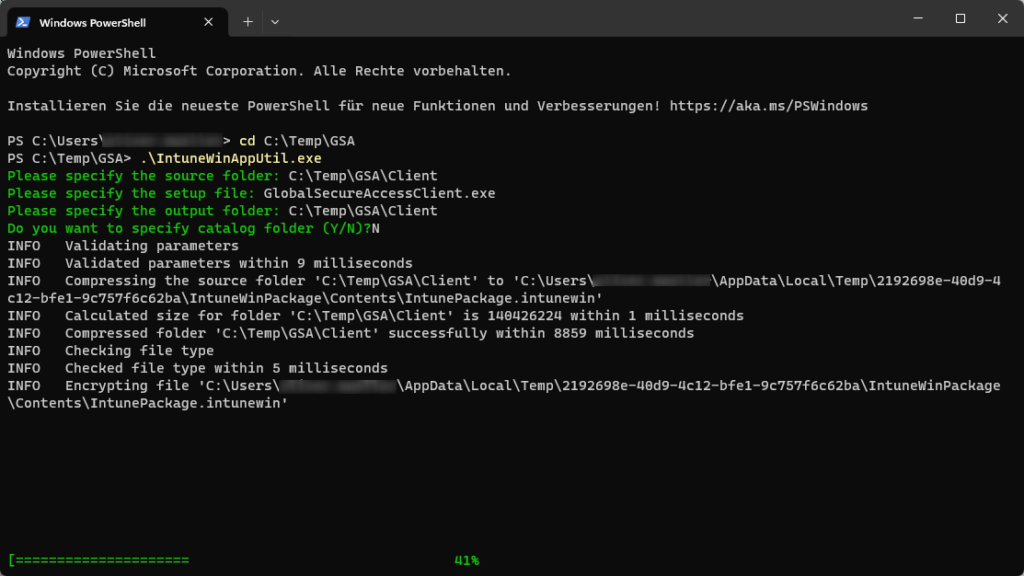
After a short time, GlobalSecureAccessClient.intunewin is available under C:\Temp\GSA\Client.
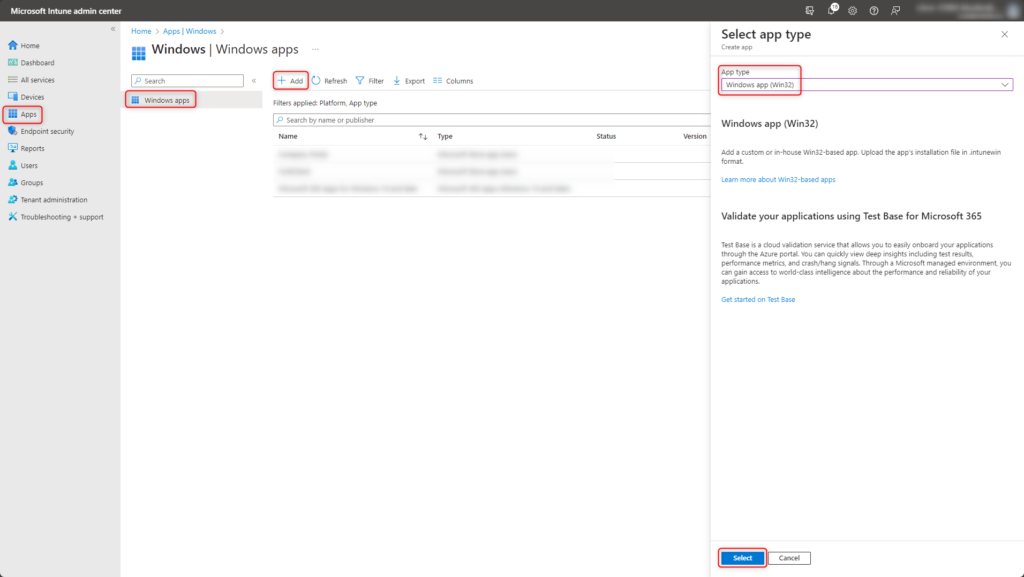
Sign In to Microsoft Intune admin center (https://endpoint.microsoft.com)
Choose Apps > Windows > Add > Windows app (Win32).
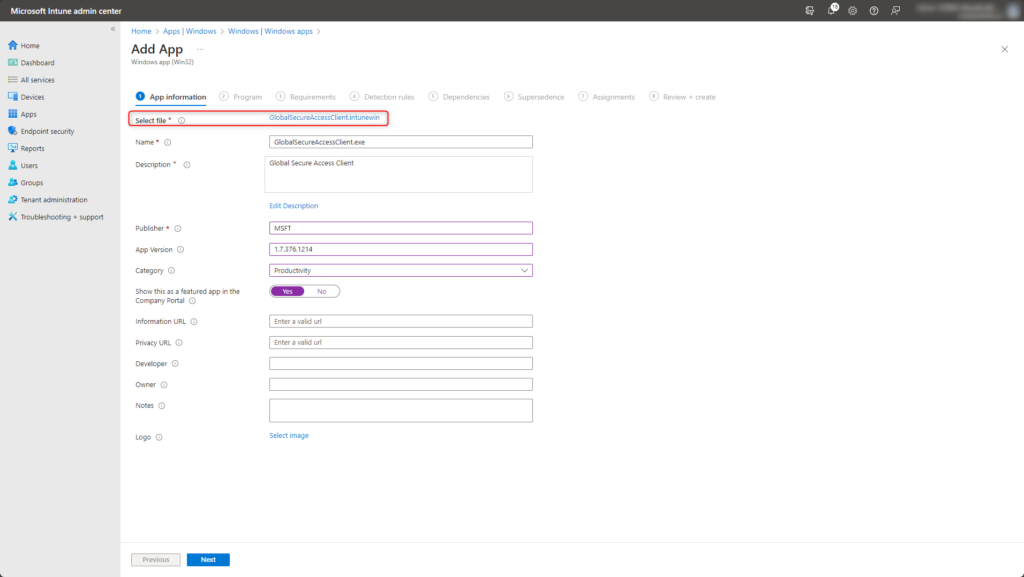
App information
Upload the previously created GlobalSecureAccessClient.intunewin file. Fill in further details about the application according to your own guidelines.
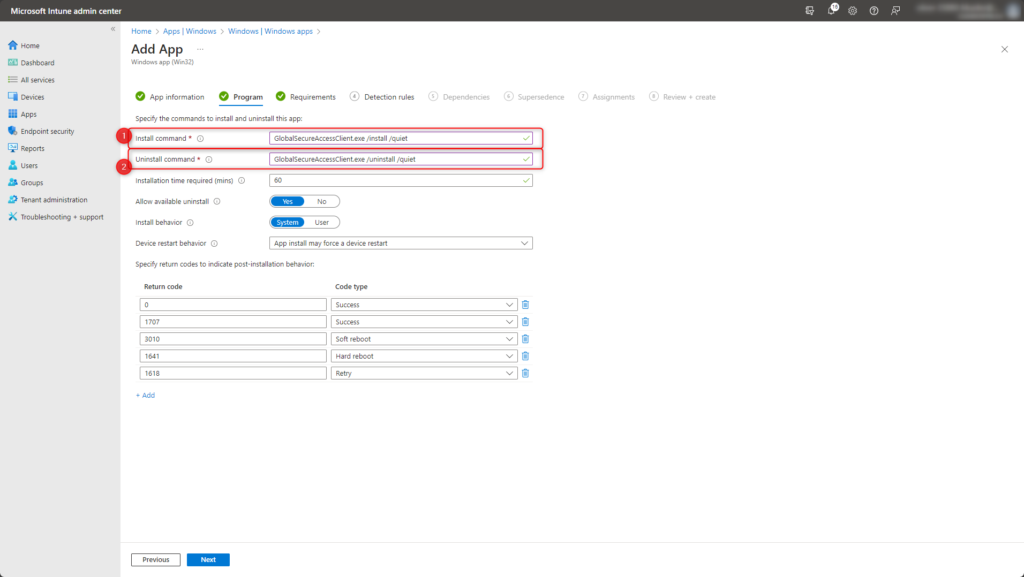
Program
Specify installation and uninstallation options:
- Install command GlobalSecureAccessClient.exe /install /quiet
- Uninstall command GlobalSecureAccessClient.exe /uninstall /quiet
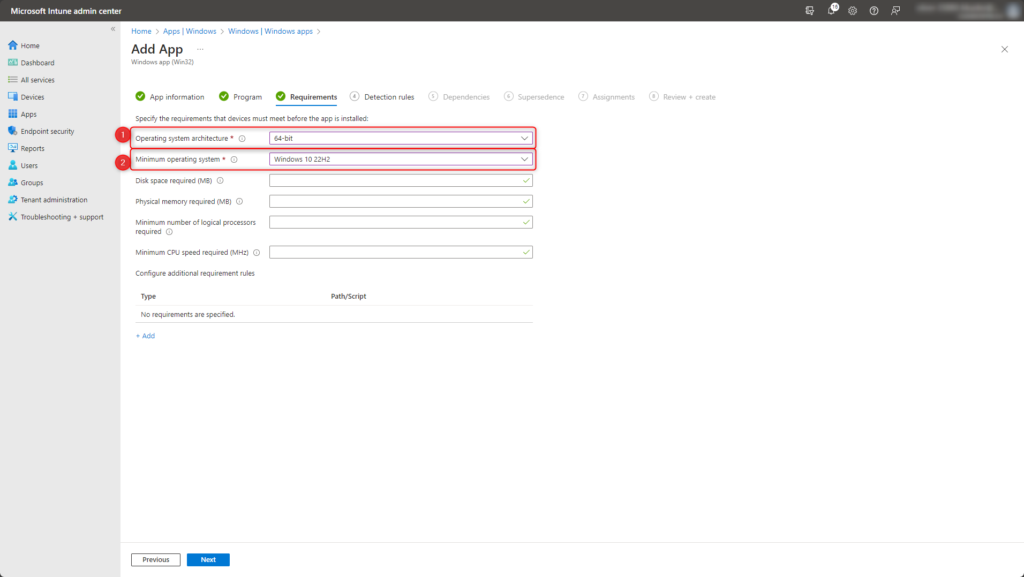
Requirements
Set system requirements for GlobalSecureAccessClient.exe.
- Operating system architecture: 64-bit
- Minimum operating system: Windows 10 22H2
Detection rules
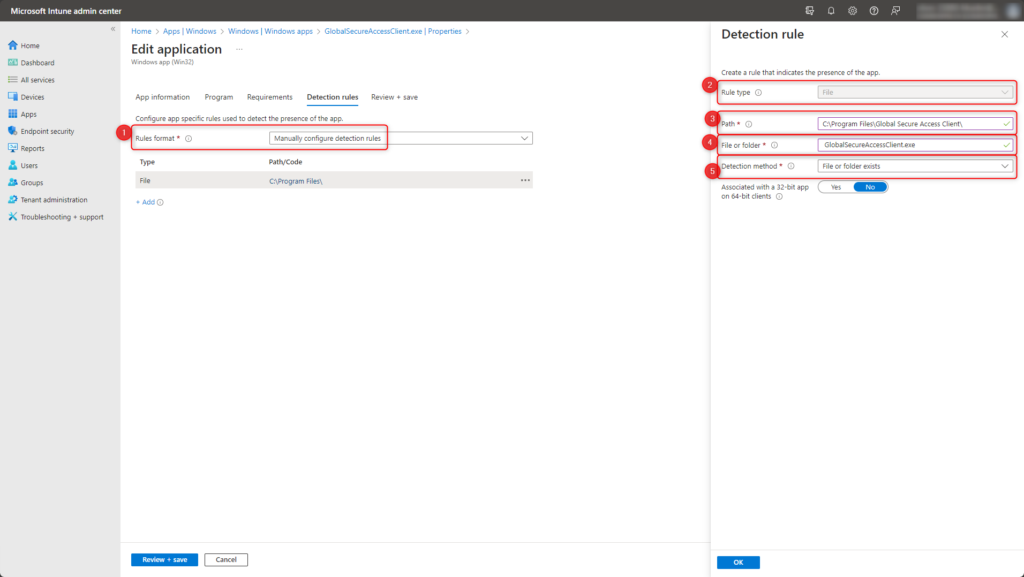
Detect the successful installation of GlobalSecureAccessClient.exe with the following parameters:
- Rules format Manually configure detection rules
- Rule type File
- Path C:\Program Files\Global Secure Access Client\
- File or Folder GlobalSecureAccessClient.exe
- Detection method File or folder exists
Dependencies und Supersedence
Skip this information as it is not currently required.
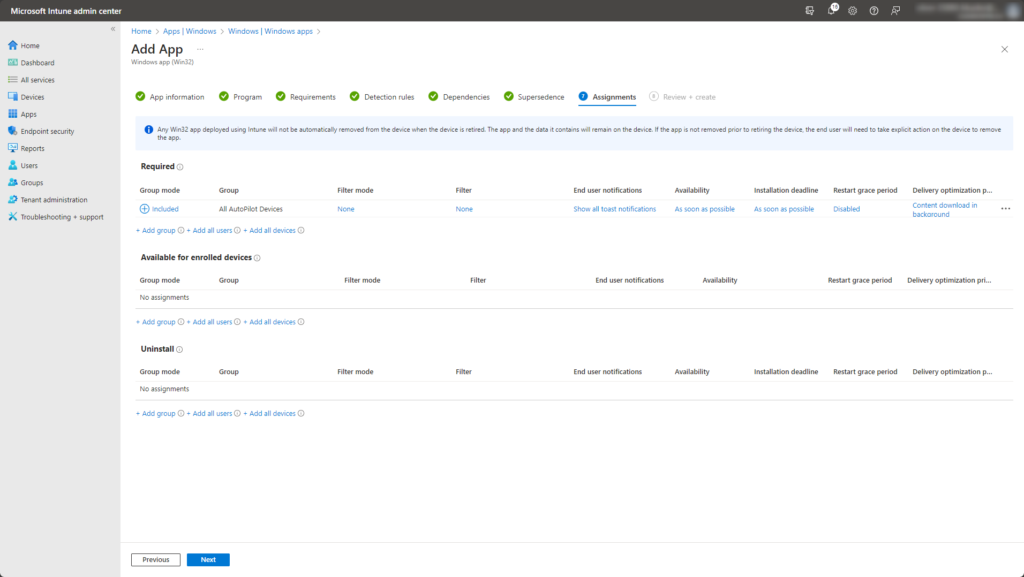
Assignments
Fill in according to your own guidelines.
Check settings and create app with Create.
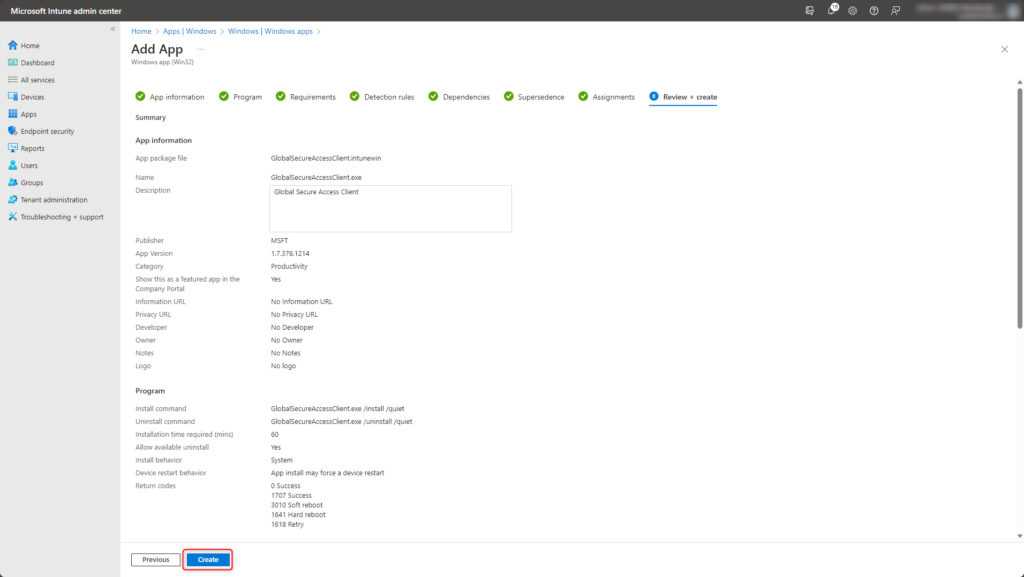
The GlobalSecureAccessClient app will be ready for rollout shortly afterwards.
Installation clientsoftware manually
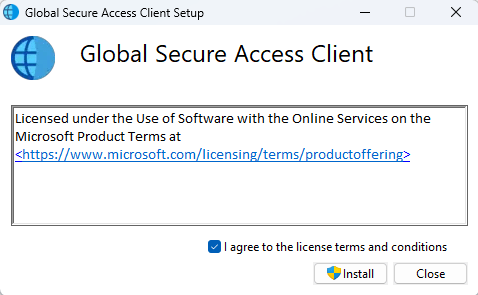
Start the installation of the downloaded file GlobalSecureAccessClient.exe with a double click.
Click Install
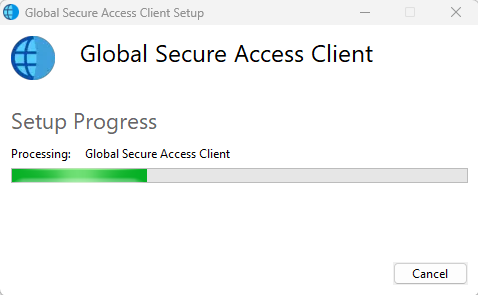
Installation in progress.
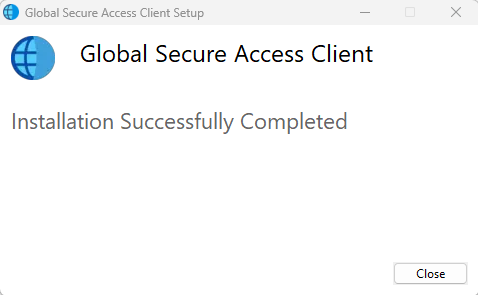
The installation is successfully completed.
Sign-In to Global Secure Access
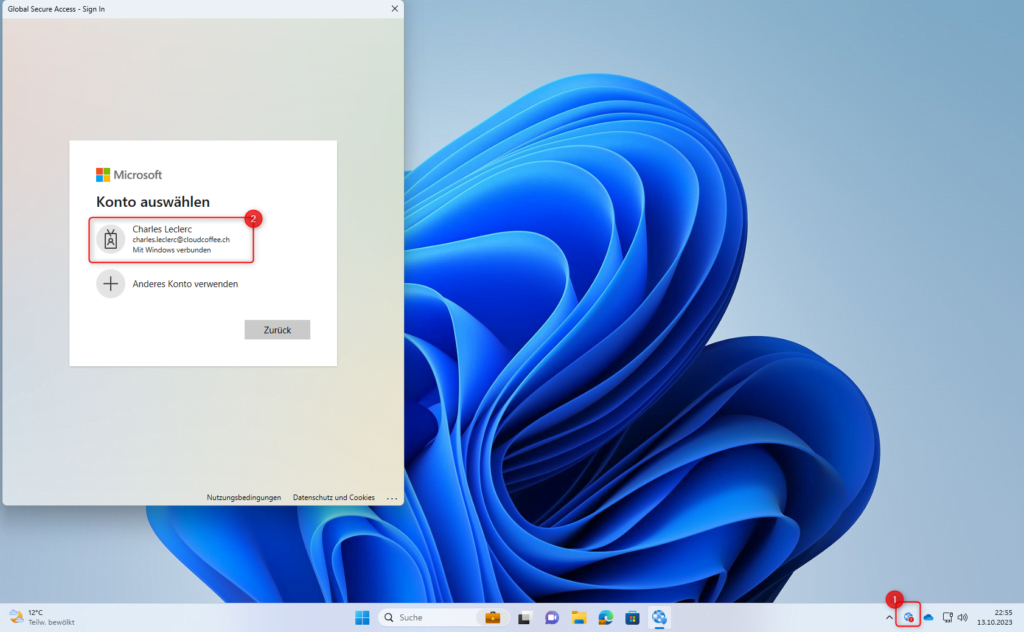
Global Secure Access starts automatically after sign-in in to the device (1) and launches the sing-in screen (2).
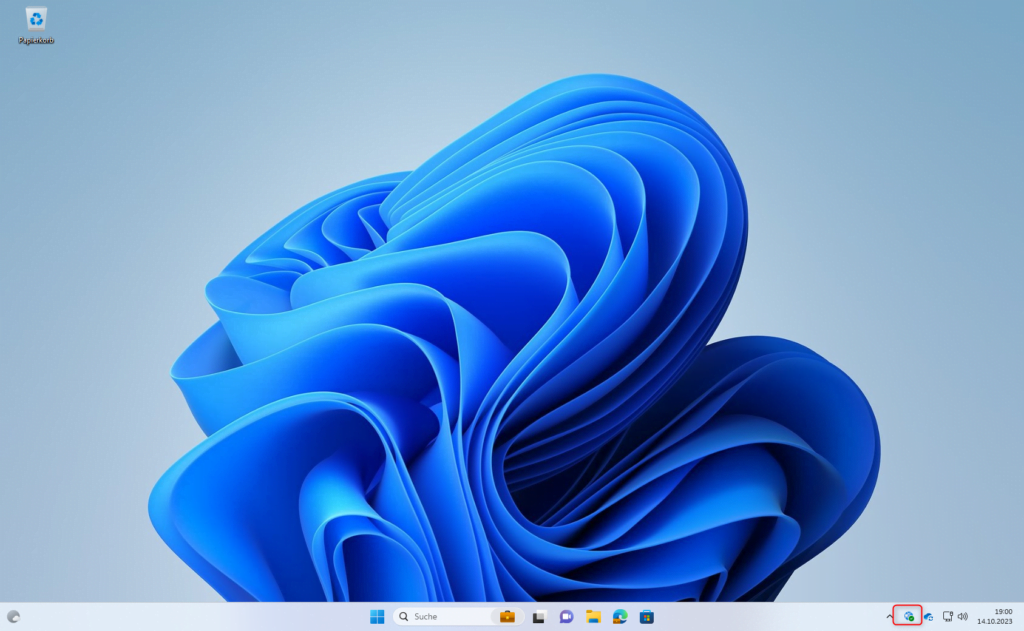
Successful signin to Global Secure Access is indicated by a green check mark in the taskbar.
Client for iOS
A preview client is available for iOS.
Early access to the client can be requested using the following link: iOS Client (Preview).
Client for MacOS
A private client is available for MacOS.
Early access to the client can be requested using the following link: MacOS Client (Preview).
Functional check
In the examples below, the domain int.cloudcoffee.ch is used. This domain is private and cannot be accessed from public.
Nslookup
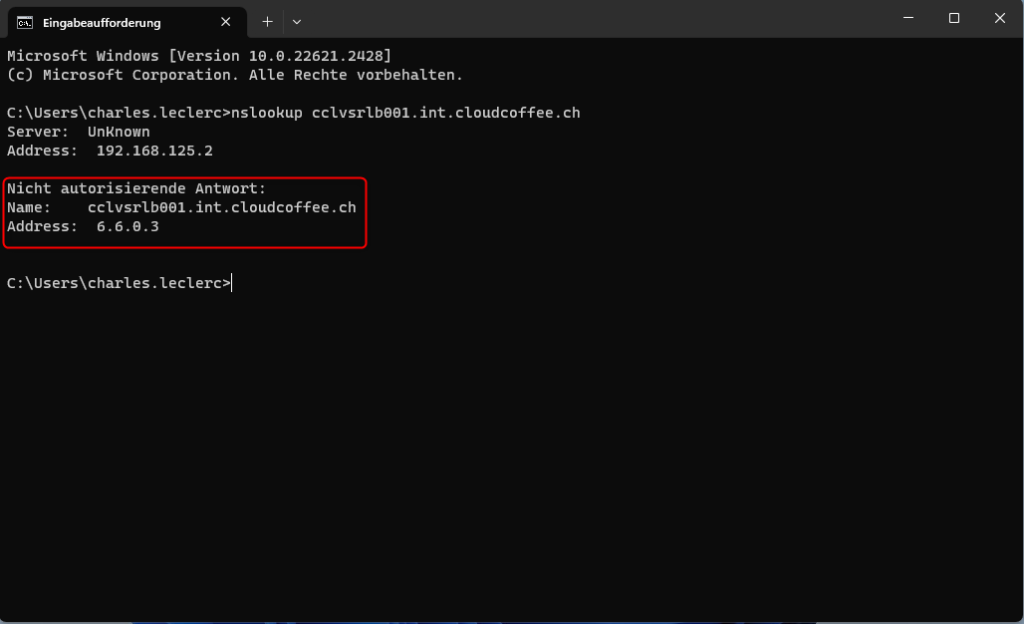
The FQDN query of the server cclvsrlb001.int.cloudcoffee.ch is resolved with the IP address 6.6.0.3. This IP address is part of the Entra Private Access IP range. The data traffic is routed via Global Secure Access to the server in the internal network.
1 | nslookup cclvsrlb001.int.cloudcoffee.ch |
Remote Desktop Services (RDS)
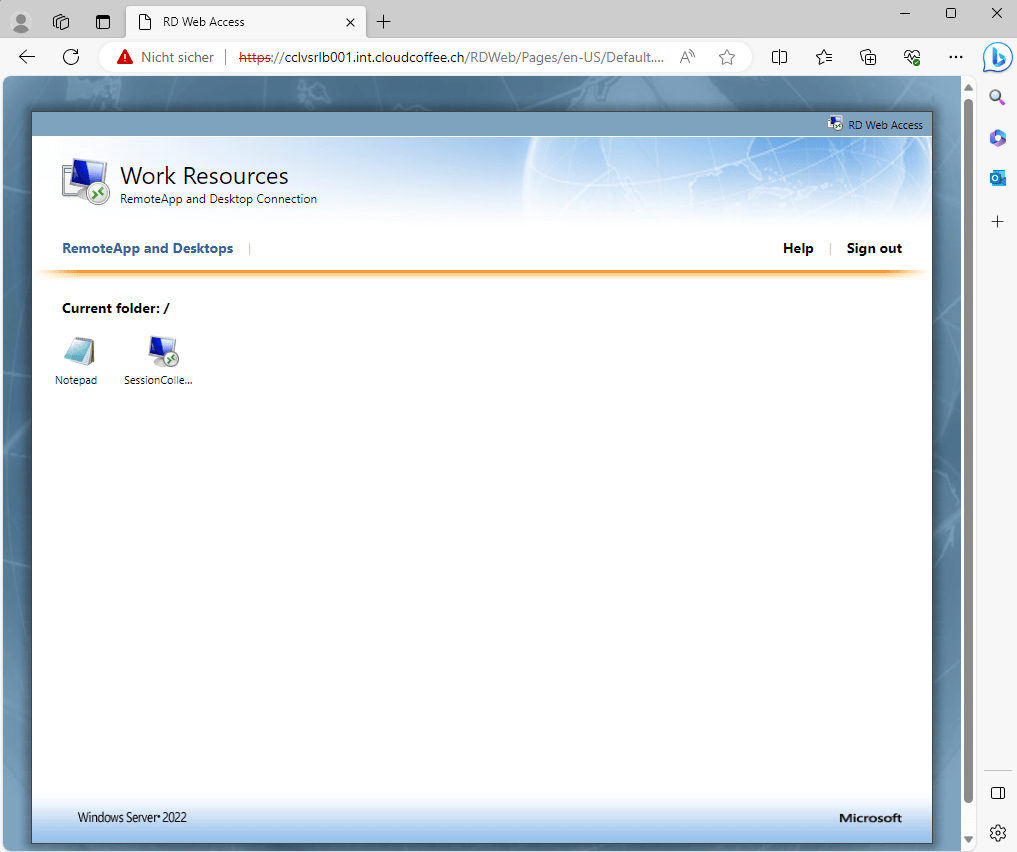
Remote Desktop Services can be accessed as usual from the internal network. It does not require any changes to the connection information.
Example:
Microsoft Remote Desktop Web Access (https://cclvsrlb001.int.cloudcoffee.ch/rdweb)
Remote desktop connections (mstsc.exe)
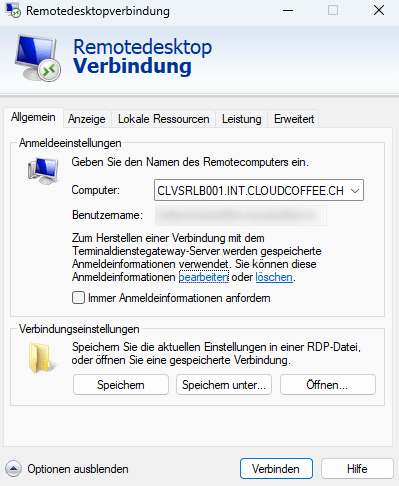
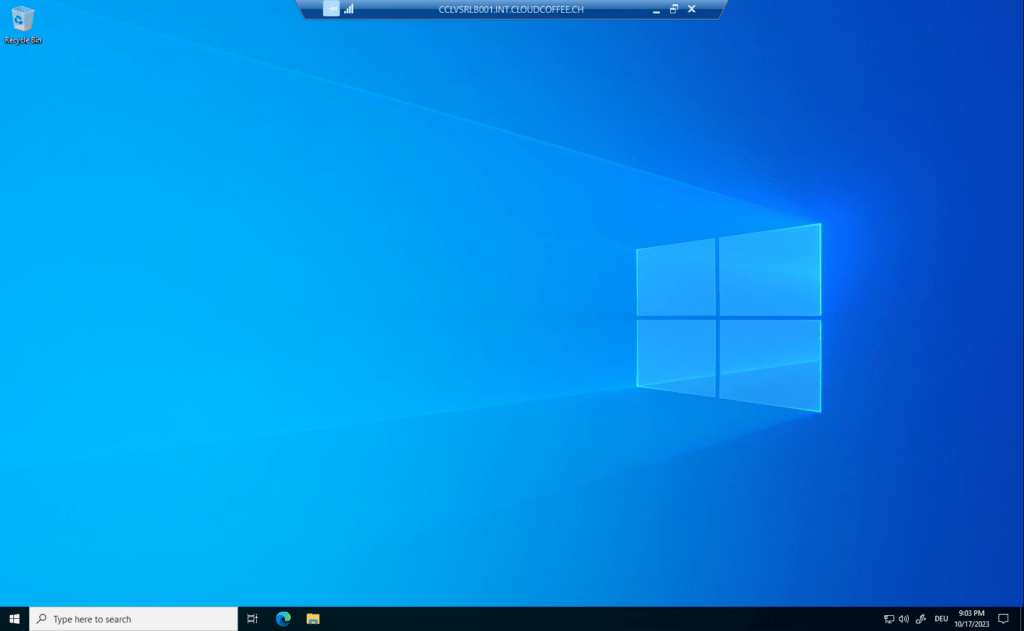
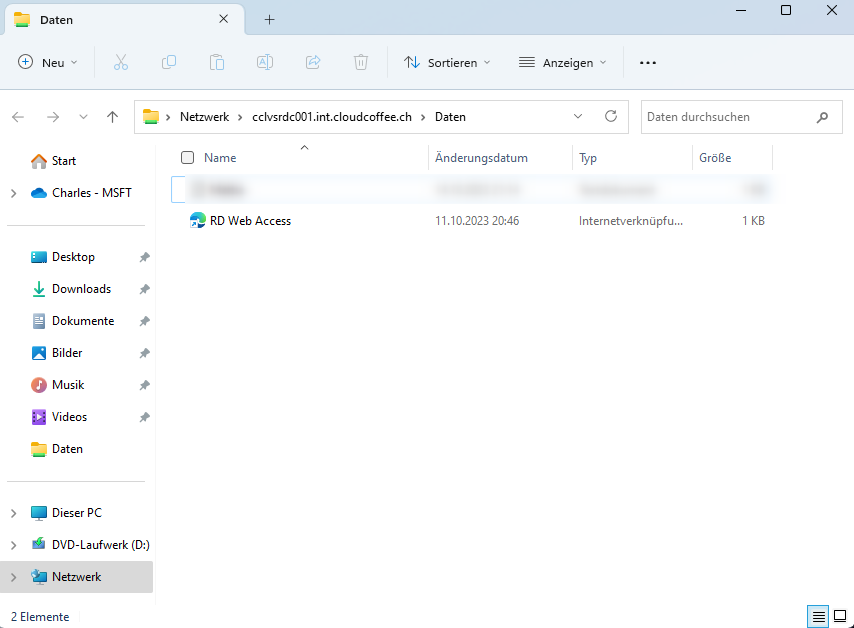
SMB file shares are connected via the UNC path, e.g. \\cclvsrdc001.int.cloudcoffee.ch\Daten
Troubleshooting
The log and diagnostic options for Global Secure Access are described in more detail in the article Microsoft Entra Internet Access – Troubleshooting.
Good to know
Application Proxy Connector
Unused Application Proxy Connectors are marked as inactive and removed from Microsoft Global Secure Access after 10 days of inactivity. However, the Application Proxy Connector is not automatically removed from the Windows Server.
Follow me on LinkedIn to always stay updated on my recent posts.
Was this post helpful to you? Show your enthusiasm with the delightful aroma of a freshly brewed coffee for me!

