Seamless Upgrade of Windows Server on Azure: Best Practices and Step-by-Step Guide
Microsoft Azure supports in-place upgrade to Windows Server 2019 and Windows Server 2022. All data, server roles and settings are taken over in the process. For a successful in-place upgrade there are a few requirements.
This guide shows how to successfully perform a direct upgrade to a newer Windows Server version.
Prerequisites and Licensing
Microsoft Azure supports a direct upgrade starting with Windows Server 2012 R2. Earlier versions of the server operating system are not officially supported.
The following upgrade paths are possible:
| Source OS | Windows Server 2012 R2 | |
| Direct upgrade possible to | Windows Server 2016 Windows Server 2019 |
| Source OS | | Windows Server 2016 |
| Direct upgrade possible to | | Windows Server 2019 Windows Server 2022 |
| Source OS | | Windows Server 2019 |
| Direct upgrade possible to | | Windows Server 2022 |
At least 32 GB free space on the operating system partition.
The virtual server must be hosted on a managed disk.
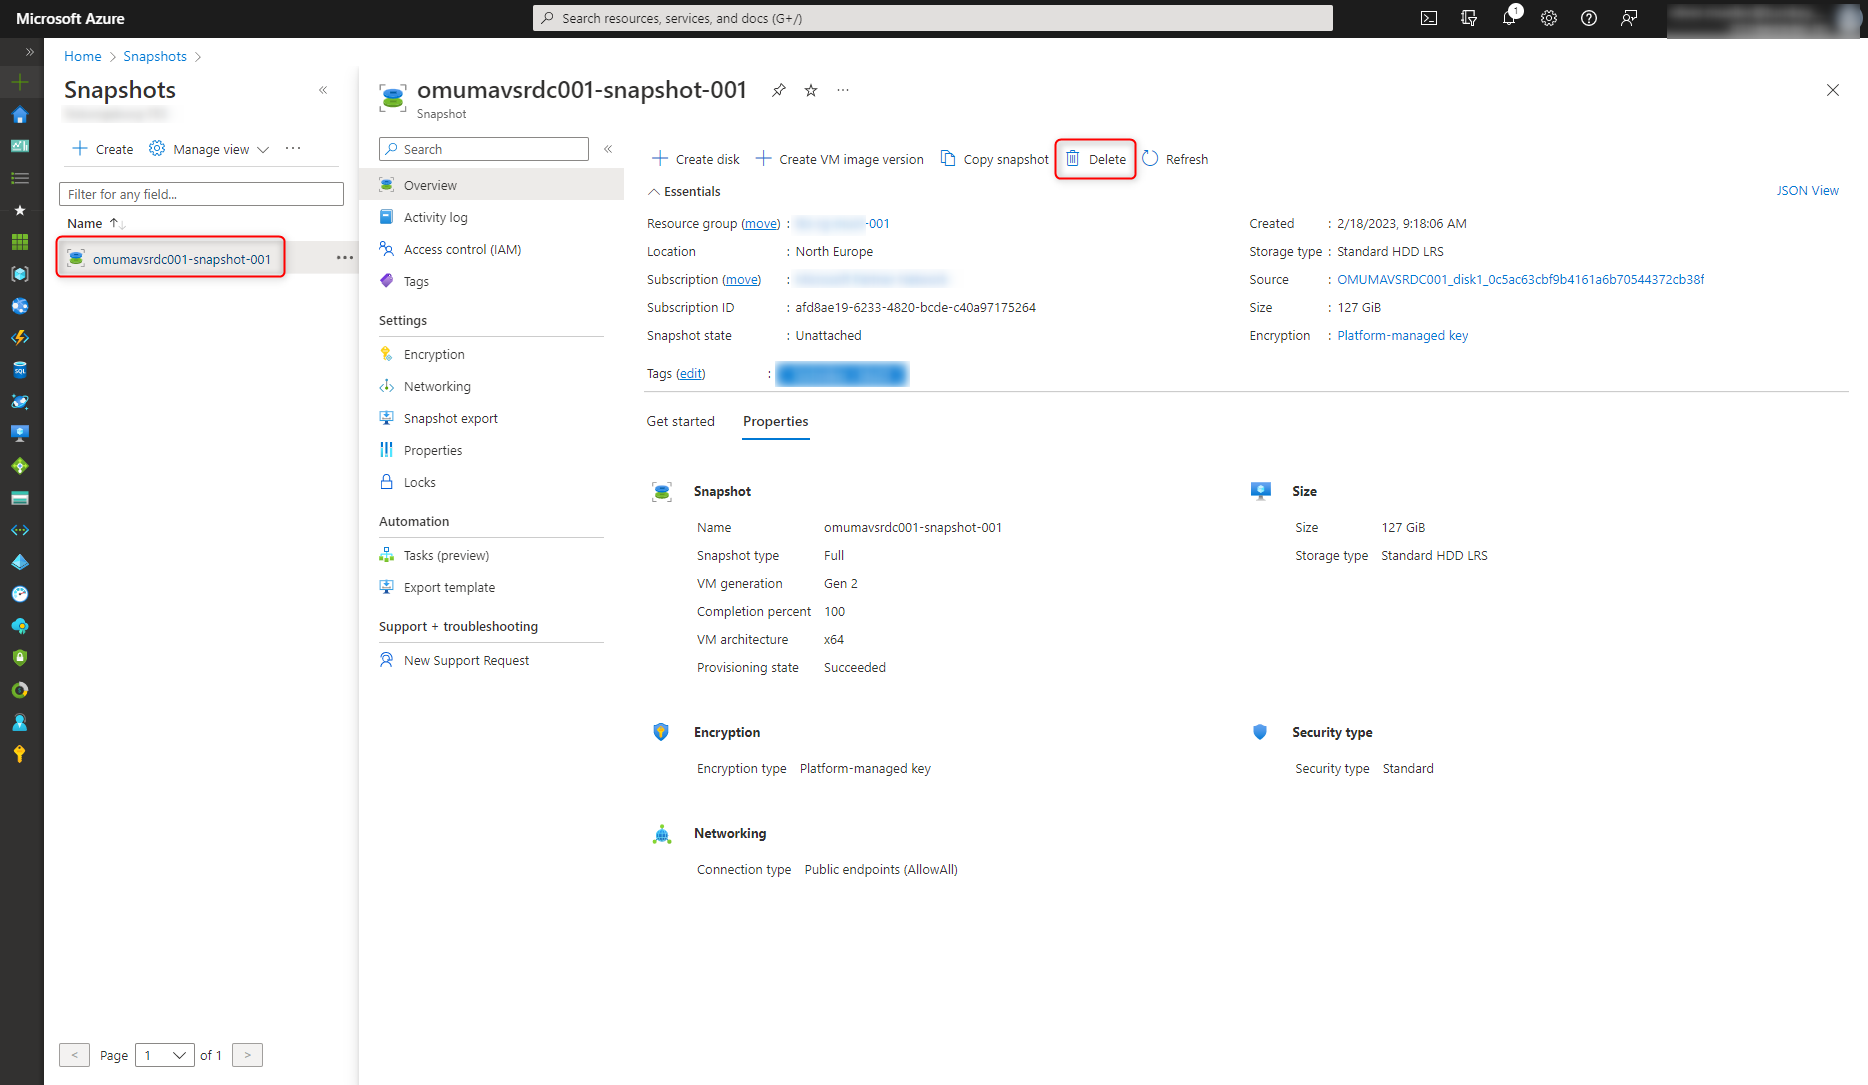
A snapshot of the operating system disk.
In the event of an unexpected error, the server can be recovered to the initial state with this. The following instructions describe how to create a snapshot:
Create an Azure snapshot of a virtual hard disk – cloudcoffee.ch
In-Place Upgrade Medium
Create upgrade medium using PowerShell
The upgrade medium in the form of a virtual disk contains all the necessary files for a direct upgrade. The following PowerShell script creates the necessary disk.
The following parameters in the script should be adjusted to your own needs:
| Parameter | Explanation | |
| resourceGroup | Resource group into which the upgrade medium will be created | |
| location | Azure Region for the upgrade medium. DThe Azure region must correspond to the location of the server to be upgraded | |
| zone | Azure Zone in the selected region. This must match the updating server. If the server is not zone-based, the value remains empty | |
| diskname | Name for the upgrade media | |
| sku | Windows Server target version Possible values are – “server2022Upgrade” – “server2019Upgrade” |
|
1 2 3 4 5 6 7 8 9 10 11 12 13 14 15 16 17 18 19 20 21 22 23 24 25 26 27 28 29 30 31 32 33 34 35 36 37 38 39 40 41 42 43 44 45 46 47 48 49 50 51 52 53 54 55 56 57 58 59 60 61 62 63 64 65 66 67 68 69 |
# # Customer specific parameters # Resource group of the source VM $resourceGroup = " " # Location of the source VM $location = "northeurope" # Zone of the source VM, if any $zone = "" # Disk name for the that will be created $diskName = "WindowsServer2022UpgradeDisk" # Target version for the upgrade - must be either server2022Upgrade or server2019Upgrade $sku = "server2022Upgrade" # Common parameters $publisher = "MicrosoftWindowsServer" $offer = "WindowsServerUpgrade" $managedDiskSKU = "Standard_LRS" # # Get the latest version of the special (hidden) VM Image from the Azure Marketplace $versions = Get-AzVMImage -PublisherName $publisher -Location $location -Offer $offer -Skus $sku | sort-object -Descending {[version] $_.Version } $latestString = $versions[0].Version # Get the special (hidden) VM Image from the Azure Marketplace by version - the image is used to create a disk to upgrade to the new version $image = Get-AzVMImage -Location $location ` -PublisherName $publisher ` -Offer $offer ` -Skus $sku ` -Version $latestString # # Create Resource Group if it doesn't exist # if (-not (Get-AzResourceGroup -Name $resourceGroup -ErrorAction SilentlyContinue)) { New-AzResourceGroup -Name $resourceGroup -Location $location } # # Create Managed Disk from LUN 0 # if ($zone){ $diskConfig = New-AzDiskConfig -SkuName $managedDiskSKU ` -CreateOption FromImage ` -Zone $zone ` -Location $location } else { $diskConfig = New-AzDiskConfig -SkuName $managedDiskSKU ` -CreateOption FromImage ` -Location $location } Set-AzDiskImageReference -Disk $diskConfig -Id $image.Id -Lun 0 New-AzDisk -ResourceGroupName $resourceGroup ` -DiskName $diskName ` -Disk $diskConfig |
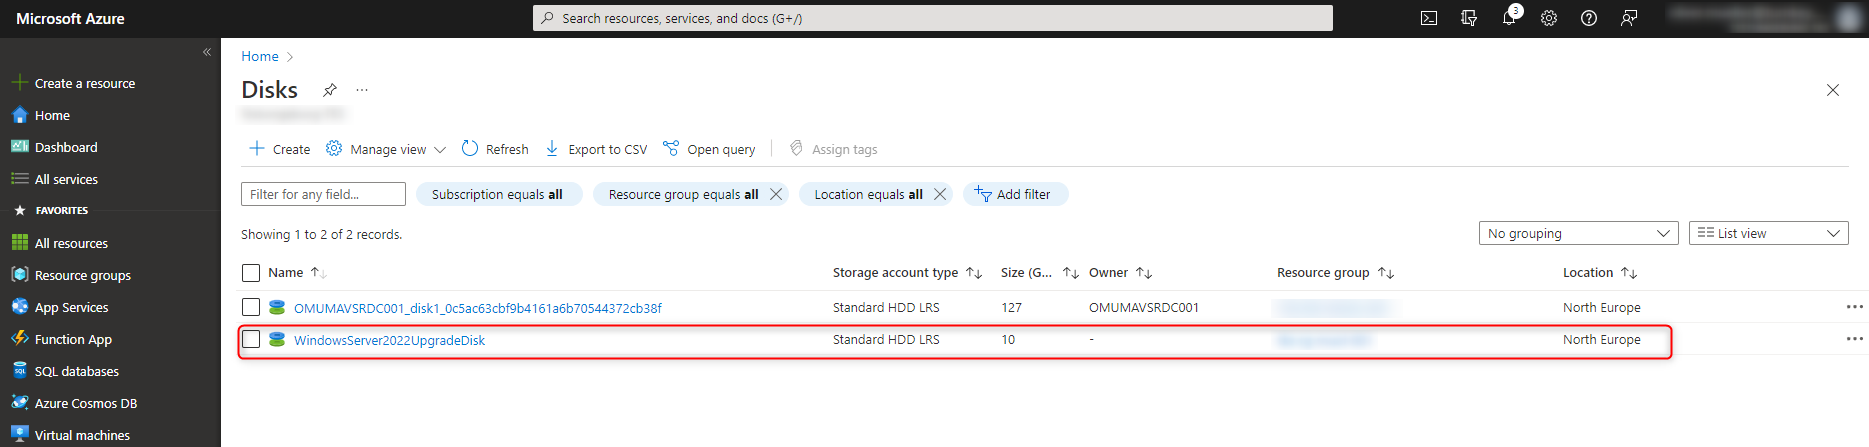
The PowerShell script creates the necessary upgrade medium.
The managed disk is shown under “Disks.
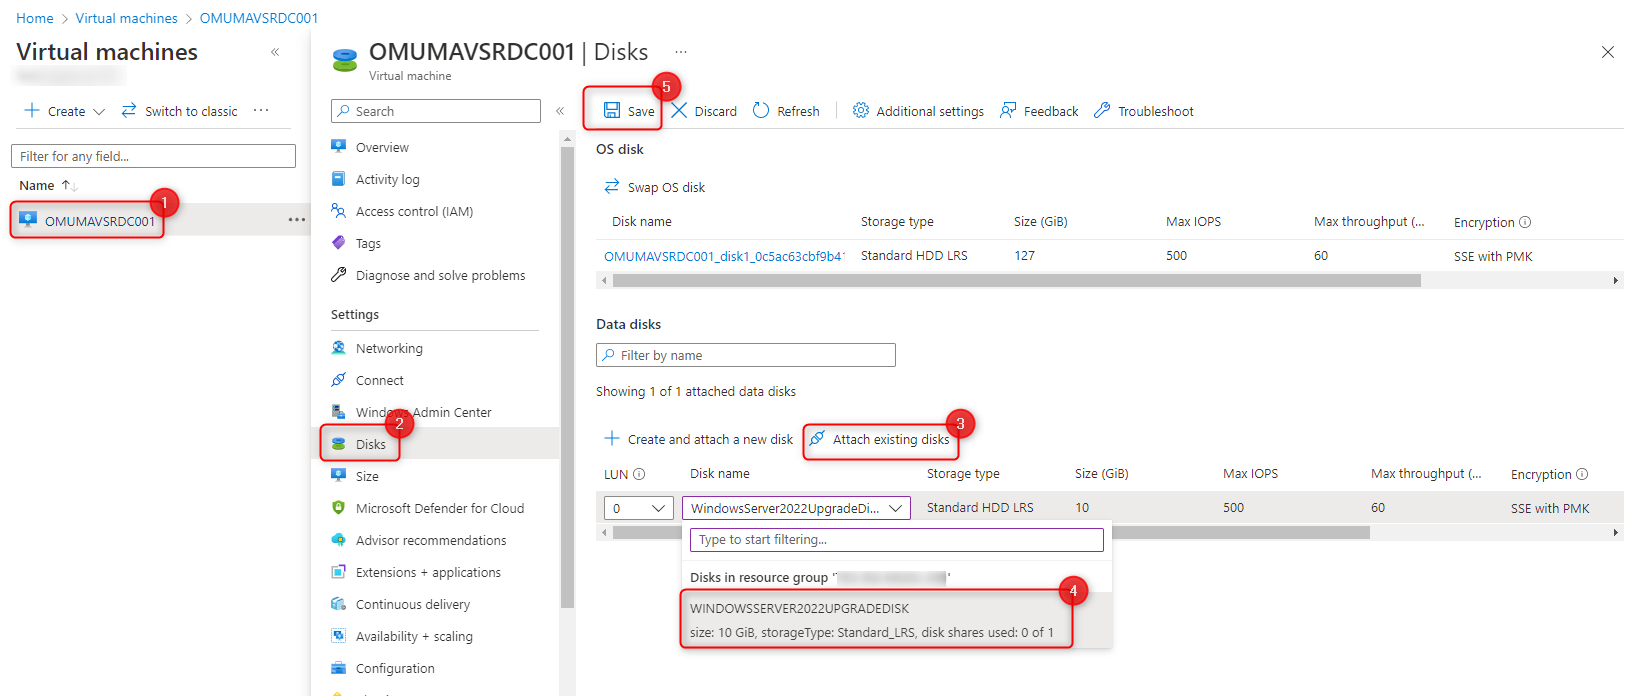
Attach Upgrade Medium to Virtual Server
The managed disk with the upgrade medium is now attached on the server in the Azure Portal (https://portal.azure.com).
- Choose virtual machine
- Select “Disks”
- Select “Attach existing disks”
- Choose disc with upgrade medium
- Confirm selection by clicking “Save”
Perform direct upgrade
The direct upgrade is started on the server. A connection via RDP or Azure Bastion to the virtual server is suitable for this purpose.
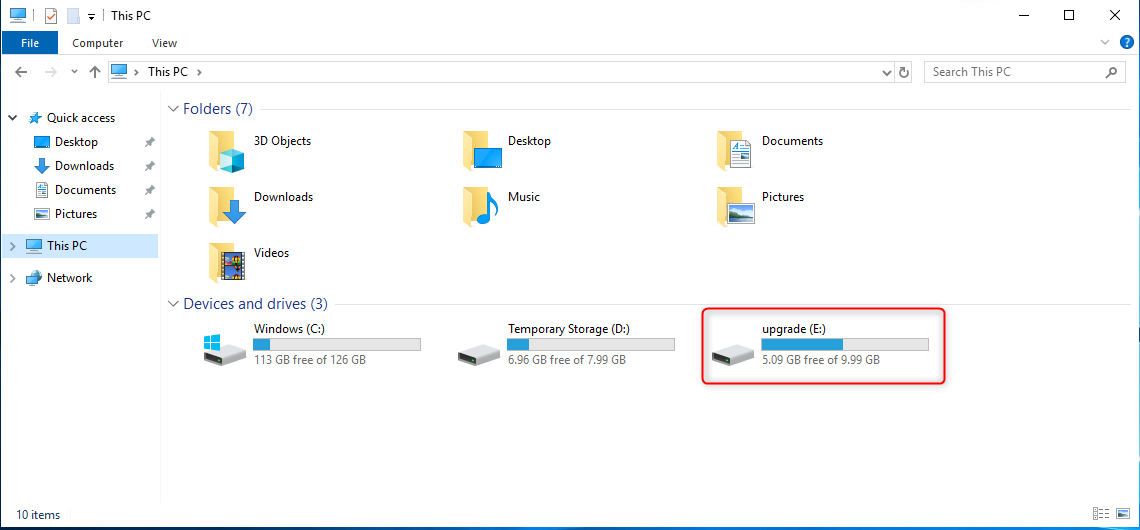
After logging in, use Explorer to determine the drive letter of the attached upgrade medium. In this example drive E:
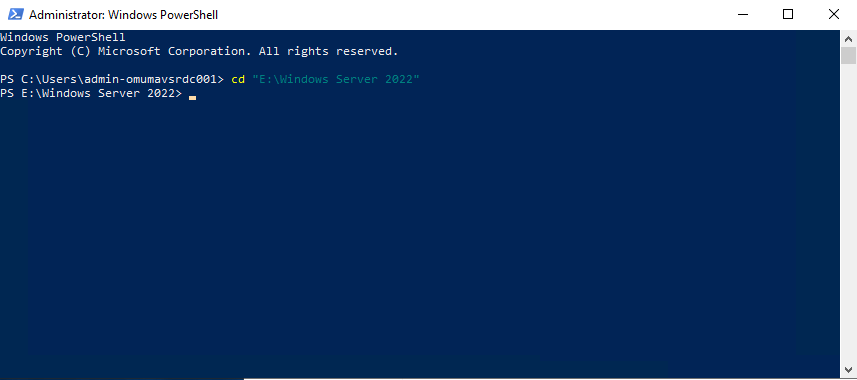
Start Windows PowerShell and change to the directory with the setup.exe file on the upgrade medium..
|
1 |
cd "E:\Windows Server 2022" |
Start upgrade with the following PowerShell command:
|
1 |
.\setup.exe /auto upgrade /dynamicupdate disable |

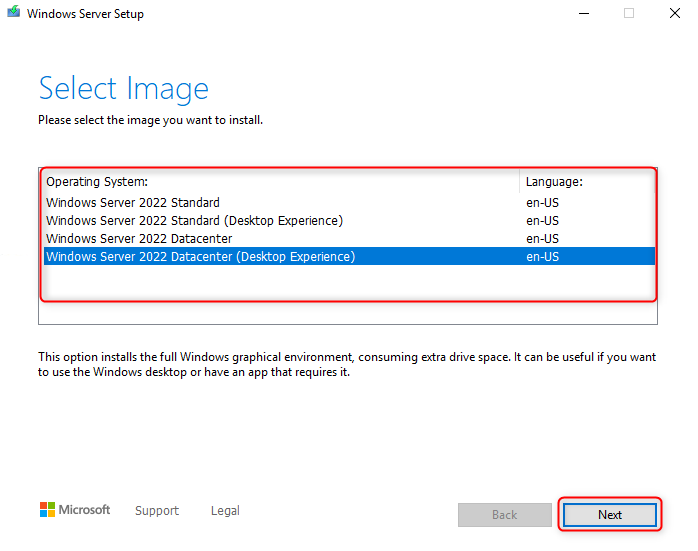
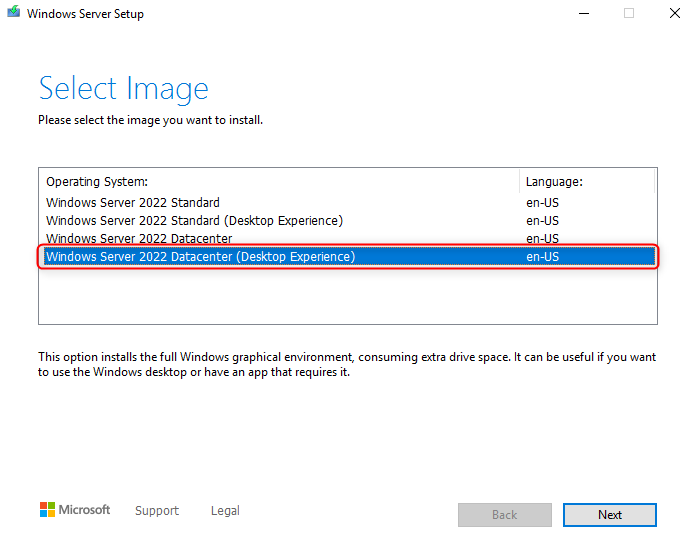
The upgrade starts and the target version of the operating system can be selected and installed with “Next”..
Attention: select the same edition as the source server!
(Standard / Datacenter, Desktop Experience / Core)
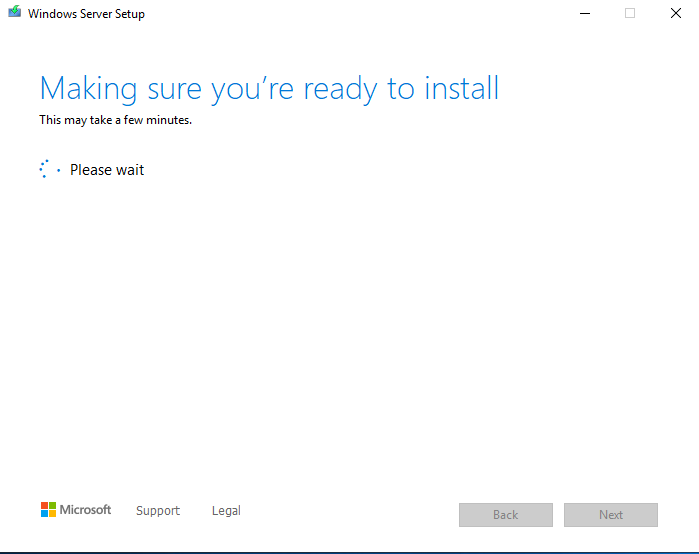
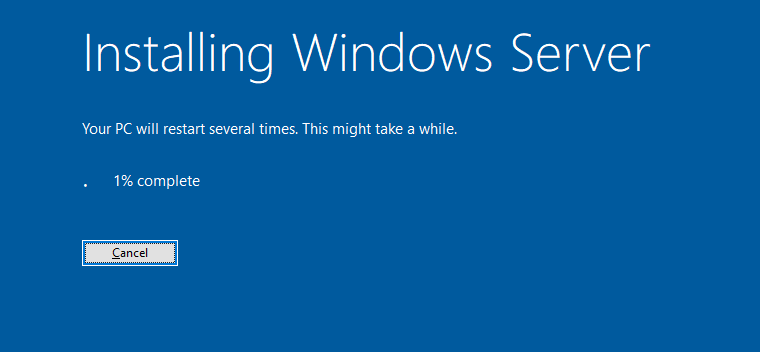
The upgrade process is started and the server is restarted several times. The RDP connection is interrupted on restart.
Depending on the resources of the virtual server (CPU, RAM, hard disk) this process can take up to an hour.
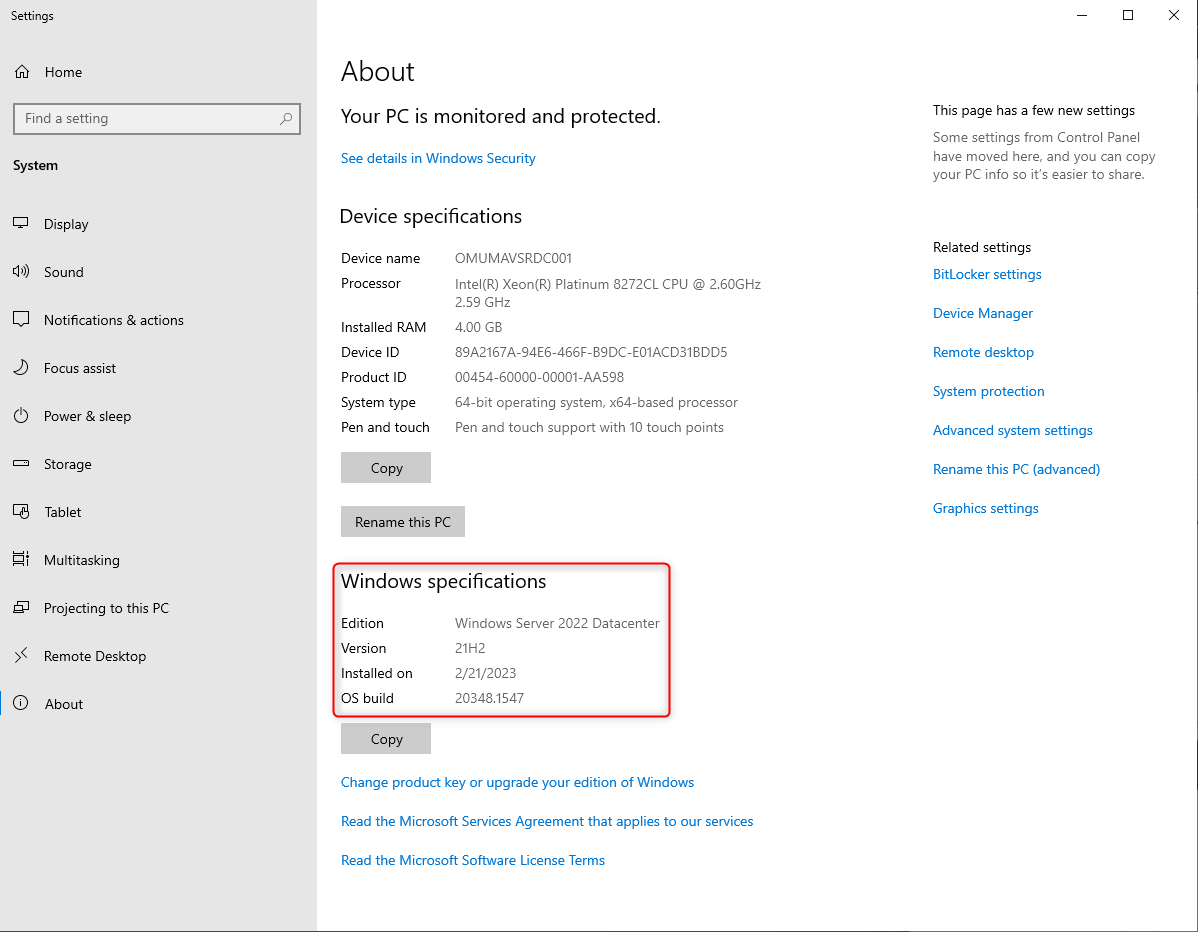
After completing the direct upgrade, the selected edition is installed and ready to use.
Post upgrade steps
After successfully upgrading the server, the following Azure resources are no longer needed and can be deleted.
Remove snapshot
Delete the snapshot of the operating system disc
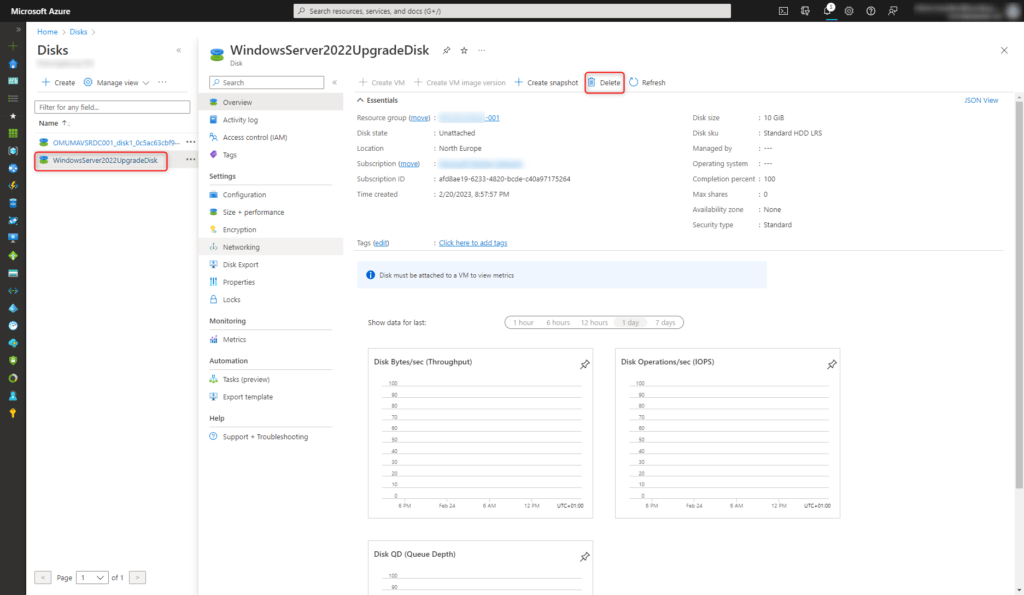
Remove upgrade medium
The upgrade files can be deleted. To do this, the managed disk must first be removed from the server. The server does not have to be shut down for this.
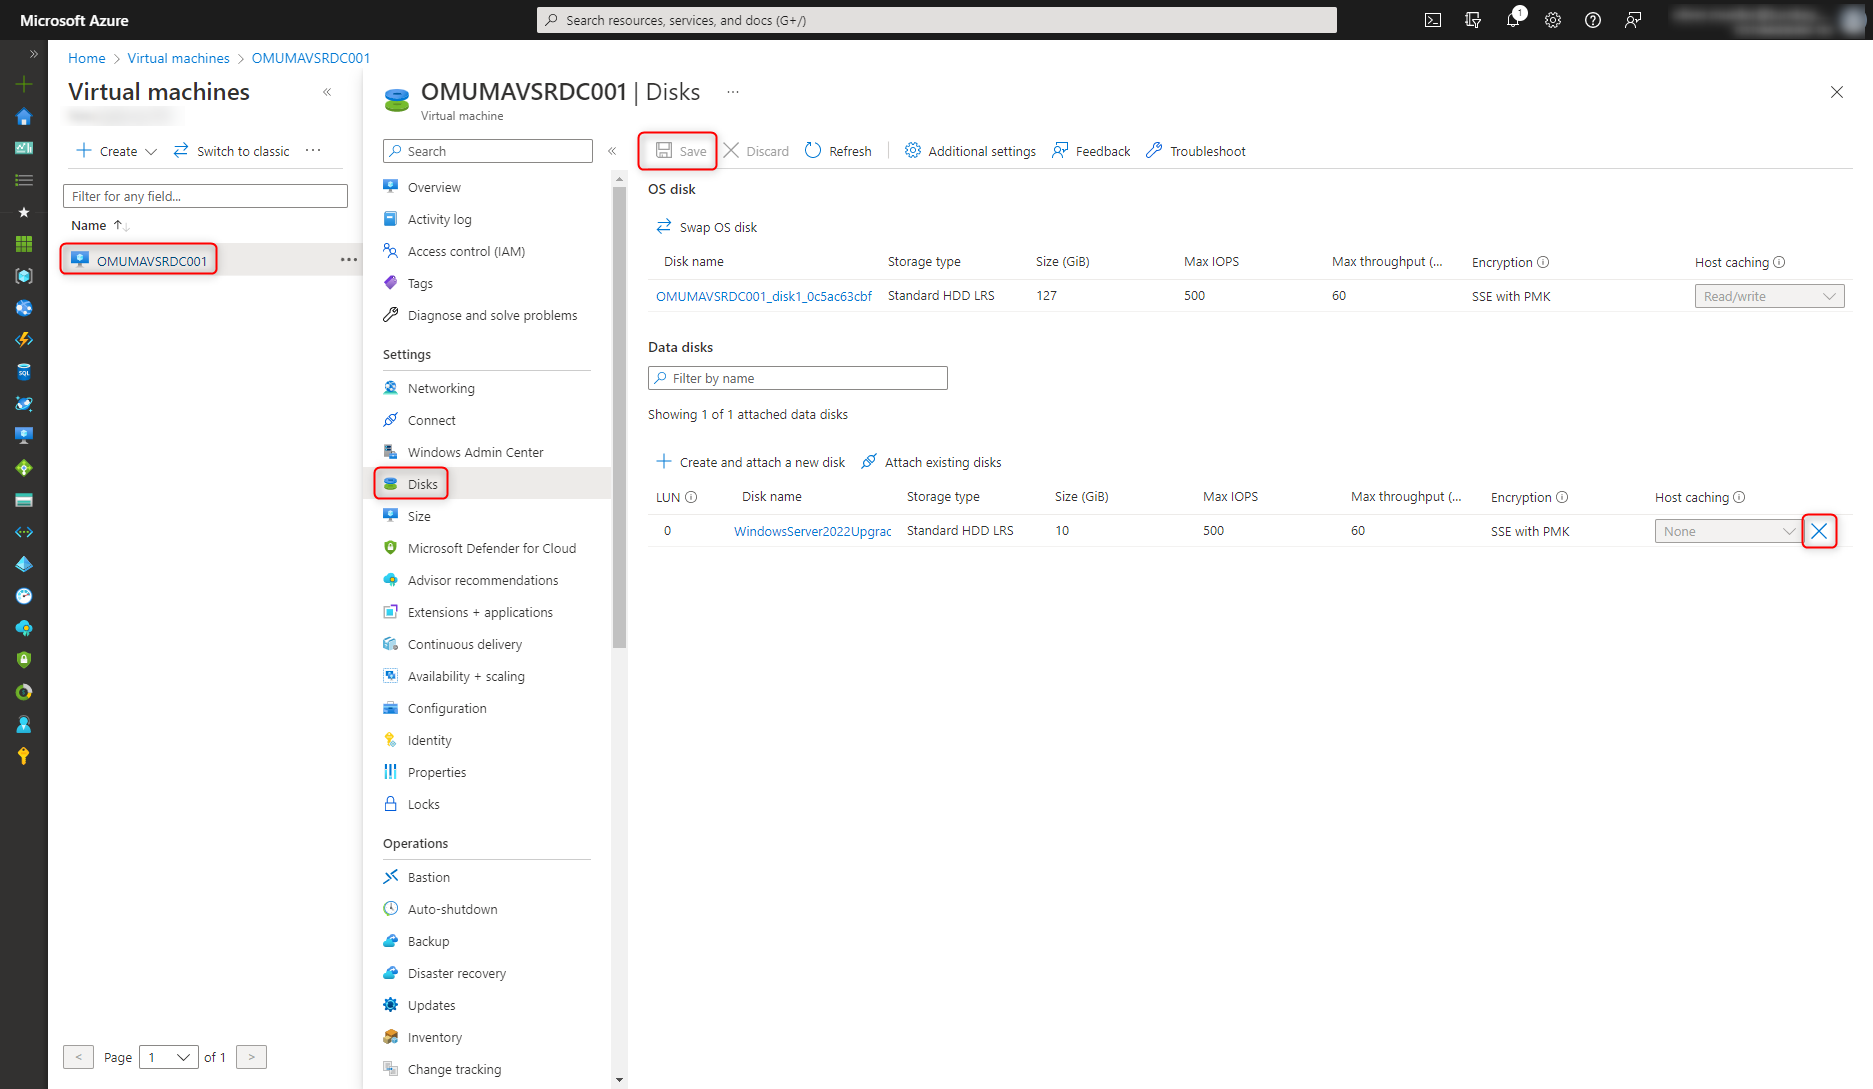
After the managed disk is detached from the server, it can be deleted.
Troubleshooting
Keep files, settings and apps grayed out
When upgrading, the option “Keep files, settings and apps” is grayed out, only “Nothing” can be selected.
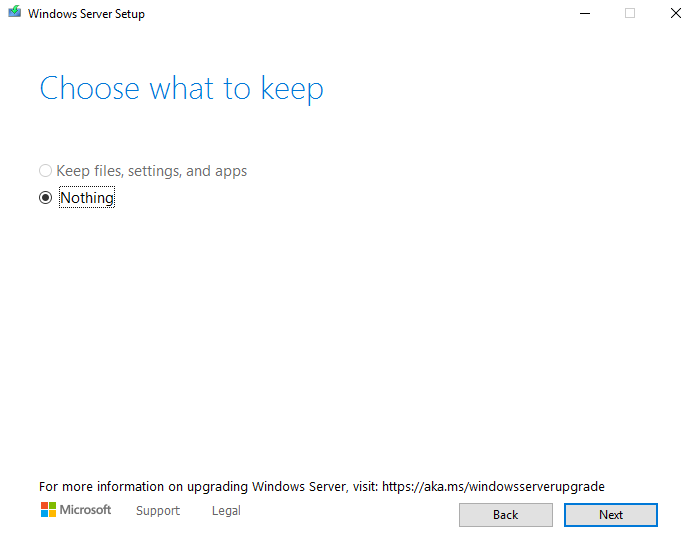
The cause is the previously incorrectly selected Windows Server Edition.
The installed Windows Server edition does not match the edition selected for the direct upgrade.
As an example: if the source server is a Windows Server 2019 Datacenter:

the direct upgrade with keeping files, settings and apps are only possible to the same edition. In this example, this is the Windows Server 2022 Datacenter Edition (Desktop Experience).
Fresh content, explained with practical relevance. Stay up to date via LinkedIn and Bluesky.


No marketing. No noise. Just content.
If this post was helpful, a coffee brings back the rich aroma behind the writing.