Microsoft Entra Privileged Identity Management (PIM): Basic Configuration
Last Updated on 27. June 2024
Microsoft Entra Privileged Identity Management (PIM) manages and monitors access to Microsoft Entra roles and Microsoft Azure roles. Access to Azure resources and Microsoft online services is on-demand and time-restricted.
Users can request privileged roles online. An administrator can approve or deny the request afterwards. The role removes automatically after the specified duration expires.
Microsoft Entra Privileged Identity Management (PIM) can minimize the following risks:
- Number of users and their authorization duration on privileged roles are reduced to a minimum
- Users are better protected against accidental compromise of sensitive data. (no unnecessary privileged roles when they are not needed).
- Attackers do not get privileged access
This guide configures Microsoft Entra Privileged Identity Management (PIM) for Microsoft Entra roles and Microsoft Azure roles.
Prerequisites and Licensing
For Microsoft Entra Privileged Identity Management (PIM), one of the following licenses is required:
- Microsoft Entra ID P2
- Enterprise Mobility + Security E5
An overview of Microsoft 365 license packages with their features can be found at https://m365maps.com.
Microsoft Entra Privileged Identity Dashboard
The management interface for Microsoft Entra Privileged Identity Management (PIM) is located in the Microsoft Entra admin center (https://entra.microsoft.com). From this central interface, all settings and options for Microsoft Entra Privileged Identity Management (PIM) can be configured.
Microsoft Entra admin center (https://entra.microsoft.com) > Identity governance > Privileged Identity Management

Microsoft Entra Privileged Identity Management: Onboarding for Microsoft Entra roless
Configuring Microsoft Entra roles Settings
View the default values of a role and customize them according to company policies.
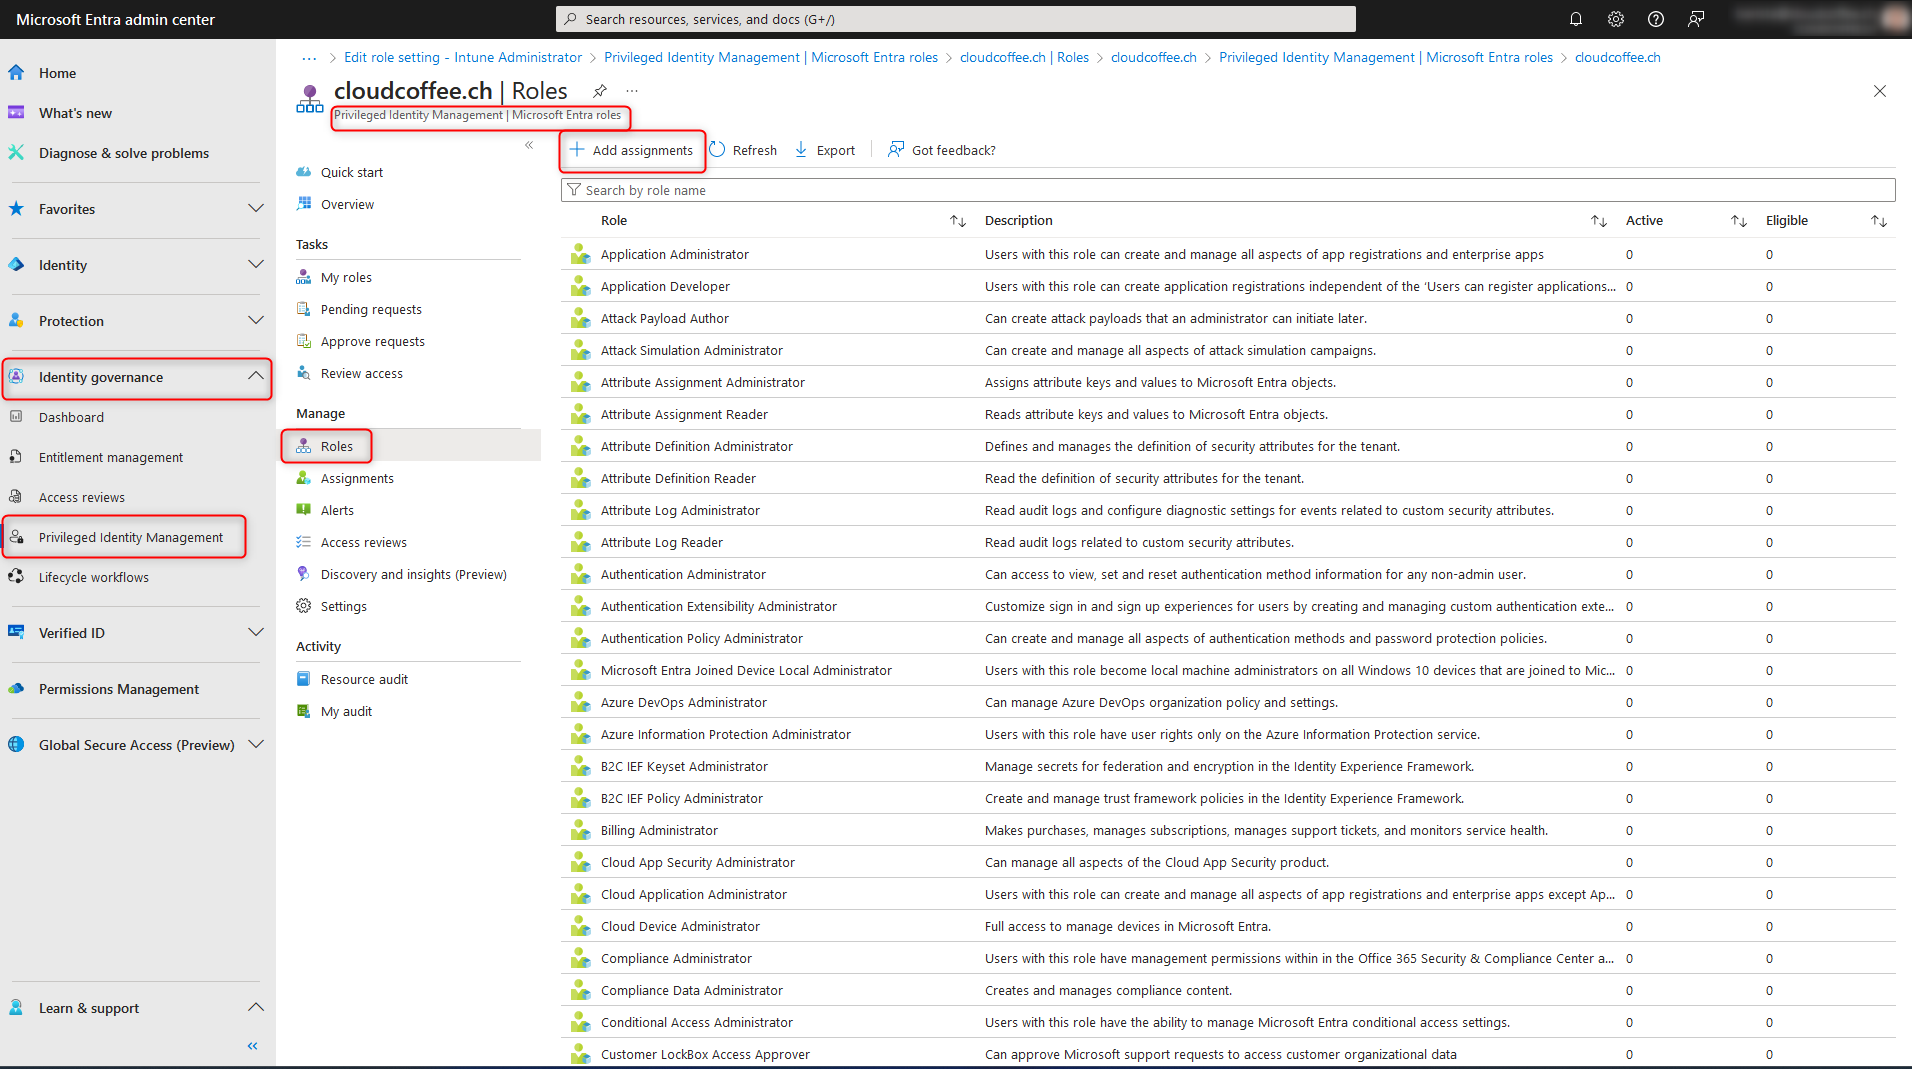
To do this, open the settings under Microsoft Entra roles under Manage.

Select Roles (1) in the category manage and choose Microsoft Entra role (2).

lick on Settings to adjust the configuration of the Microsoft Entra role.

All values can be adjusted via Edit.

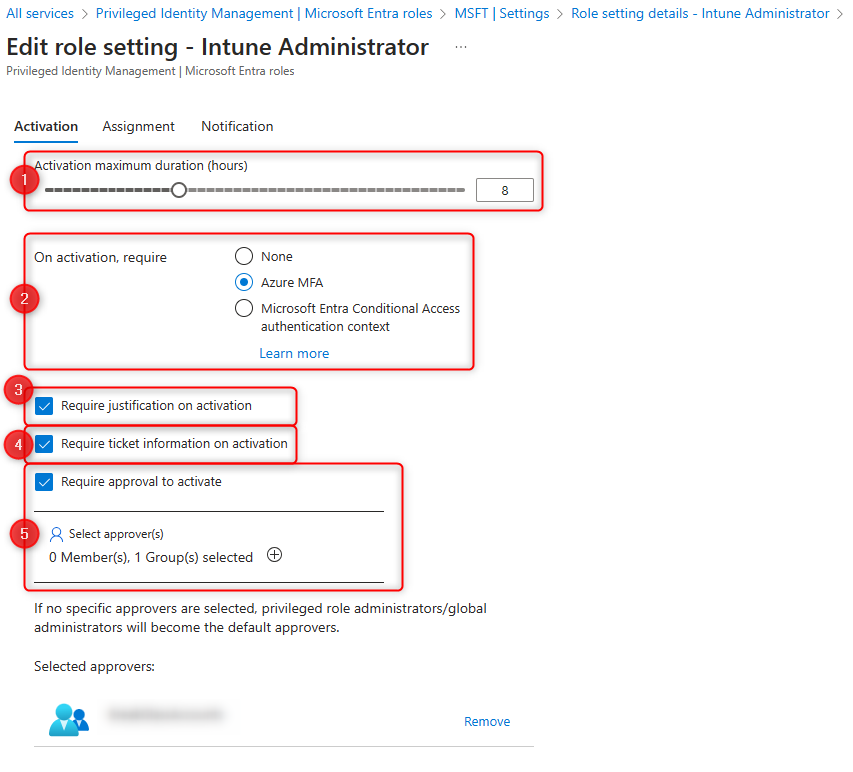
The example below shows a customized configuration for the Intune Administrator role:
- Maximum activation time of active assignment of the role to a user.
- Multi-factor authentication is required for role activation.
- When applying for the permit, a justification must be given.
- A support ticket number for activation is required.
- The release is confirmed by another user (4-eyes principle).
If multiple users or user groups are approved for role activation, confirmation of one user is sufficient to complete the request.
If no users or user groups are selected, the approval request is sent to all global administrators and privileged role administrator.
If the option is disabled, the request is automatically approved by Azure.
- Time period in which a user can request an Microsoft Entra role.
- Time period during which a user can have an Microsoft Entra role enabled.
- Multi-factor authentication is required for role activation.
- Justification is required for active assignments.

Under “Notification” additional recipients of notifications are added. If no additional recipients are added, the following people will receive the notification
- Requester (user)
- global administrators
- privileged role administrator

Assign permission for Microsoft Entra roles
In order to receive a Microsoft Entra role via Microsoft Entra Privileged Identity Management (PIM), appropriate permissions are required for the users. There is the possibility to assign both integrated and custom Microsoft Entra roles.
The assignment of Microsoft Entra roles is done in the Microsoft Entra admin center (https://entra.microsoft.com) > Identity governance > Privileged Identity Management > Microsoft Entra roles > Roles > Add assignments.
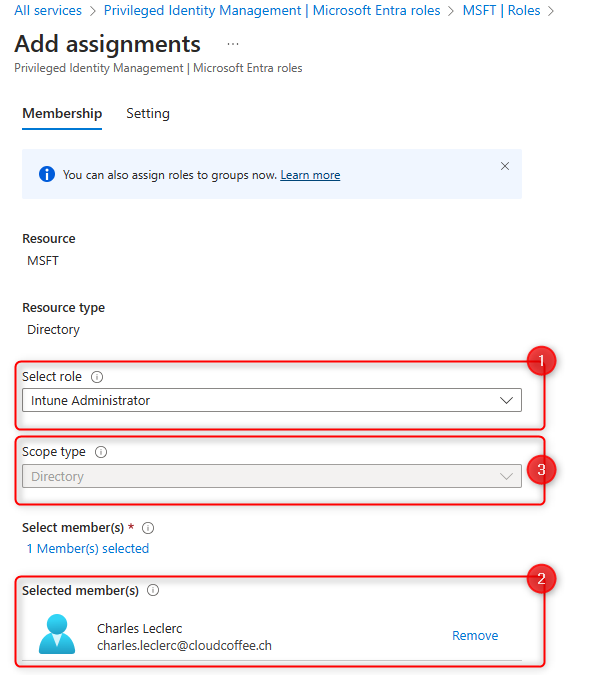
Select Microsoft Entra role (1) and assign User or Group (2). The access scope can be restricted for some roles, such as for the User Administrator role (3).
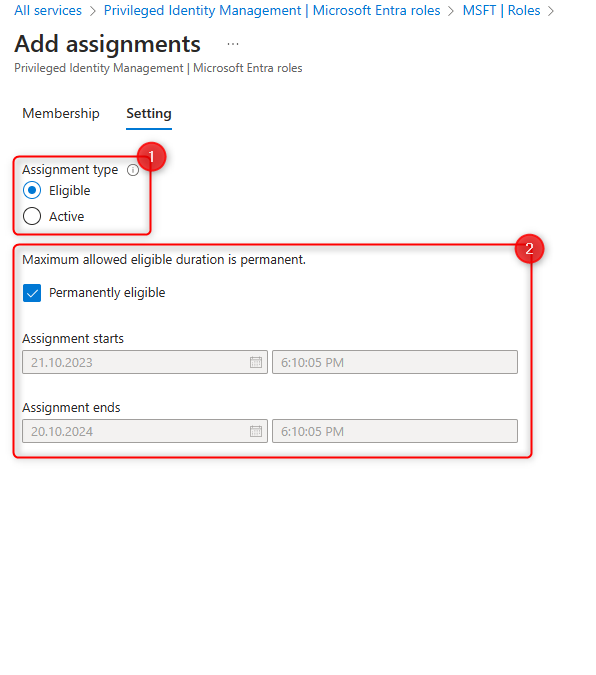
Select the assignment type (1).
- Eligible: User must actively request the role
- Active: Role is assigned to the user permantly
The second part specifies the duration of the authorization (2).
For the indication of the duration it is important to understand the following:
Eligible
The duration specifies how long the user can request the Microsoft Entra role. The period specified here does not affect the maximum time the role is actively assigned. This period is specified in the properties of the role, which is described in the chapter Configuring Entra role settings.
Active
The Microsoft Entra role is automatically assigned to the user in the specified time period.
Microsoft Entra Privileged Identity Management: Onboarding for Microsoft Azure roles
Preparing Microsoft Azure roles for PIM
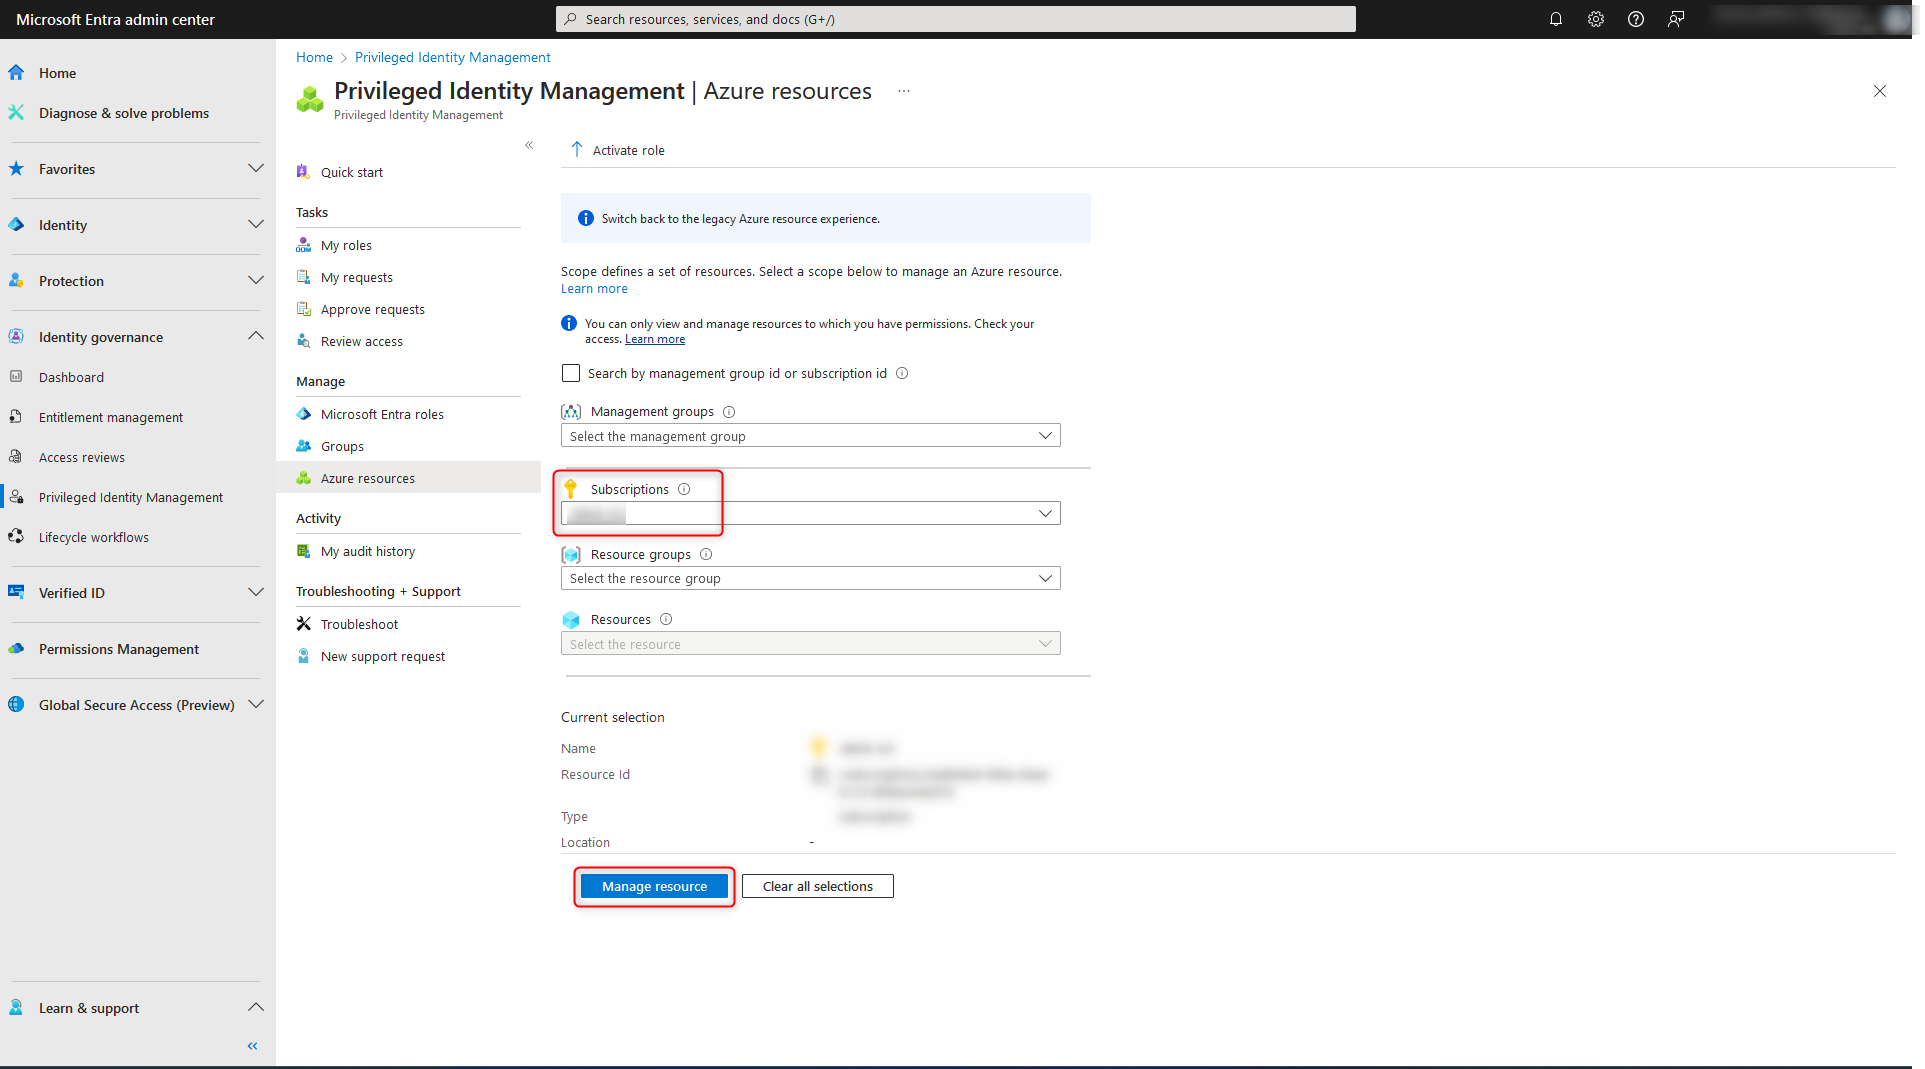
Before Microsoft Azure roles can be managed with Microsoft Entra Privileged Identity Management (PIM), it is necessary to appropriately prepare the subscription for PIM.
Microsoft Entra admin center (https://entra.microsoft.com) > Identity Governance > Privileged Identity Management > Azure resources

Next, select the Azure subscription, click on Manage Resource, and thereby start the onboarding process.
Select Assignments
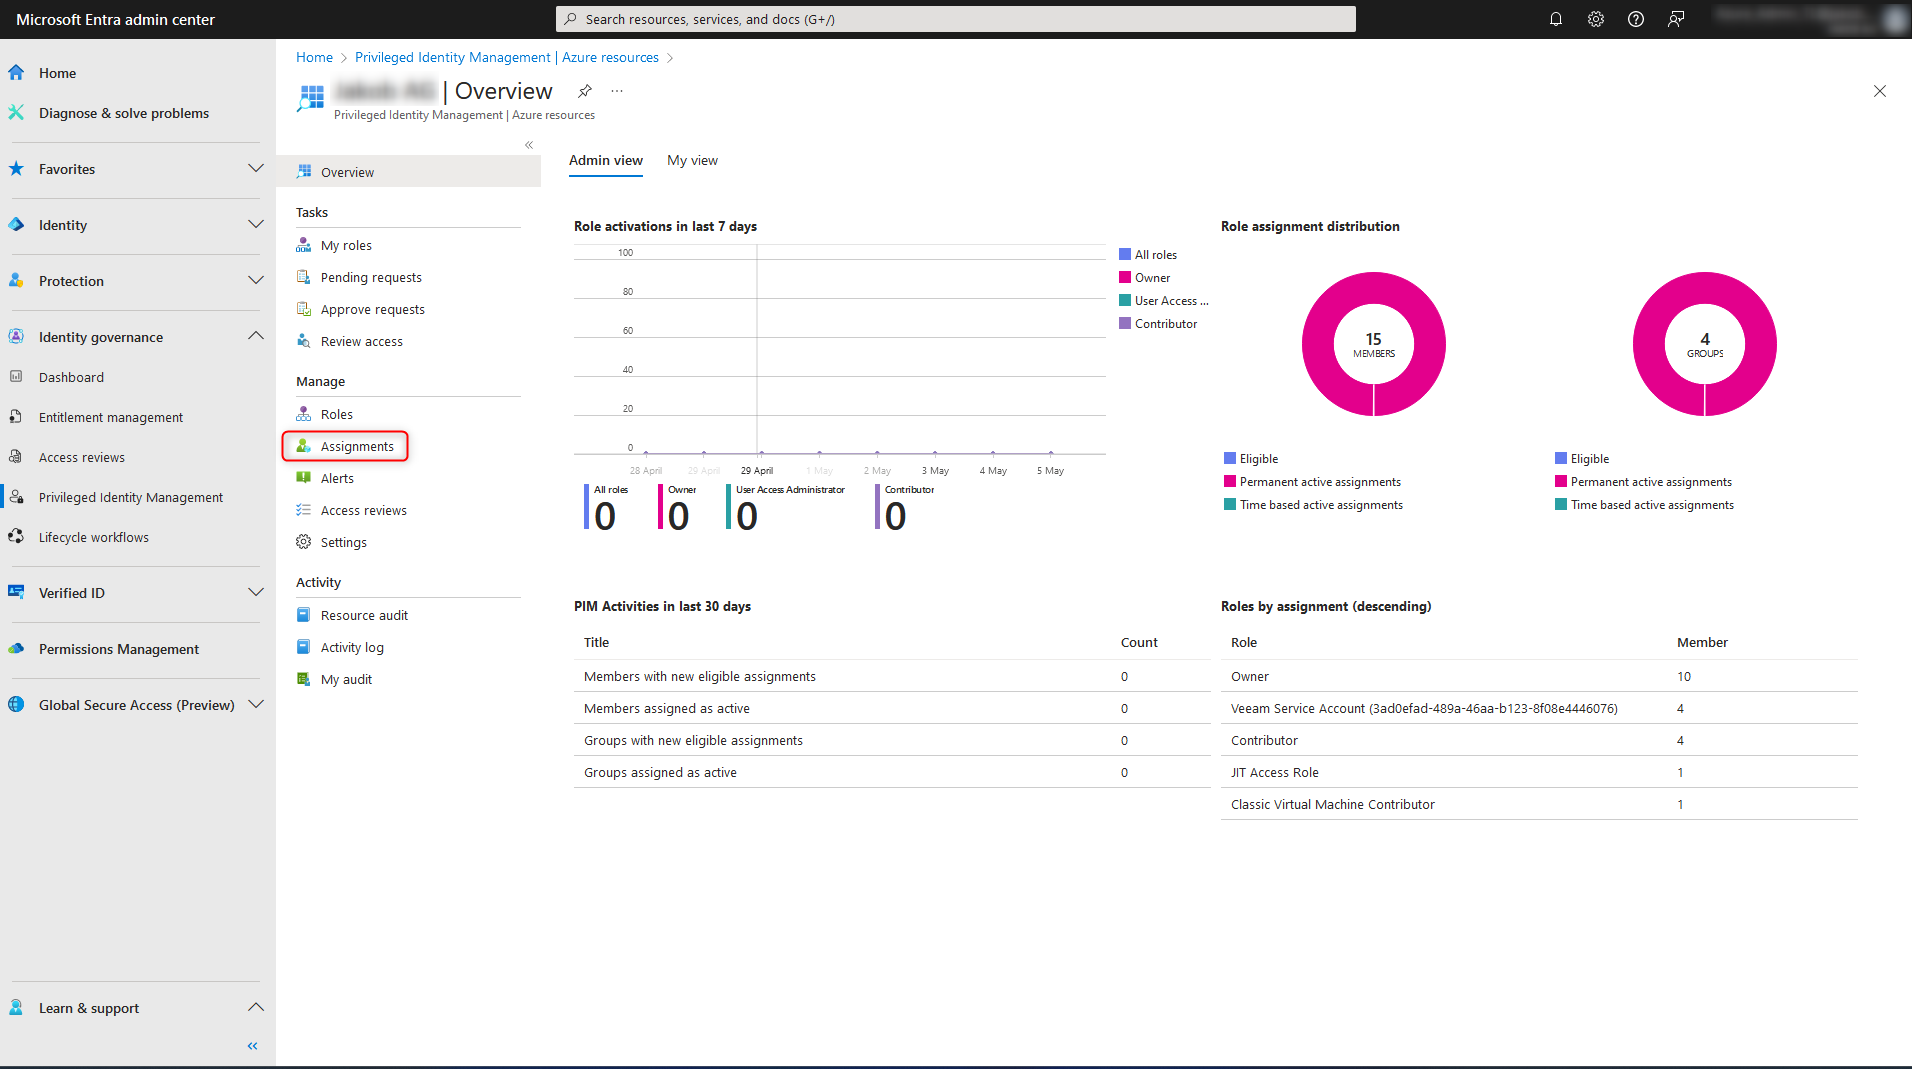
Select Add assignments

The rest of the process is the same as for the Microsoft Entra roles, see here for instructions.
Assign permission for Microsoft Azure roles
Similar to the assignment of Microsoft Entra roles, it is necessary for users to have appropriate permissions to be assigned Microsoft Azure roles.
Microsoft Entra admin center (https://entra.microsoft.com) > Identity Governance > Privileged Identity Management > Azure resources > choose subscription > Manage resource > Roles > Add assignments.

The rest of the configuration is identical to the Microsoft Entra roles permission assignments and can be read here.
Fresh content, explained with practical relevance. Stay up to date via LinkedIn and Bluesky.


No marketing. No noise. Just content.
If this post was helpful, a coffee brings back the rich aroma behind the writing.