Deploying Azure Naming Tool on a docker container
The Azure Naming Tool is a free tool for docker container that always generates the correct name for an Azure resource based on best practices.
Microsoft has provided guidance on the various phases in the cloud adoption strategy in the Cloud Adoption Framework. These guides also include best practices for naming Azure resources. Naming is extremely important, but it is also very extensive. As a result, many ambiguities or errors can arise when naming resources.
This guide describes the installation and configuration of Azure Naming Tool step-by-step on a Docker container.
Prerequisites and Licensing
There are no license costs for the “Azure Naming Tool” software.
Detailed information about the software and the license agreement of “Azure Naming Tool” can be read on Github.
In this tutorial, “Azure Naming Tool” is deployed with a Docker container on a Synology NAS.
Installation Docker Container
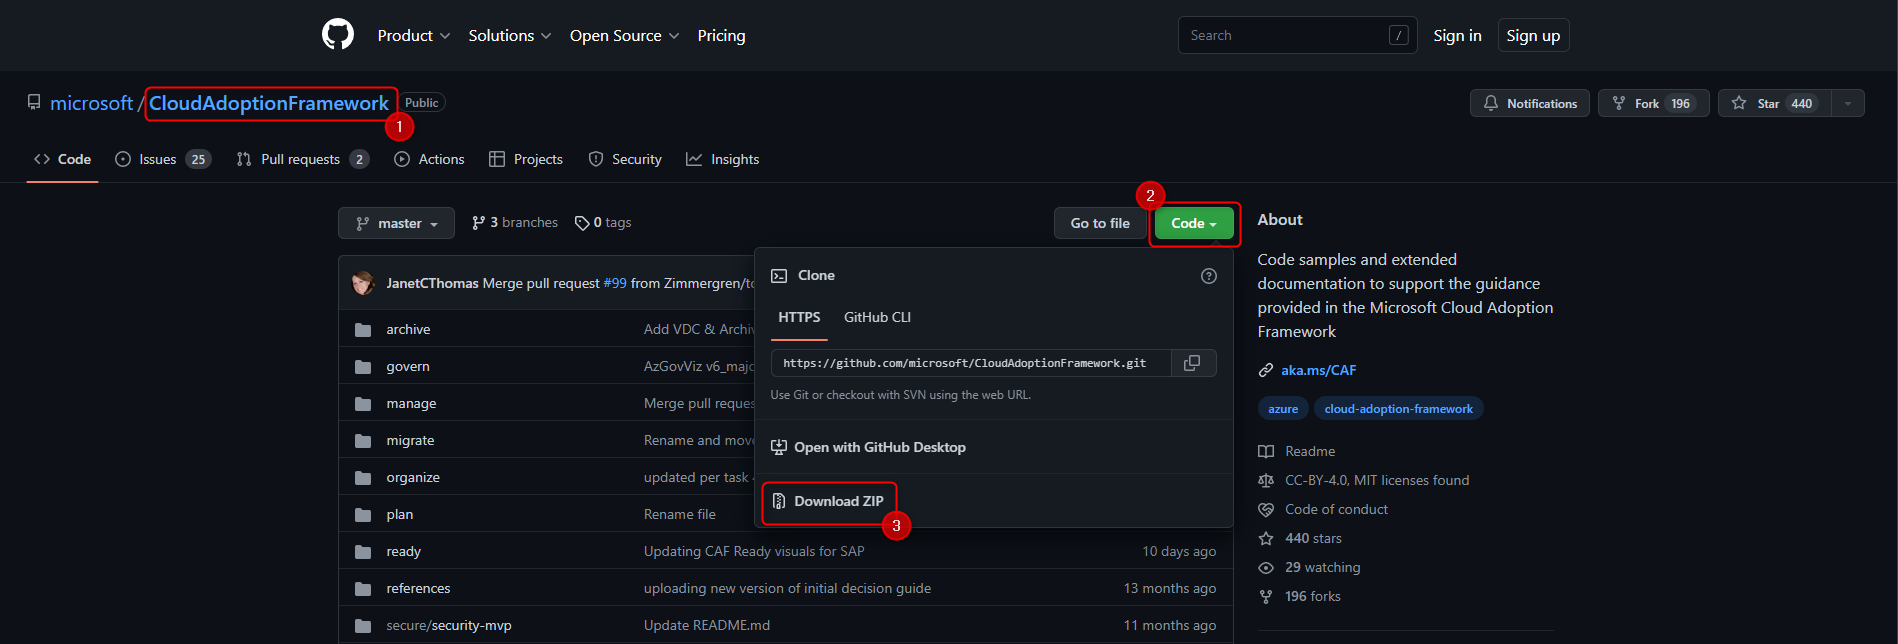
“Azure Naming Tool” is part of the Cloud Adoption Framework and will be downloaded from Github.
https://github.com/microsoft/CloudAdoptionFramework/tree/master/ready/AzNamingTool
- Select Cloud Adoption Framework
- click on green “Code” button
- Download file using “Download ZIP”
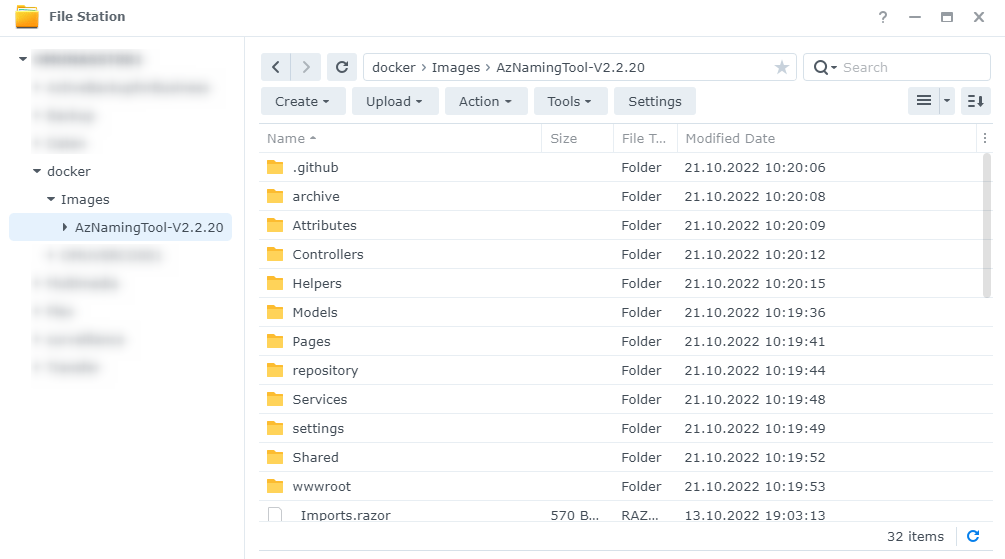
Extract ZIP file “CloudAdoptionFramework-master.zip” and move all data from “ready\AzNamingTool” to Synology NAS.
Establish SSH connection to Synology NAS.
Run the following Docker command in the path of the AzNamingTool files to create the image:
- the point at the end of the command must contain
sudo docker build -t azurenamingtool .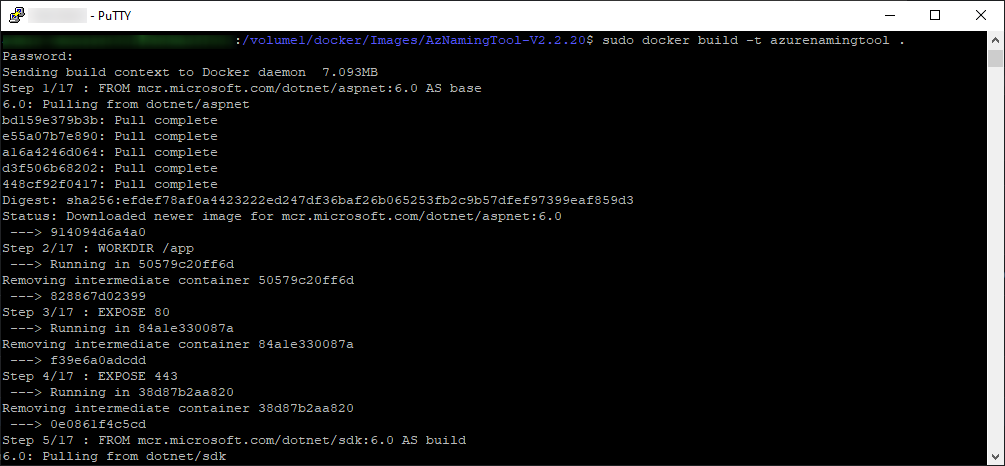
After the image has been created, a new Docker container can now be created and a volume mounted.
- Replace port 8081 with another port that is not used on the Docker server (variable -p)
- Customize container name (variable –name)
sudo docker run -d -p 8081:80 --name=containername --mount source=azurenamingtoolvol,target=/app/settings azurenamingtool:latest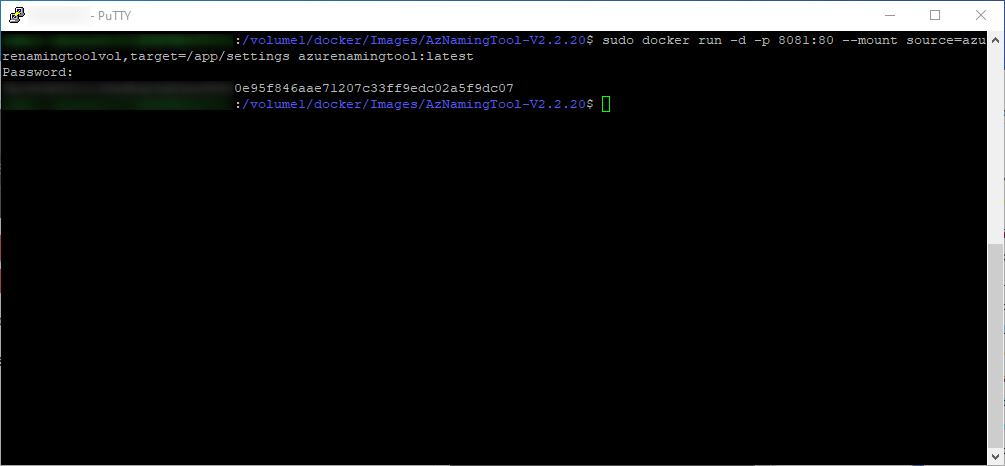
Azure Naming Tool can now be accessed from the browser.
- URL format: http://IP-des-Synolgy-NAS:8081
for example http://10.125.28.43:8081 - Replace 8081 with the port used in the “docker run” command

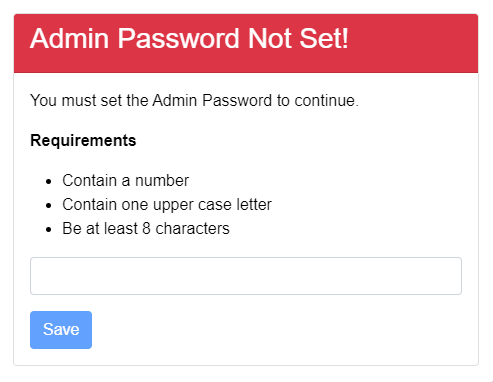
When signin in for the first time, the password for the administrator must be set.
Configuration Azure Naming Tool
The configuration defines the structure of the naming for the Azure resources. This requires signin as an administrator after starting the Azure Naming Tool in the browser.
Click on “Admin”

The password was set when Azure Naming Tool was started for the first time.

Select “Configuration”

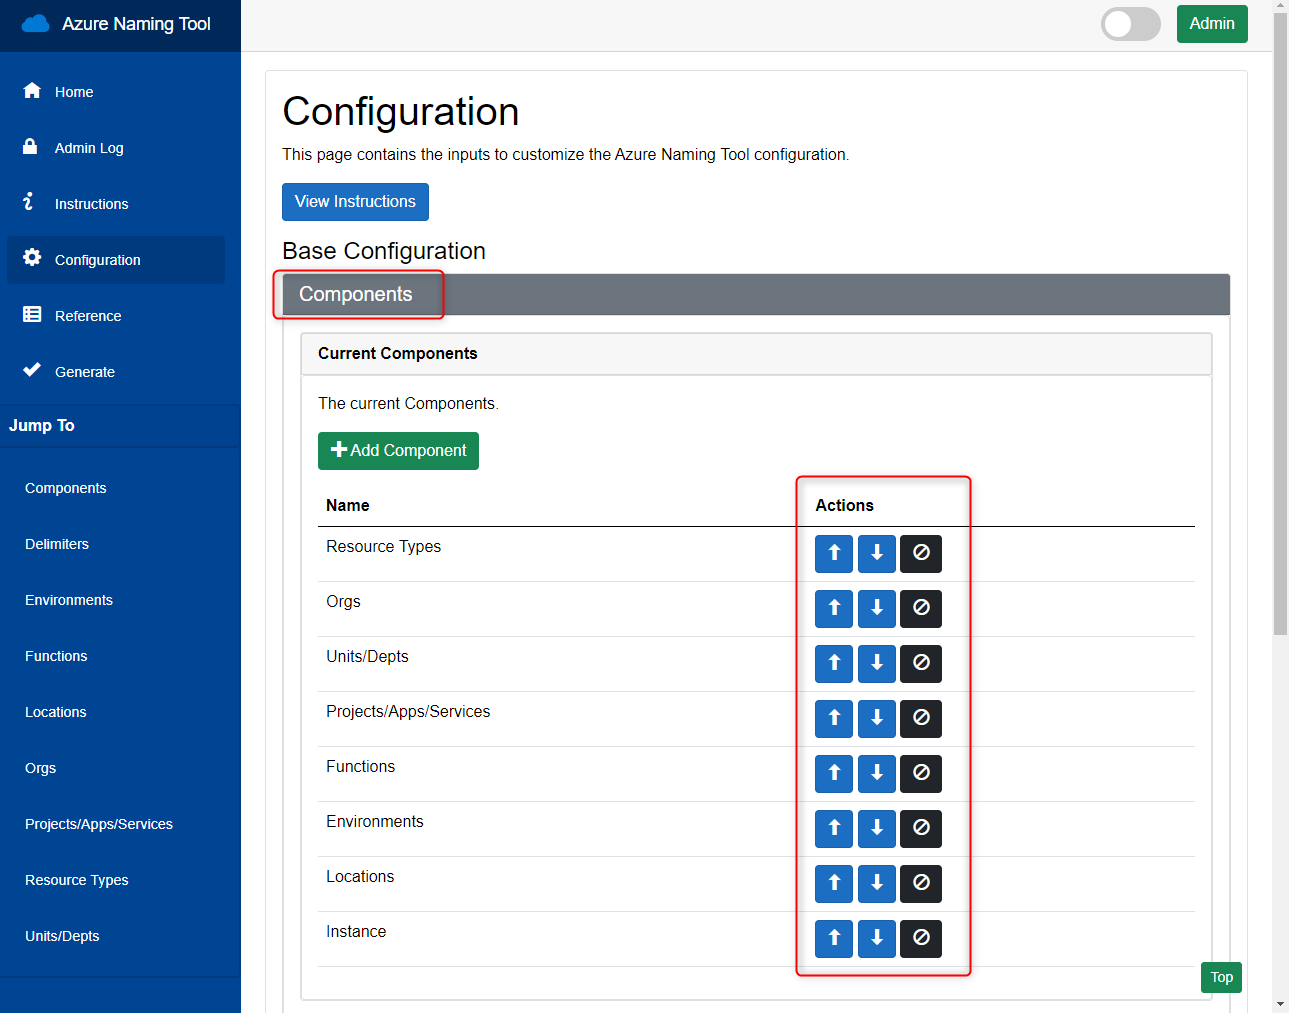
Basic Configuration – Components
In the “Basic Configuration” under “Components” the structure of the naming is defined. The components can be shifted arbitrarily in the order, new ones can be added or deleted.
Thus the naming is created according to the own needs and guidelines, for example vmspafuncdevac001
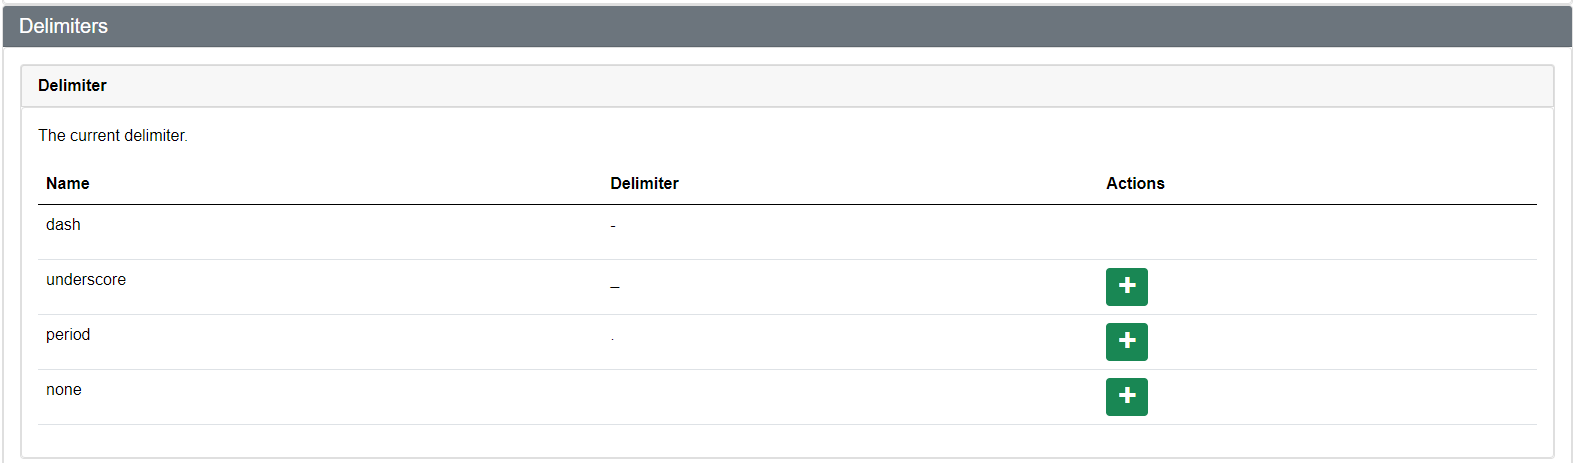
Basic Configuration – Delimiter
In order to be able to read the names better, a delimiter is defined how the individual sections are separated from each other. By default a dash is used, e.g. vm-spa-func-dev-ac-001
Component Configuration
Continuing with the “Component Configuration”.
In the “Component Configuration” the values of all variables are administered, which are used in the “Base Configuration”.

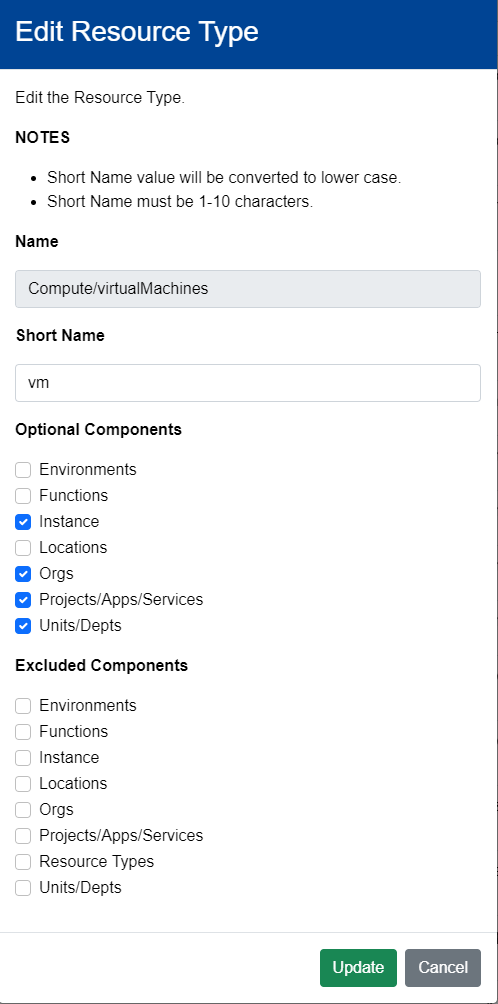
The “Resource Types” section is one of the most important sections.
Here you can individually define how a resource is to be named. As an example the naming of virtual machines.
Select “Compute/virtualMachines – Windows (vm)”

Select “Edit”

Now you can specify which parts are optional or excluded for the naming of the resource.
Preview
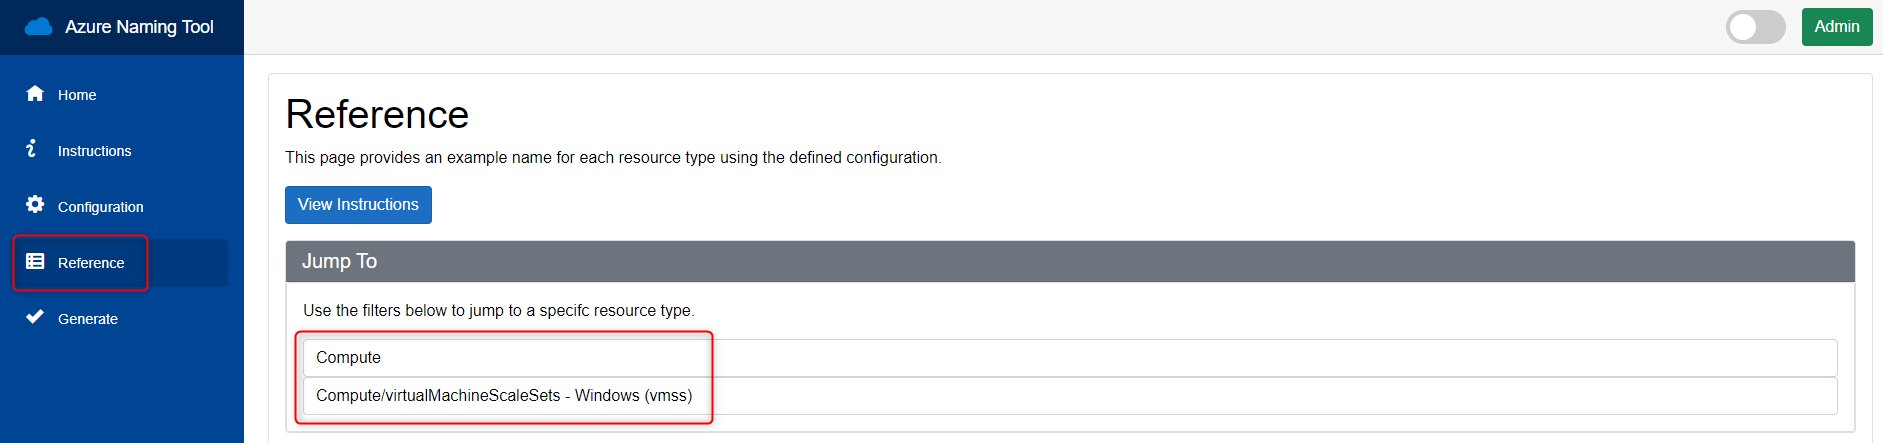
The naming of all resources can be displayed under “Reference”. This allows the settings to be checked and further adjusted if necessary. As an example the naming of virtual machines.
Select “Compute/virtualMachines – Windows (vm)”
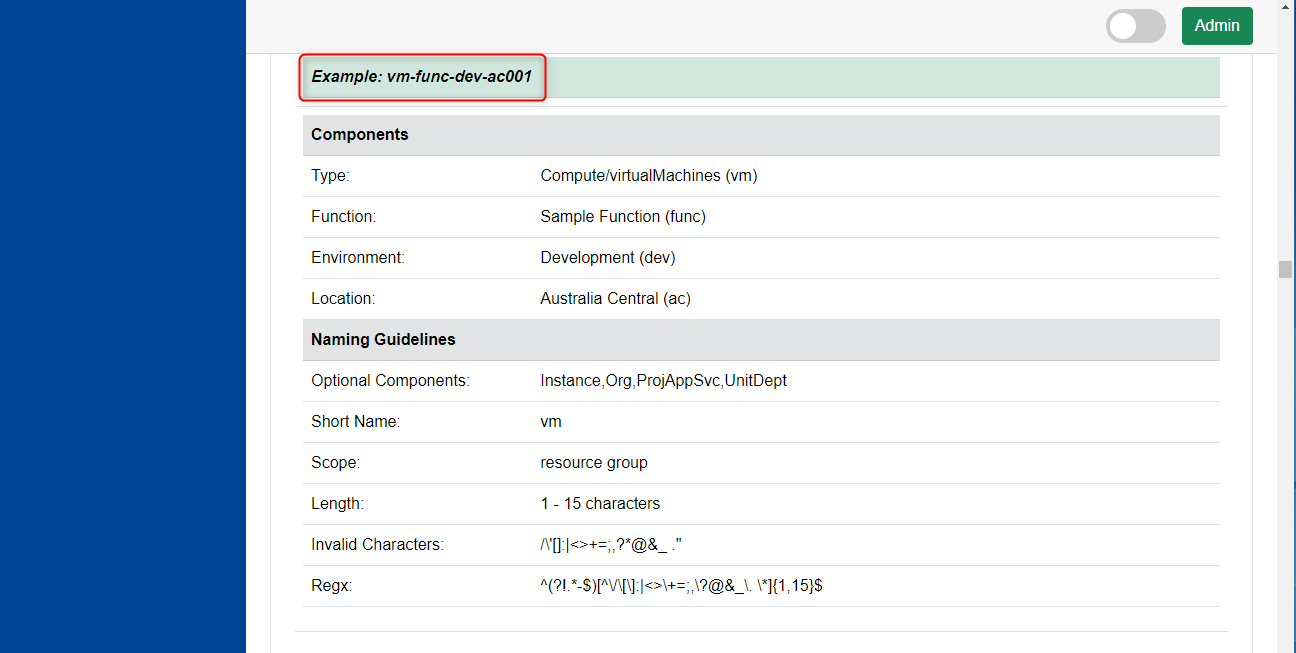
Now the naming for a virtual machine is displayed.
The explanation of how the naming is created is also shown.
Backup
Create backup of the configuration
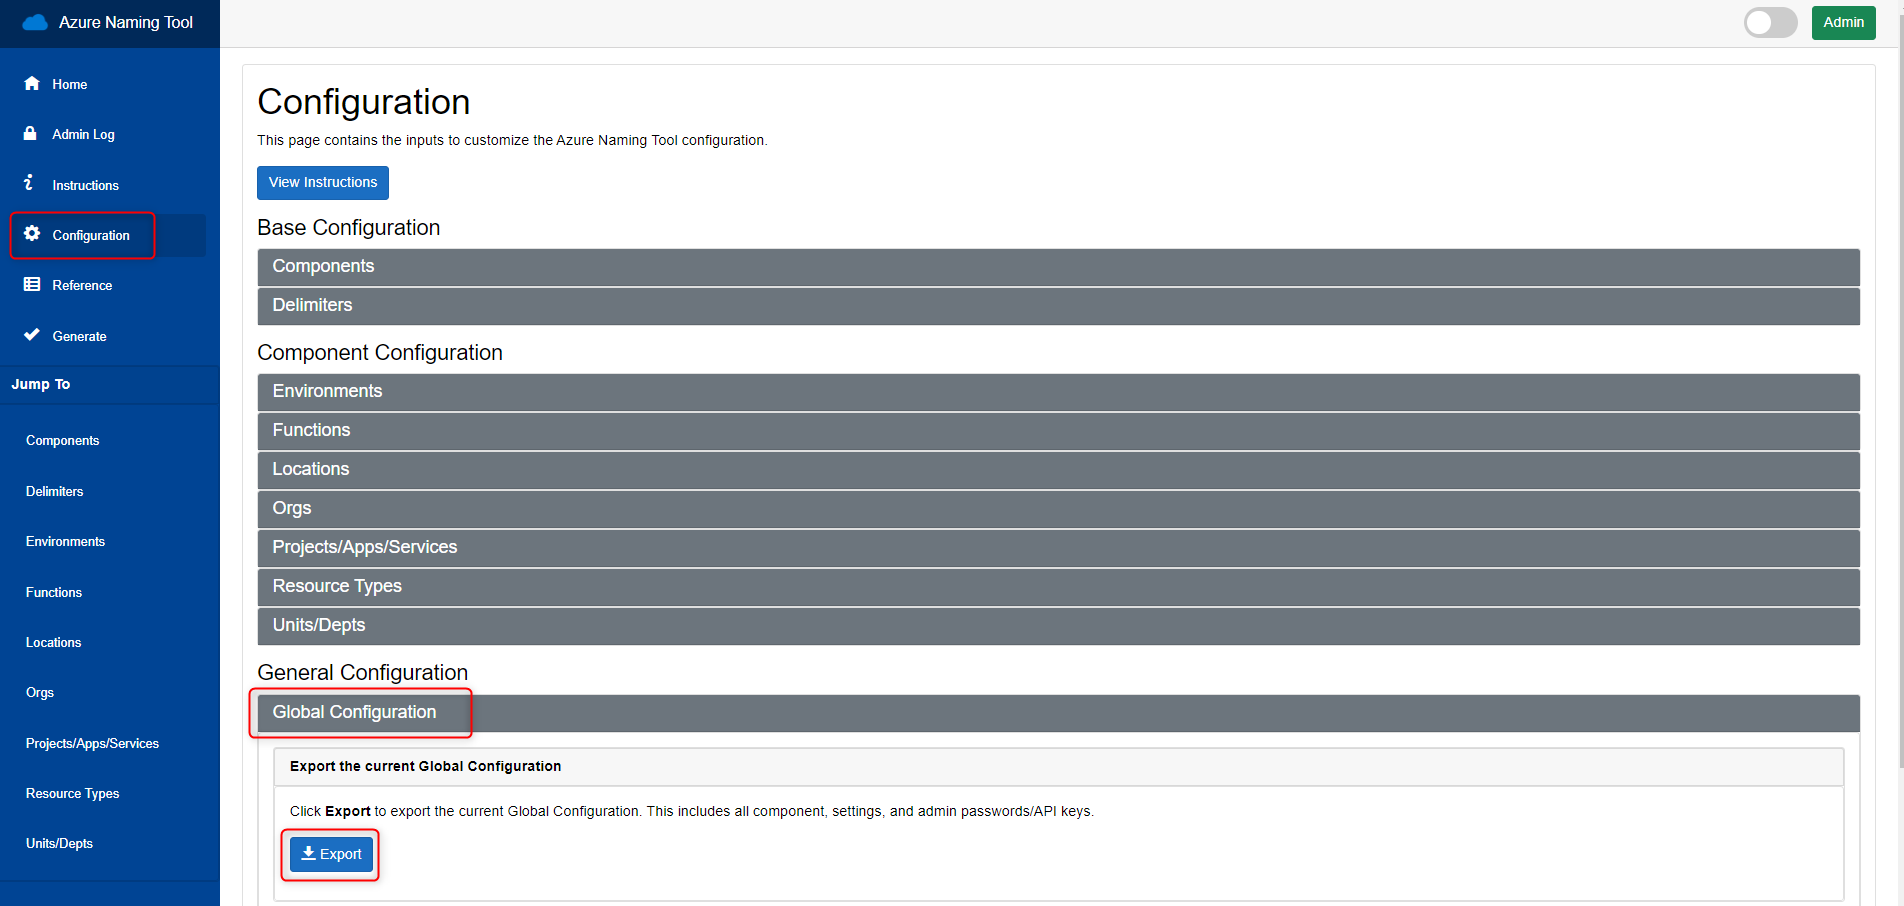
The entire configuration of the Azure Naming Tool can be backed up.
The configuration is saved in a JSON file. The backup is created under “Configuration” > “Global Configuration” > “Export”.
Restore backup of the configuration
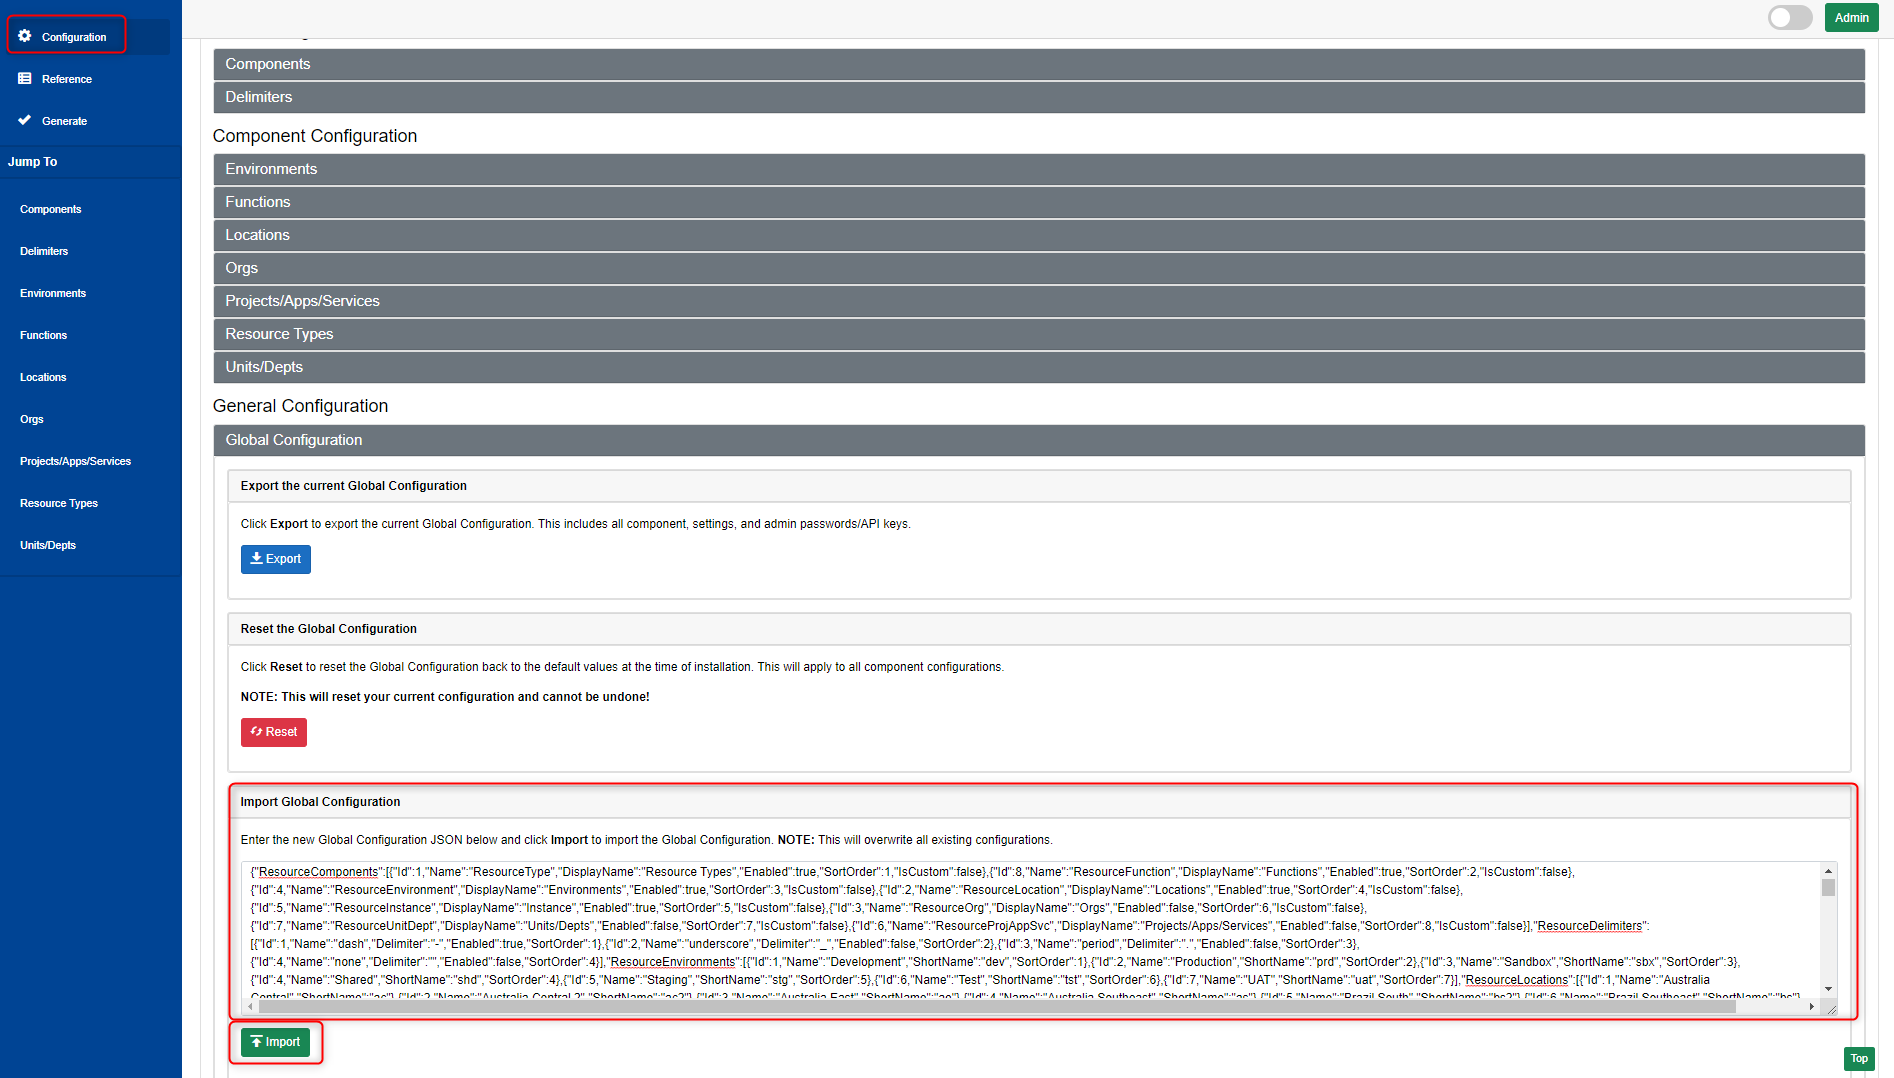
If necessary, the configuration can be restored from a backup. Restoring the configuration is performed under “Configuration” > “Global Configuration” > “Import Global Configuration”.
Paste the content from the backup (JSON file) via the clipboard and click on “Import”.
Create Azure Resource Names
Any user with access to the Azure Naming Tool can now generate standardized names for Azure resources via a browser. No signin to the Azure Naming Tool is required.
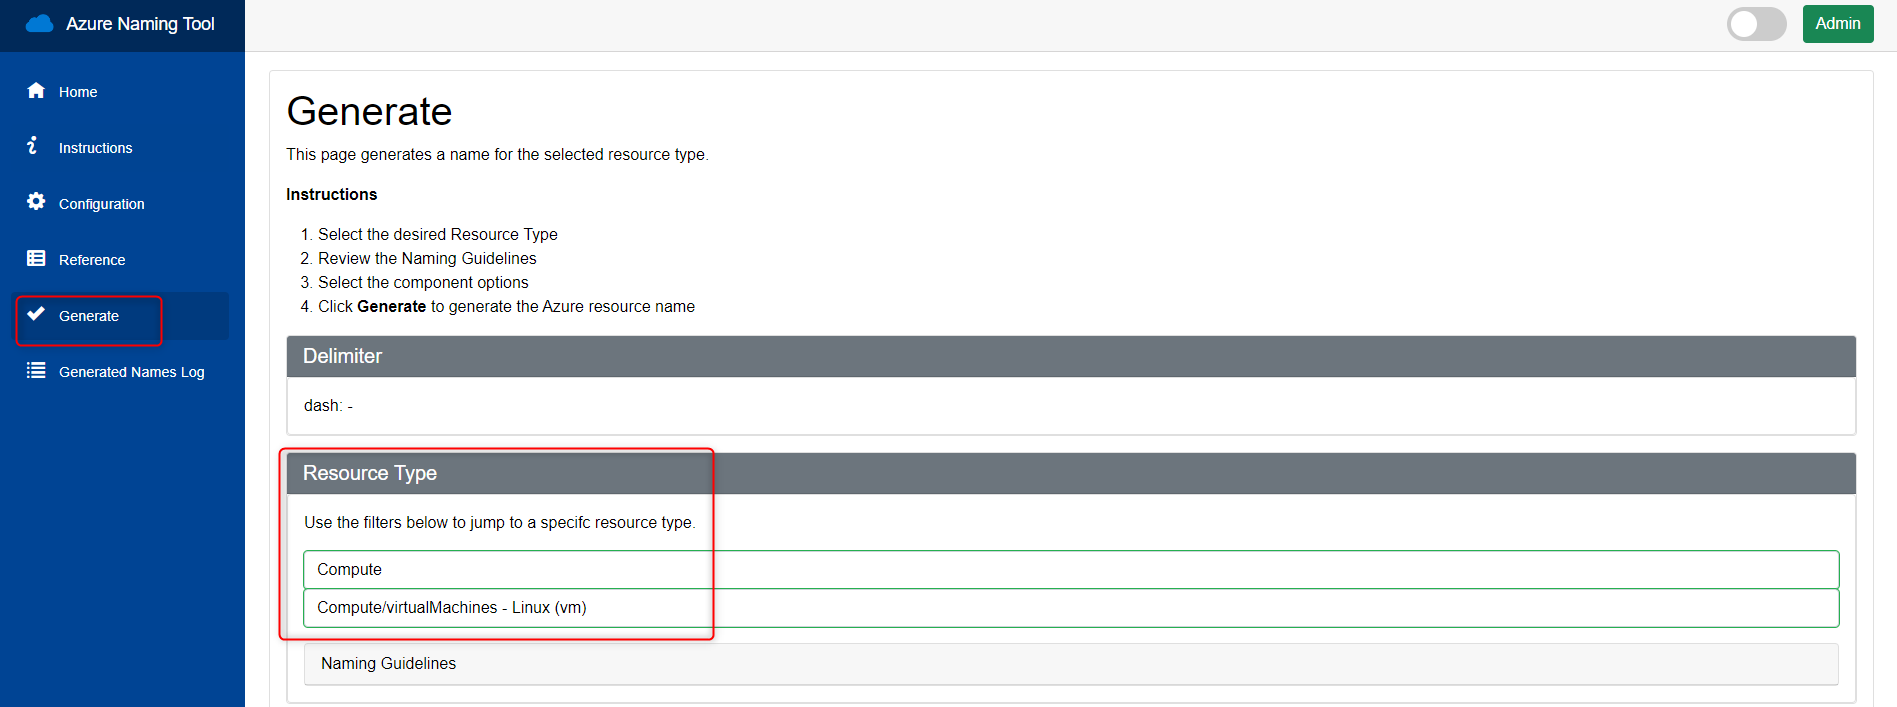
Open the Azure Naming Tool in the browser, click “Generate” and select the “Resource Type”.
Fill out all variables and generate the naming by clicking “Generate”.
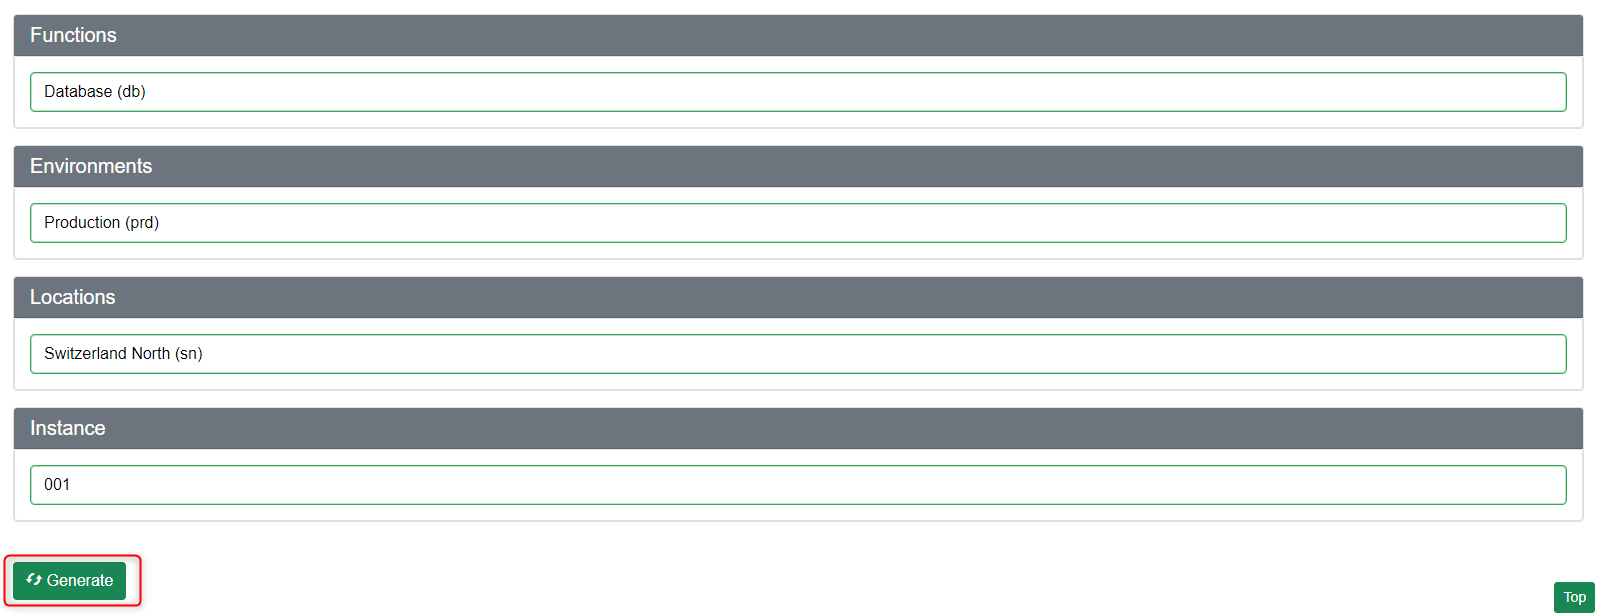
The generated name for the Azure resource is displayed immediately.

Fresh content, explained with practical relevance. Stay up to date via LinkedIn and Bluesky.


No marketing. No noise. Just content.
If this post was helpful, a coffee brings back the rich aroma behind the writing.