Create an Azure snapshot of a virtual hard disk
An Azure Snapshot is an exact image of a disk at a specific point in time. This is a quicker way to back up the state of a hard disk than with an Azure backup.
Azure snapshots are best suited when, for example, operating system or software updates are to be tested. Additional virtual machines can be cloned from an Azure snapshot for this purpose. An existing virtual machine can also be restored to the original state of the snapshot if required.
This guide describes how to create an Azure snapshot, how to download a snapshot in VHD format, and how to clone a virtual machine from an Azure snapshot.
Prerequisites and Licensing
No license is required for the “Snapshot” feature.
Each snapshot incurs storage costs. More information about the costs can be found under “Snapshots” in the following link: Pricing – Managed Disks | Microsoft Azure
The hard disk must be a managed disk of the following type:
- Standard HDD
- Standard SSD
- Premium SSD
- Ultra Disk
Create Snapshot
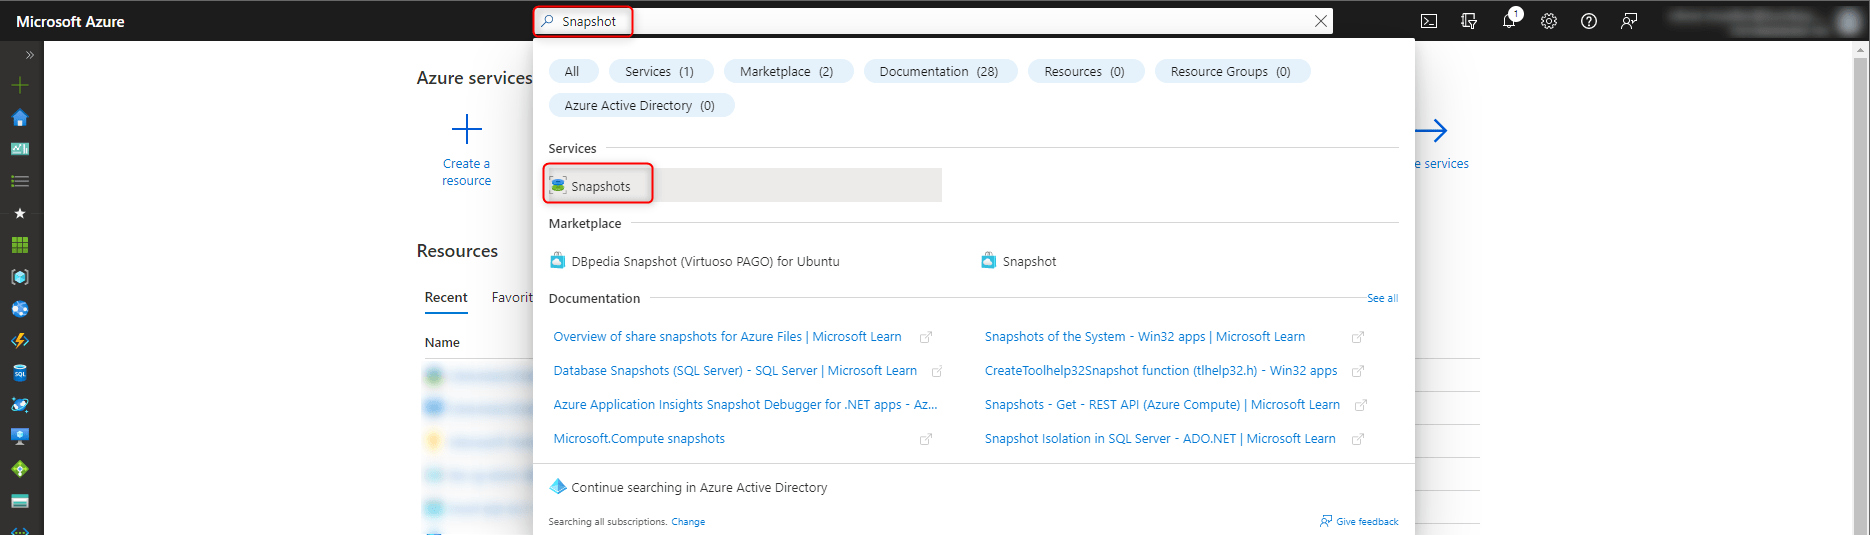
Navigate to “Snapshots” in the Azure Portal (https://portal.azure.com).
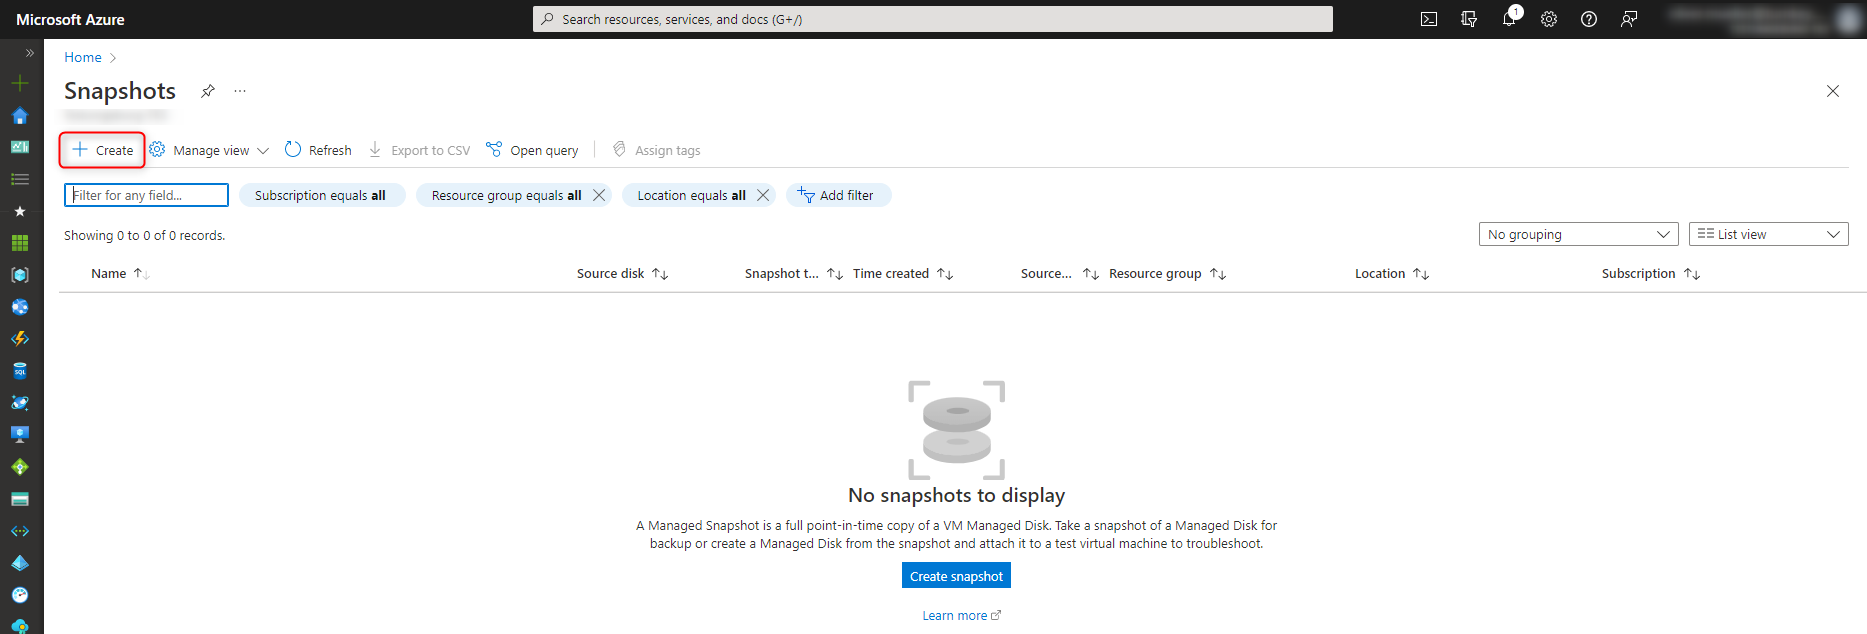
Clicking on “Create” creates a new Azure Snapshot.
The next step is to select from which hard disk a snapshot will be created.
- Select subscription and resource group to which the snapshot will be added
- Type in a name for the snapshot
- Select region for the storage location. It’s important to select the same region as the source hard drive.
- Select snapshot type “Full. More information about “Incremental” can be found here: More information about “Incremental” can be found here: Create an incremental snapshot – Azure Virtual Machines | Microsoft Learn
- Select source type “Disk”
- Select subscription of the source hard disk
- Select the source disk from which the snapshot should be created.
The source disk must be a managed disk in the region specified in point 3. - Select storage type, unless no redundant storage is required, the option “Standard HDD” is sufficient.

The other settings for “Encryption”, “Networking” and “Advanced” can be configured as required. Otherwise, the default settings for creating the snapshot are used.
The selected settings are shown again for verification and a click on “Create” starts the creation of the Azure snapshot.

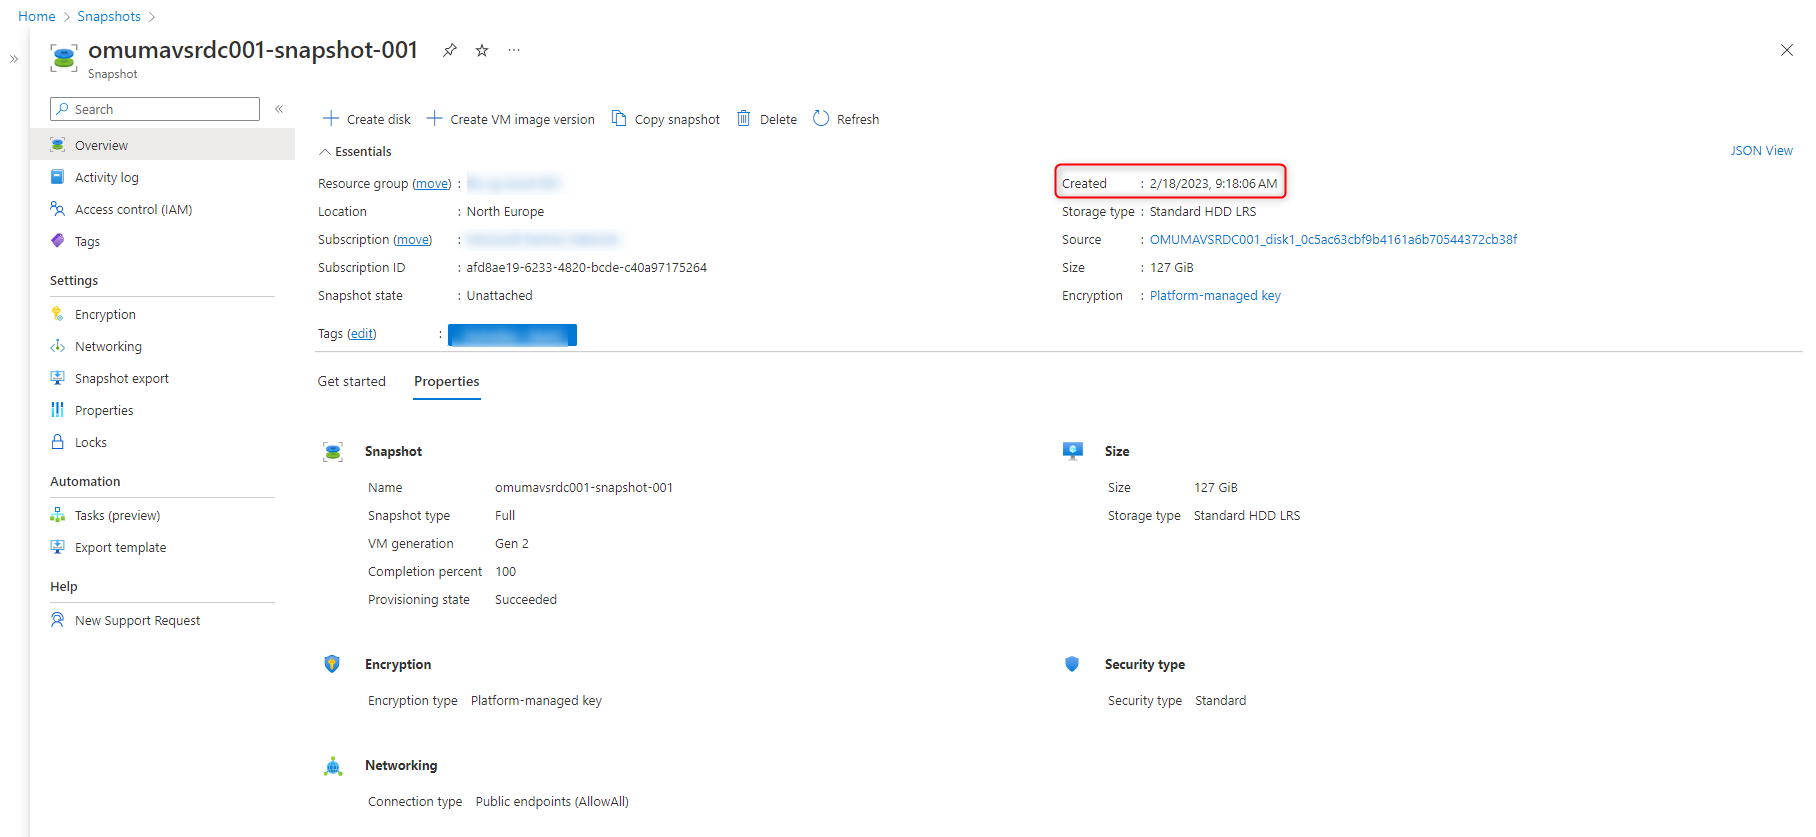
After a short time the snapshot is successfully created and displayed.
Export Snapshot
The created Azure snapshot can be downloaded as a VHD file.
This hard disk in VHD format can be imported e.g. in a Microsoft Hyper-V.
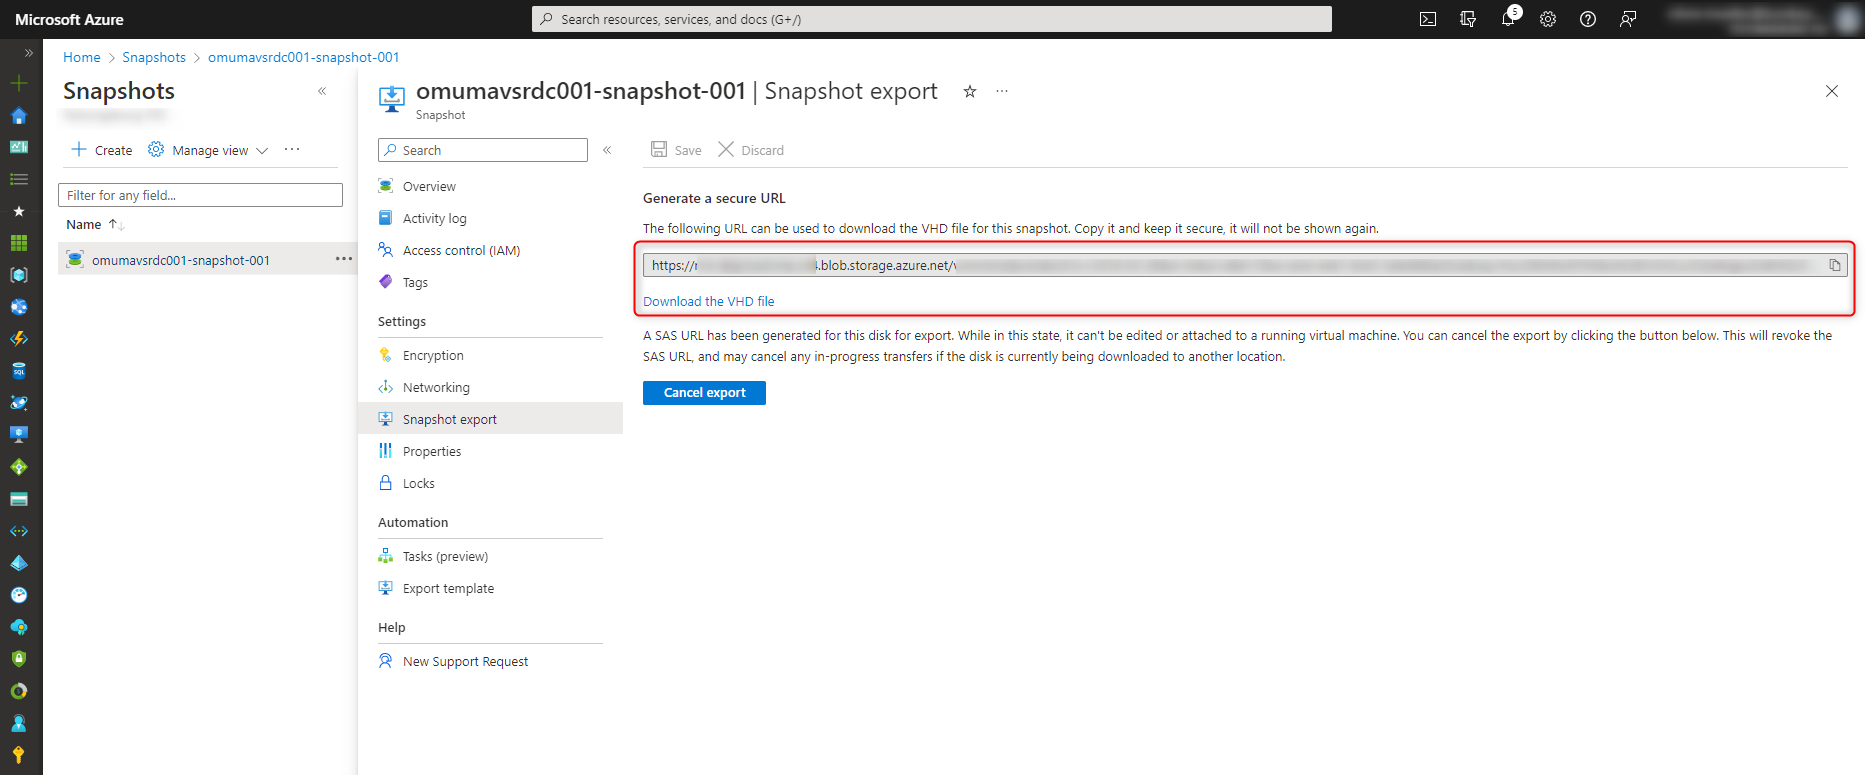
For downloading the snapshot Azure provides a download link.
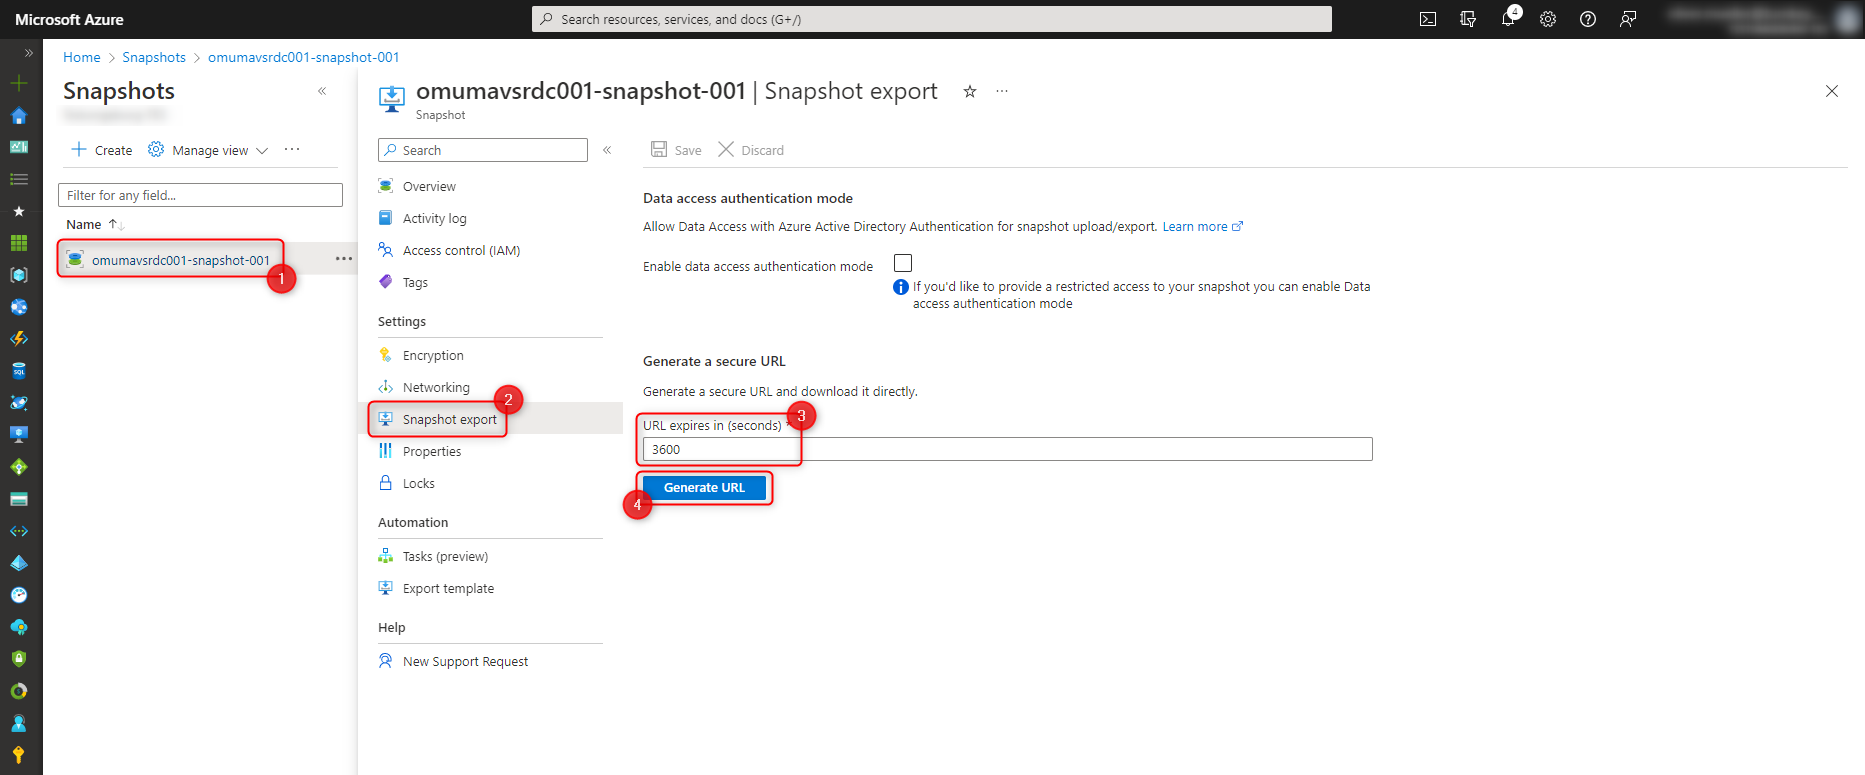
- Select snapshot
- Click “Snapshot export”
- Set seconds until the download link expires (keep in mind: depending on the size of the snapshot and the download speed)
- Click “Generate URL”
The generated Download link shows up, click on it to download the snapshot in the VHD format.
Create or restore Virtual Machine from Snapshot
To create or restore a virtual machine from a snapshot, generate a managed disk from the snapshot.
- Select snapshot
- Click on “Create disk”
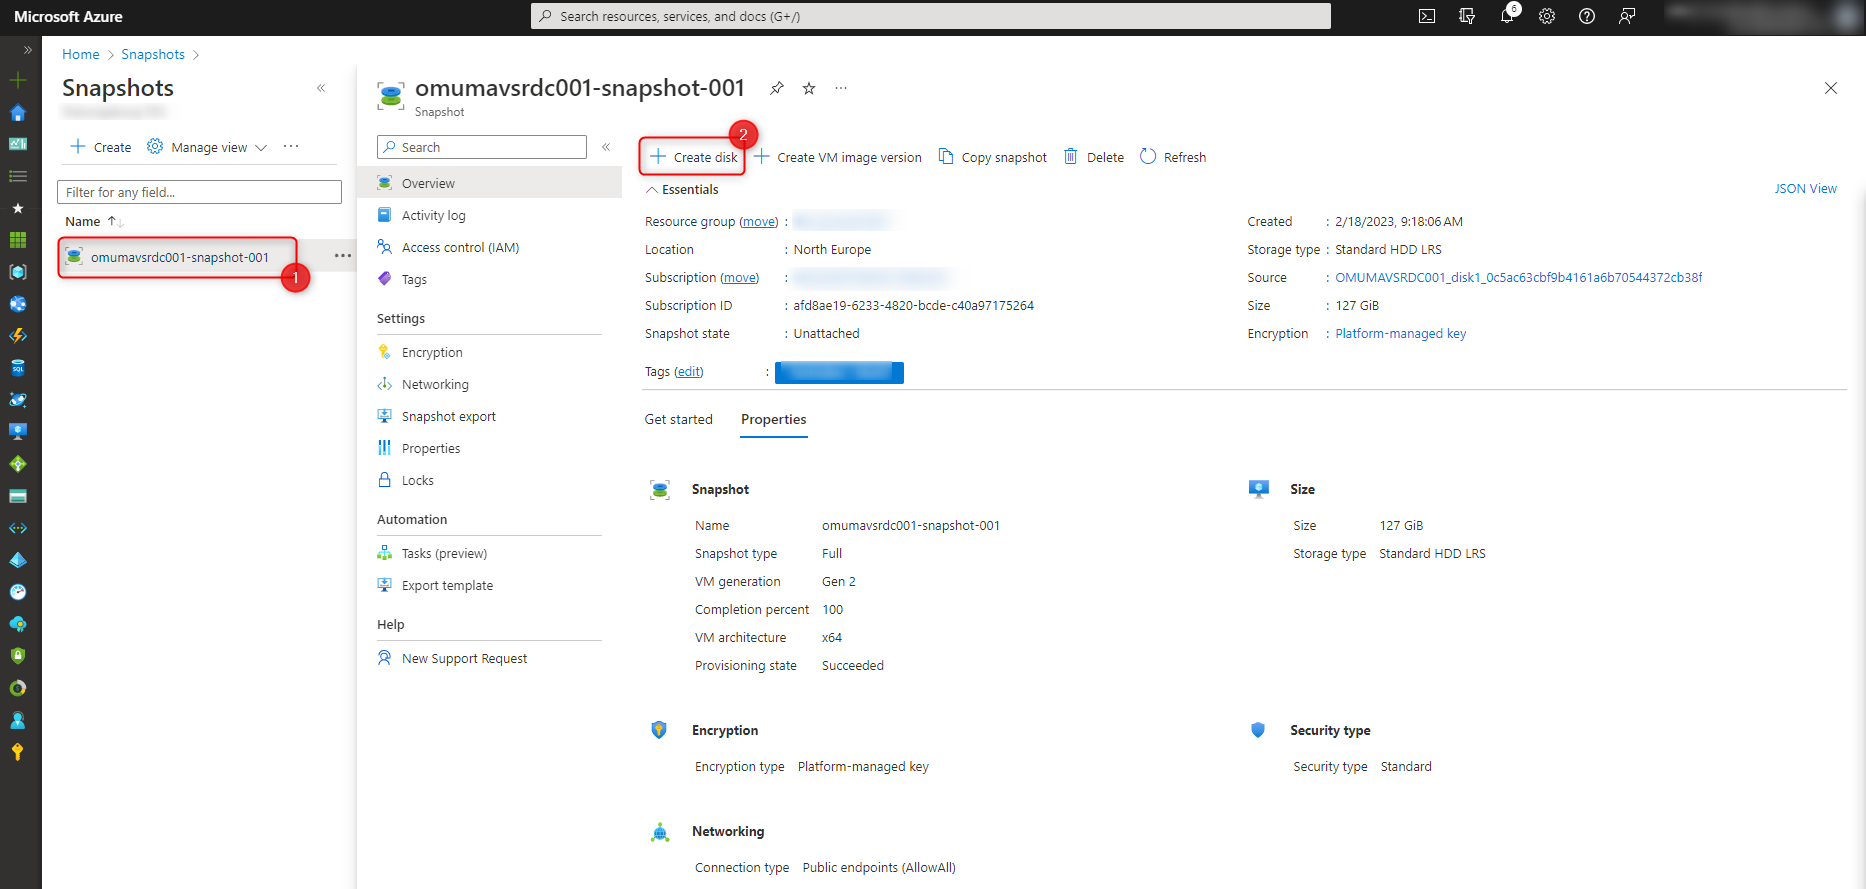
The properties of the managed disk shows up.
- Select subscription and resource group to which the managed disk will be added
- Type in a name for the hard disk
- If necessary and available in the region, an Availability Zone can be selected
- Select size and type of hard disk

The other settings for “Encryption”, “Networking” and “Advanced” can be configured as required. Otherwise, the default settings for creating the managed disk are used.
The selected settings are shown again for review. To start creating the managed disk from the selected snapshot, click on “Create”.
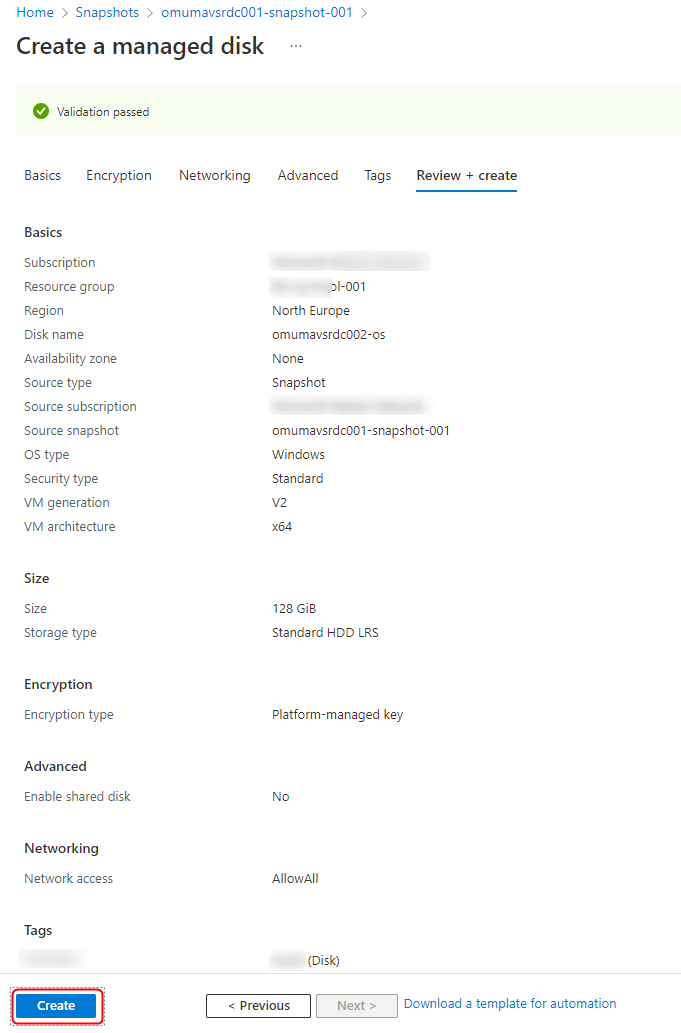
The managed disk is created within minutes.
From this managed disk, select “Create VM” to create the new virtual machine.
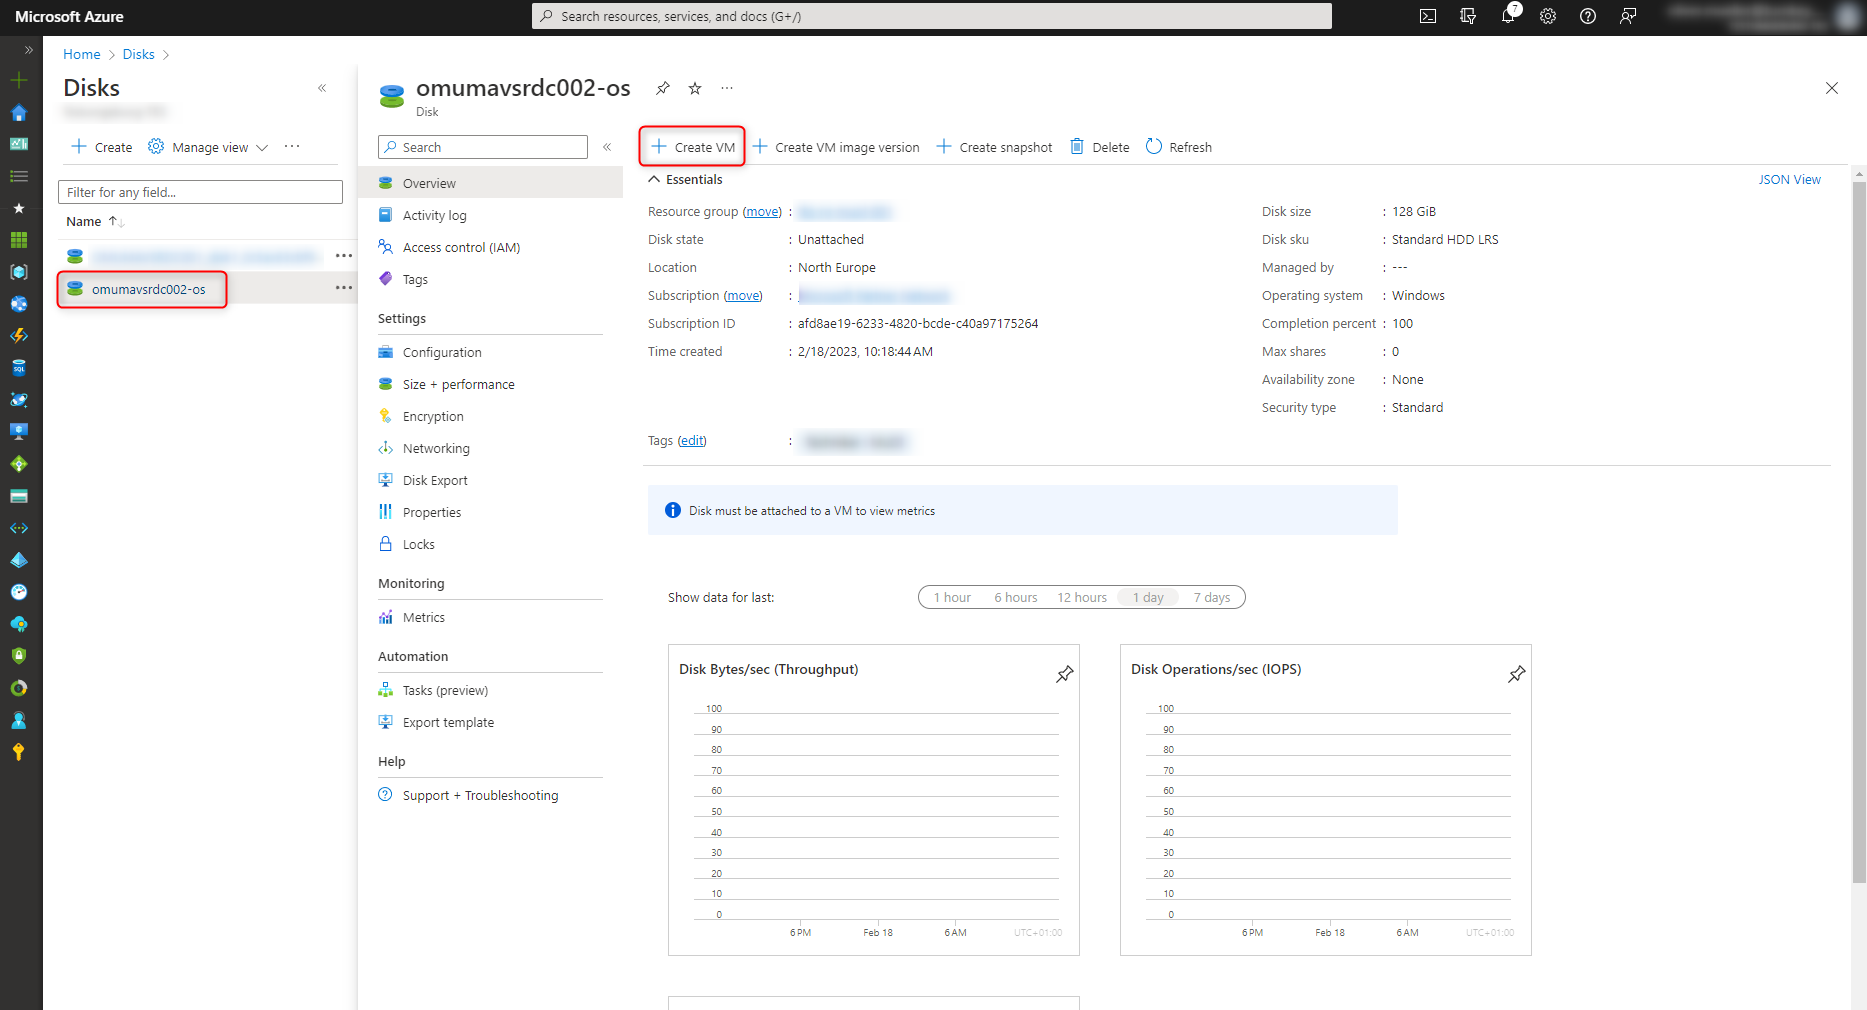
Deploying the virtual machine is done according to the well-known “Virtual Machines” wizard.
choose the just created managed disk in the section “Image”.
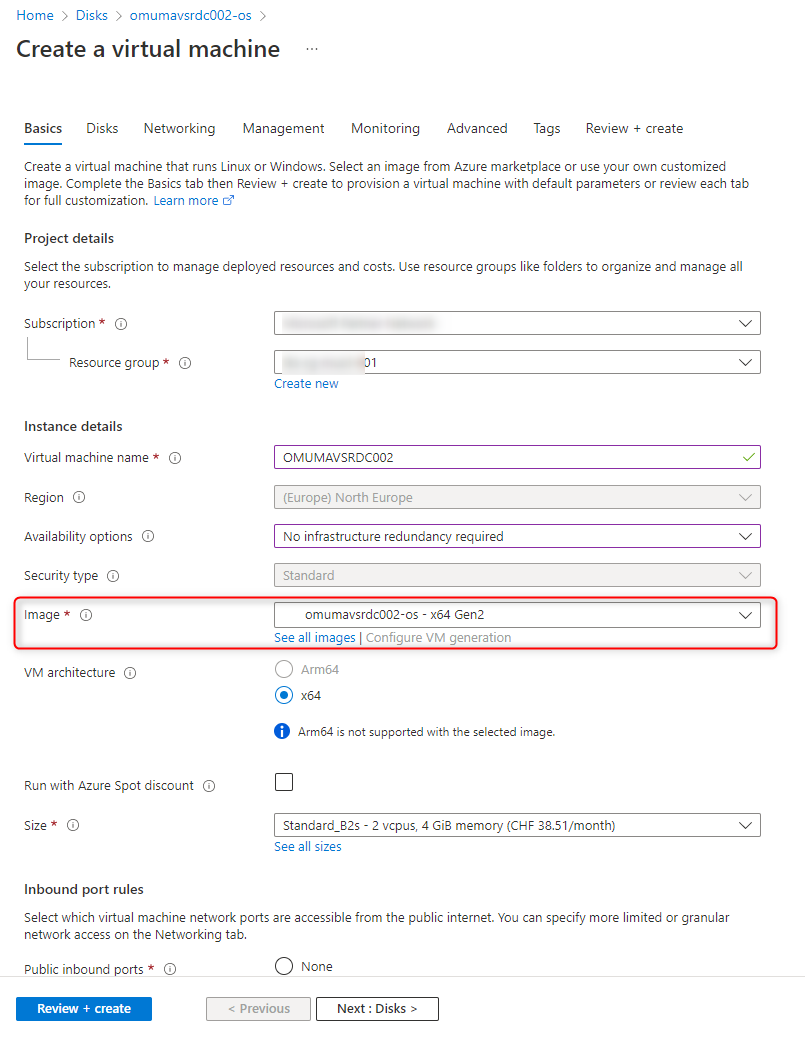
The virtual machine with data from the Azure snapshot is ready shortly.

Fresh content, explained with practical relevance. Stay up to date via LinkedIn and Bluesky.


No marketing. No noise. Just content.
If this post was helpful, a coffee brings back the rich aroma behind the writing.