Azure Arc and Windows Server: The perfect pair for the hybrid cloud
Last Updated on 28. December 2023
Microsoft Azure Arc is a solution that enables resources to be centrally managed and monitored across multiple environments. Azure Arc extends the management capabilities of Azure to on-premises resources or other cloud providers such as Amazon Web Services (AWS) or Google Cloud Platform (GCP).
Resources integrated into Azure Arc are administered via the unified Azure Portal. Regardless of where they are physically or geographically located. Overall, Azure Arc provides consistent, centralized and simplified management of resources.
This guide describes how to deploy a Windows Server hosted outside the Azure Cloud step-by-step using the Azure Connected Machine Agent in Azure Arc.
Prerequisites and Licensing
Supported operating systems
The following operating systems are supported by Azure Arc:
(As of July 2023)
- Windows Server 2012 R2, 2016, 2019 and 2022
- Windows 10, 11
- Windows IoT Enterprise
- Azure Stack HCI
- CBL-Mariner 1.0, 2.0
- Ubuntu 16.04, 18.04, 20.04 and 22.04 LTS
- Debian 10 and 11
- CentOS Linux 7 and 8
- Rocky Linux 8
- SUSE Linux Enterprise Server (SLES) 12 SP3-SP5 and 15
- Red Hat Enterprise Linux (RHEL) 7, 8 and 9
- Amazon Linux 2
- Oracle Linux 7 und 8
Software prerequisites Windows operating systems
- NET Framework 4.6 or higher (https://learn.microsoft.com/en-us/dotnet/framework/install/guide-for-developers)
- Windows PowerShell 4.0 or higher
Software prerequisites Linux operating systems
- systemd
- wget
- openssl
- Gnupg
Prerequisites for external infrastructure
The Azure Connected Machine Agent requires port 443 outbound to the following URLs:
https://learn.microsoft.com/en-us/azure/azure-arc/servers/network-requirements?tabs=azure-cloud#urls
The local administrator role is required to install the Azure Connected Machine Agent.
Licensing
An Azure subscription is required to deploy a server in Azure Arc, but there is no additional charge.
Onboarding Azure Arc
Create installation script for Azure Arc Connected Machine Agent
Azure Arc is deployed in the Azure Portal (https://portal.azure.com).
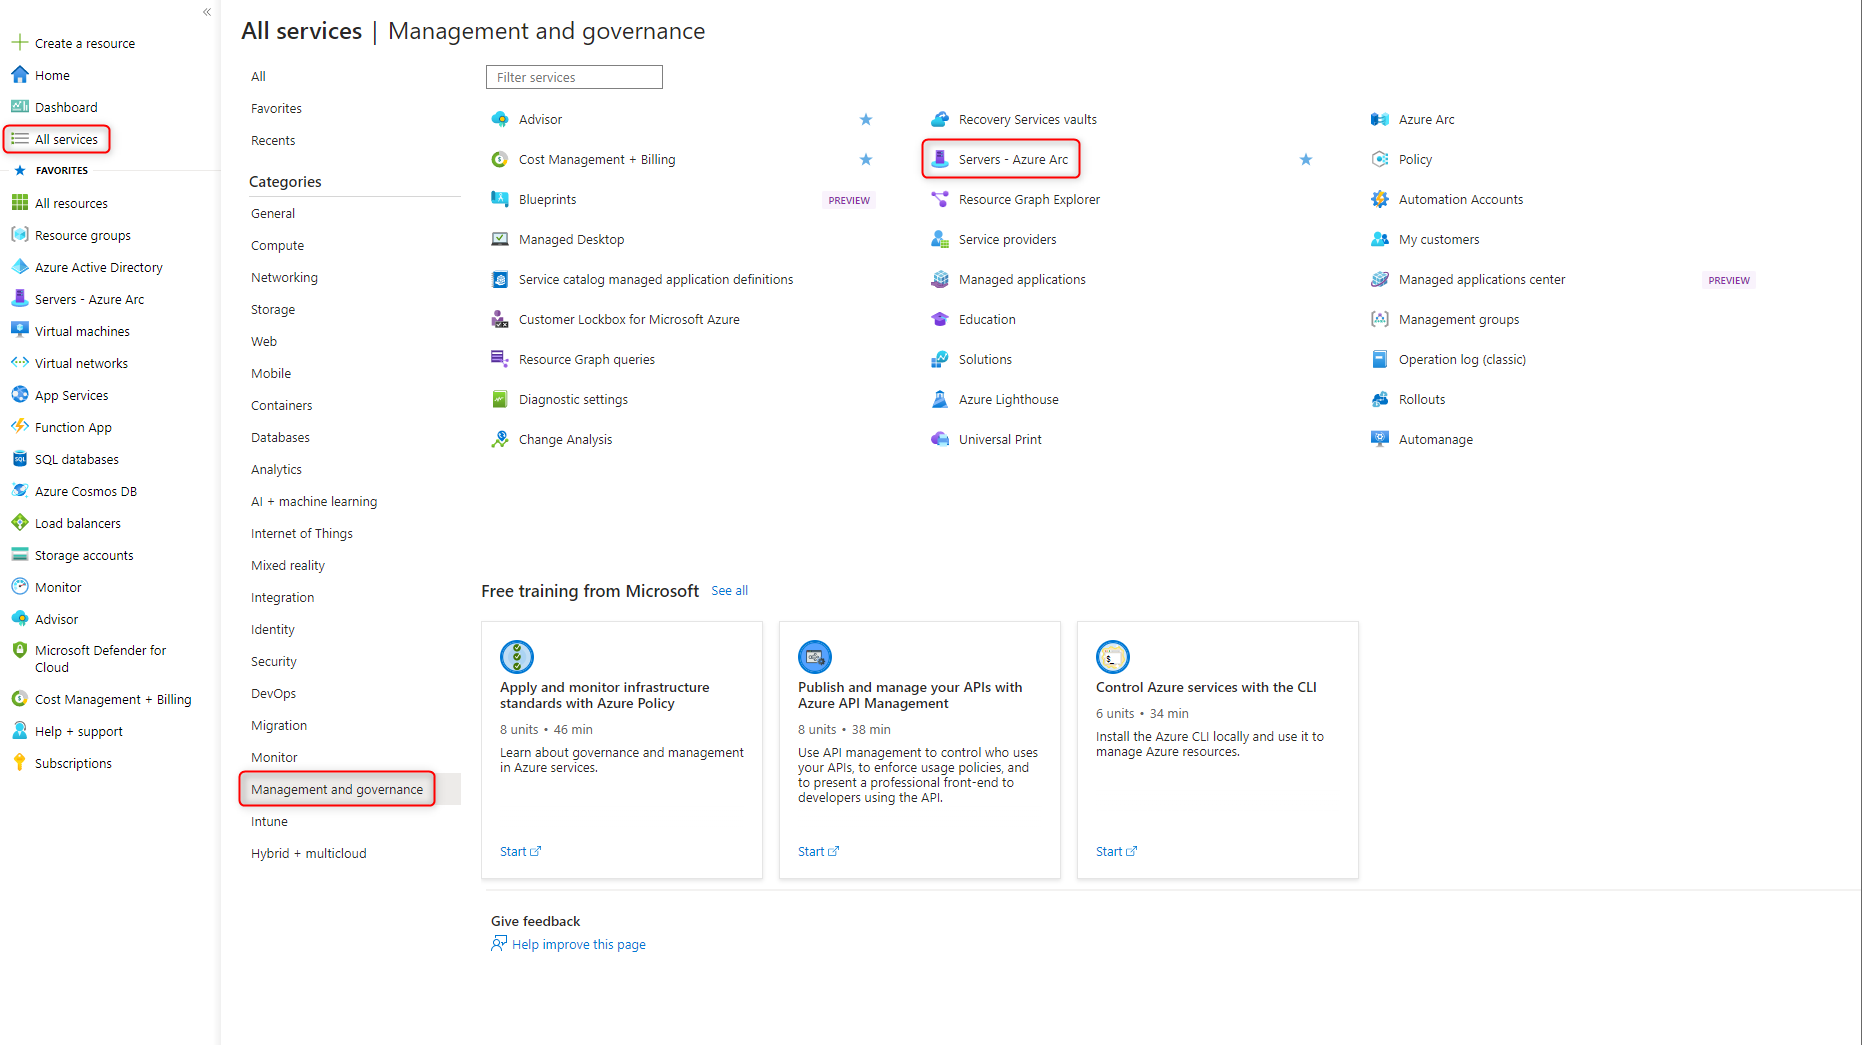
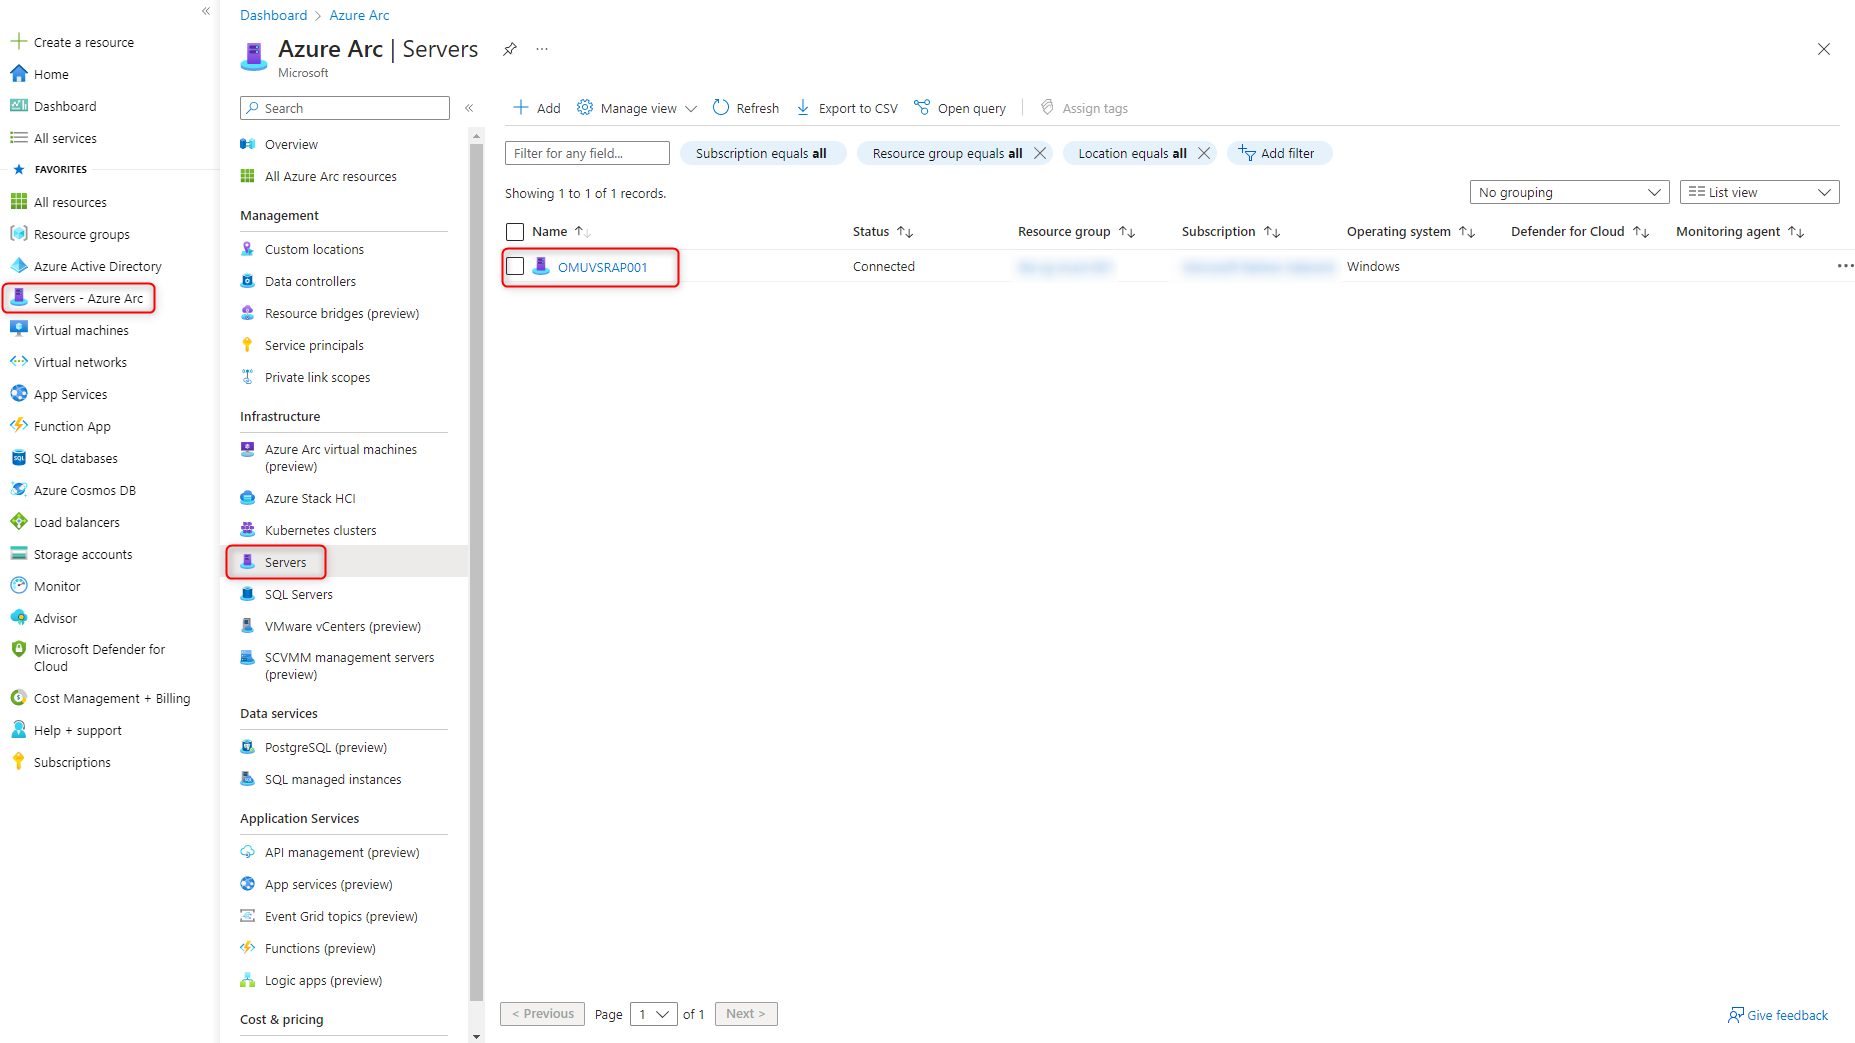
In the menu All services, under the Management and governance category, select Resource Servers – Azure Arc.
Click Add
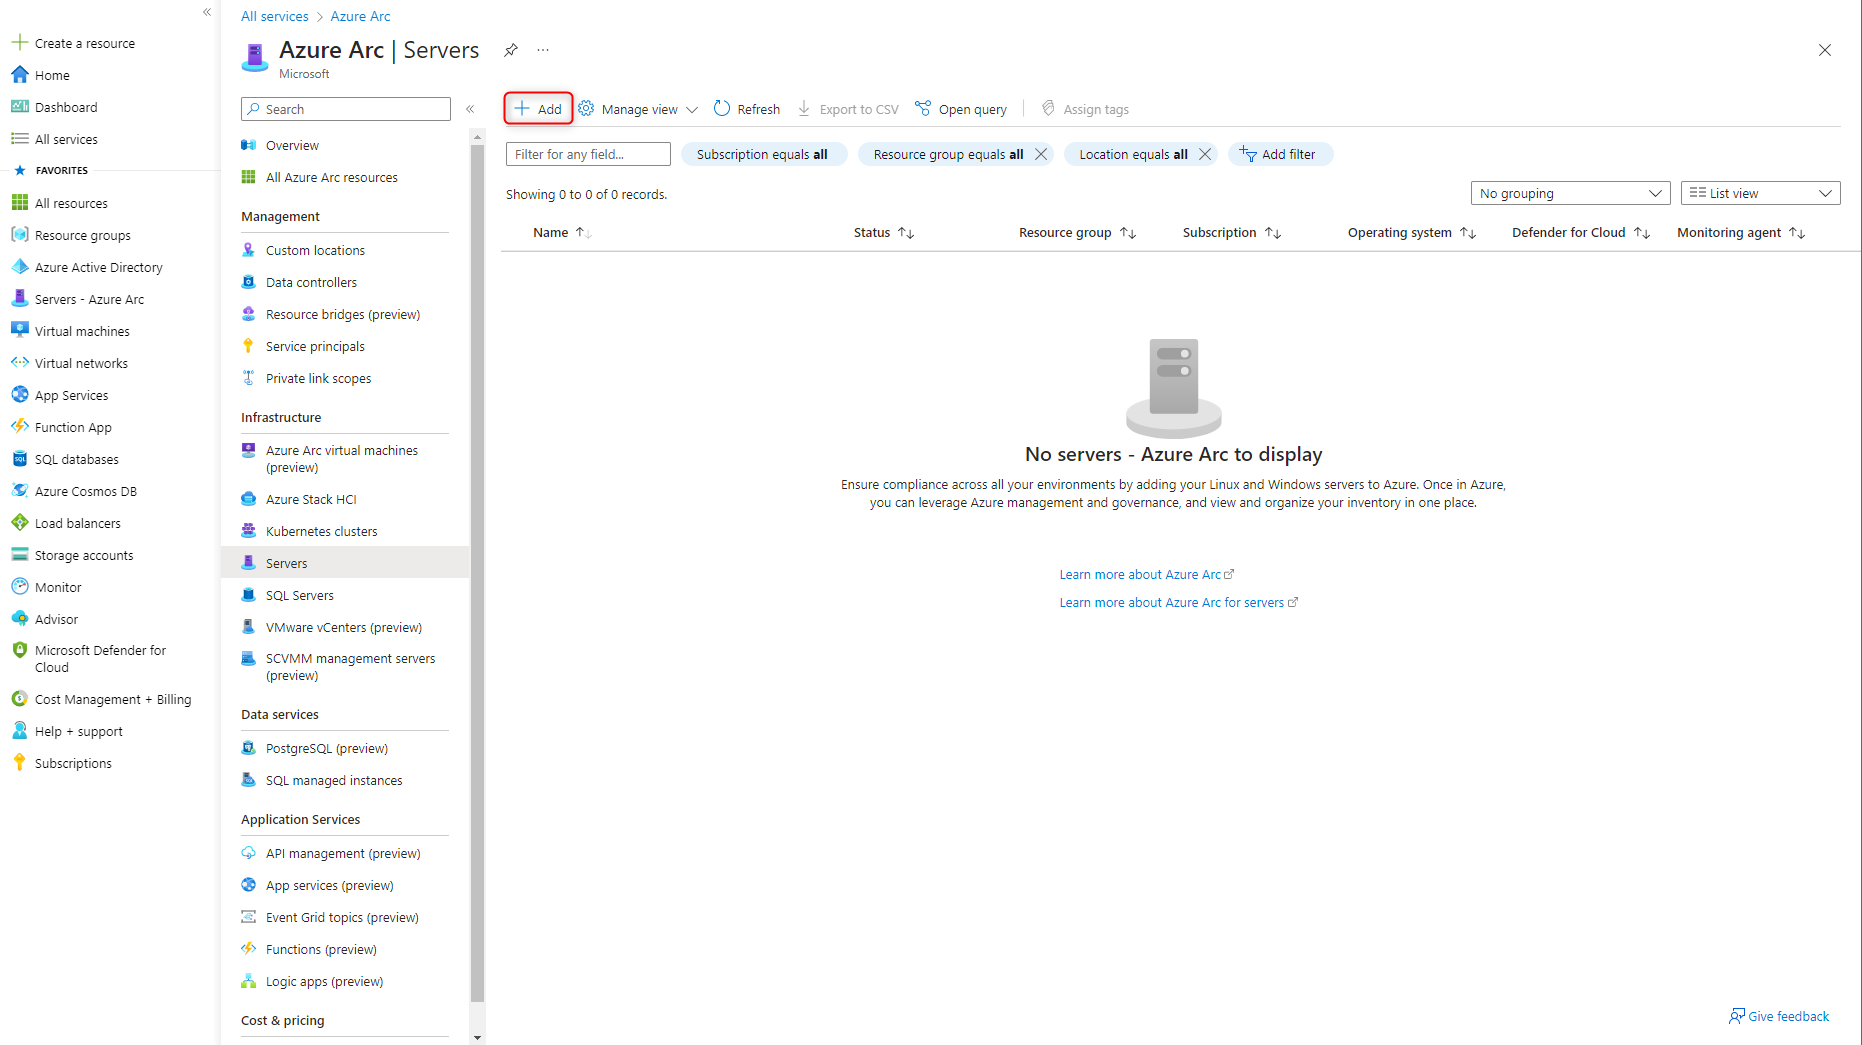
This step-by-step guide deploys a single server in Azure Arc.
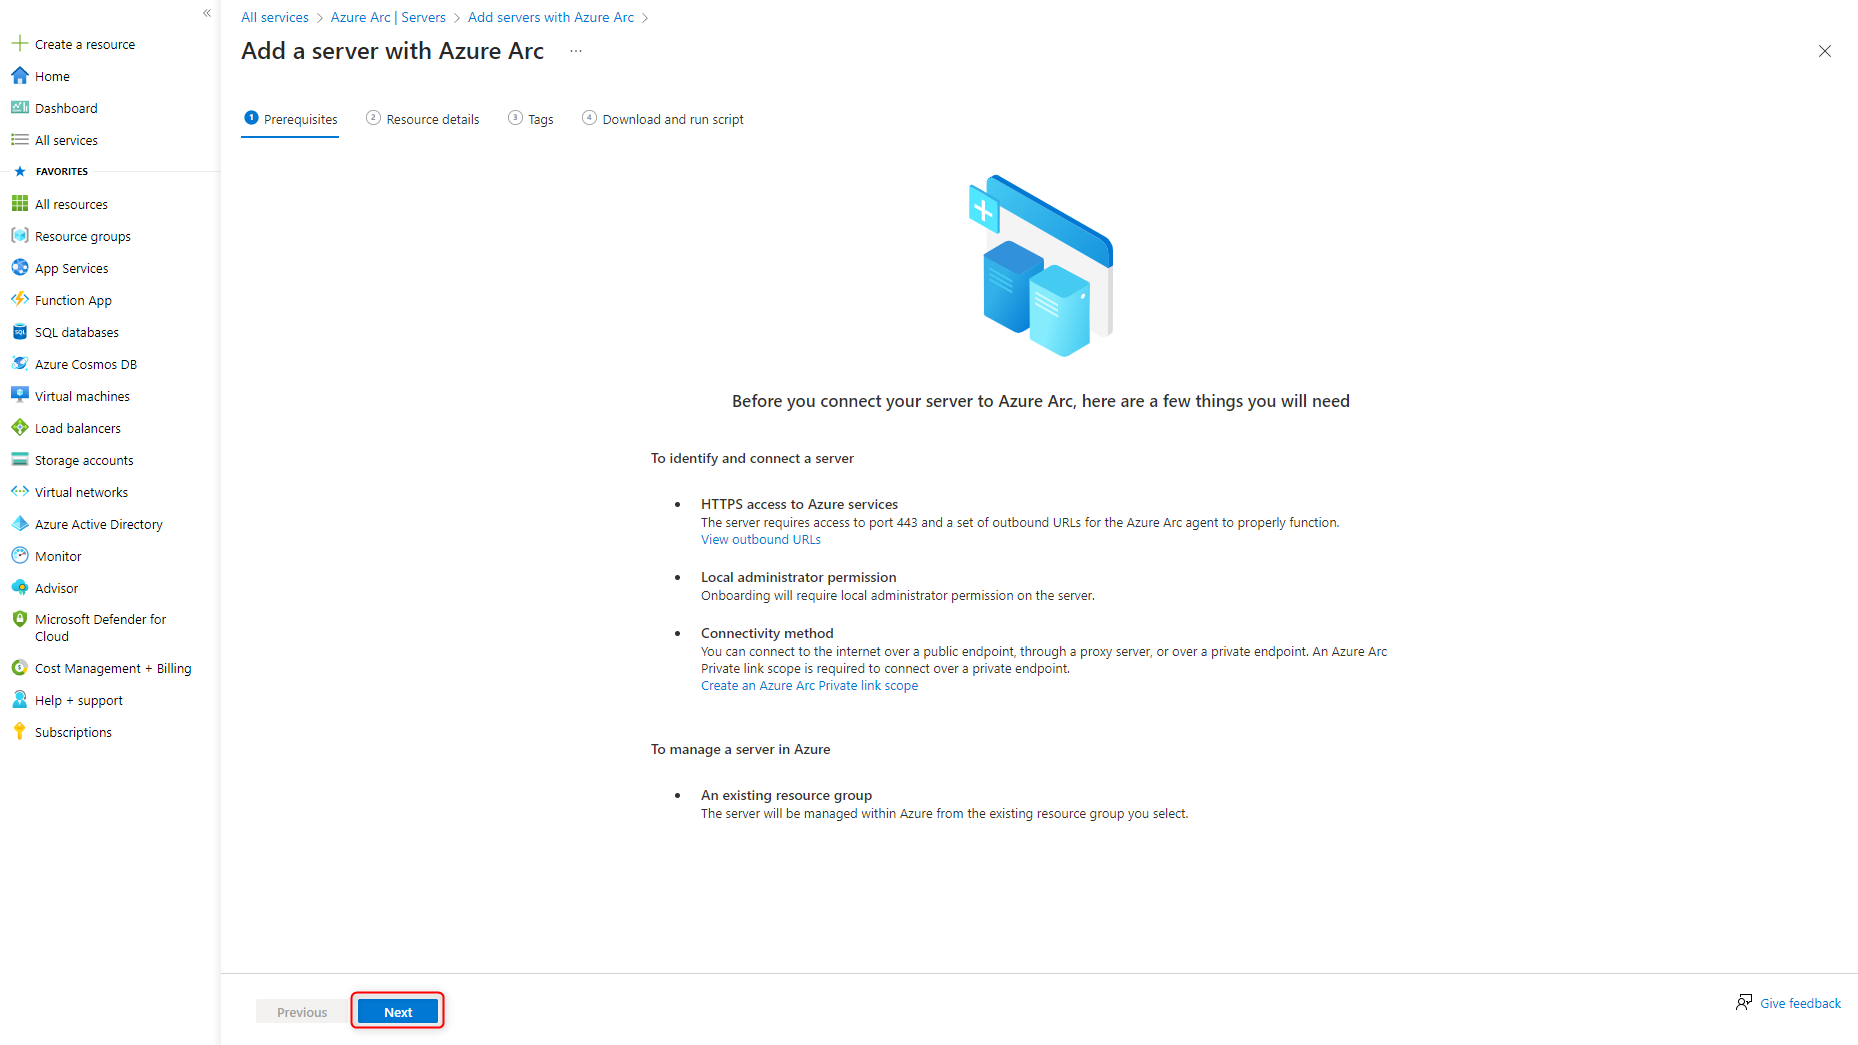
Click on Generate Script at the Add a single server option.

Check prerequisites and start the configuration for the Azure Connected Machine Agent by clicking Next.
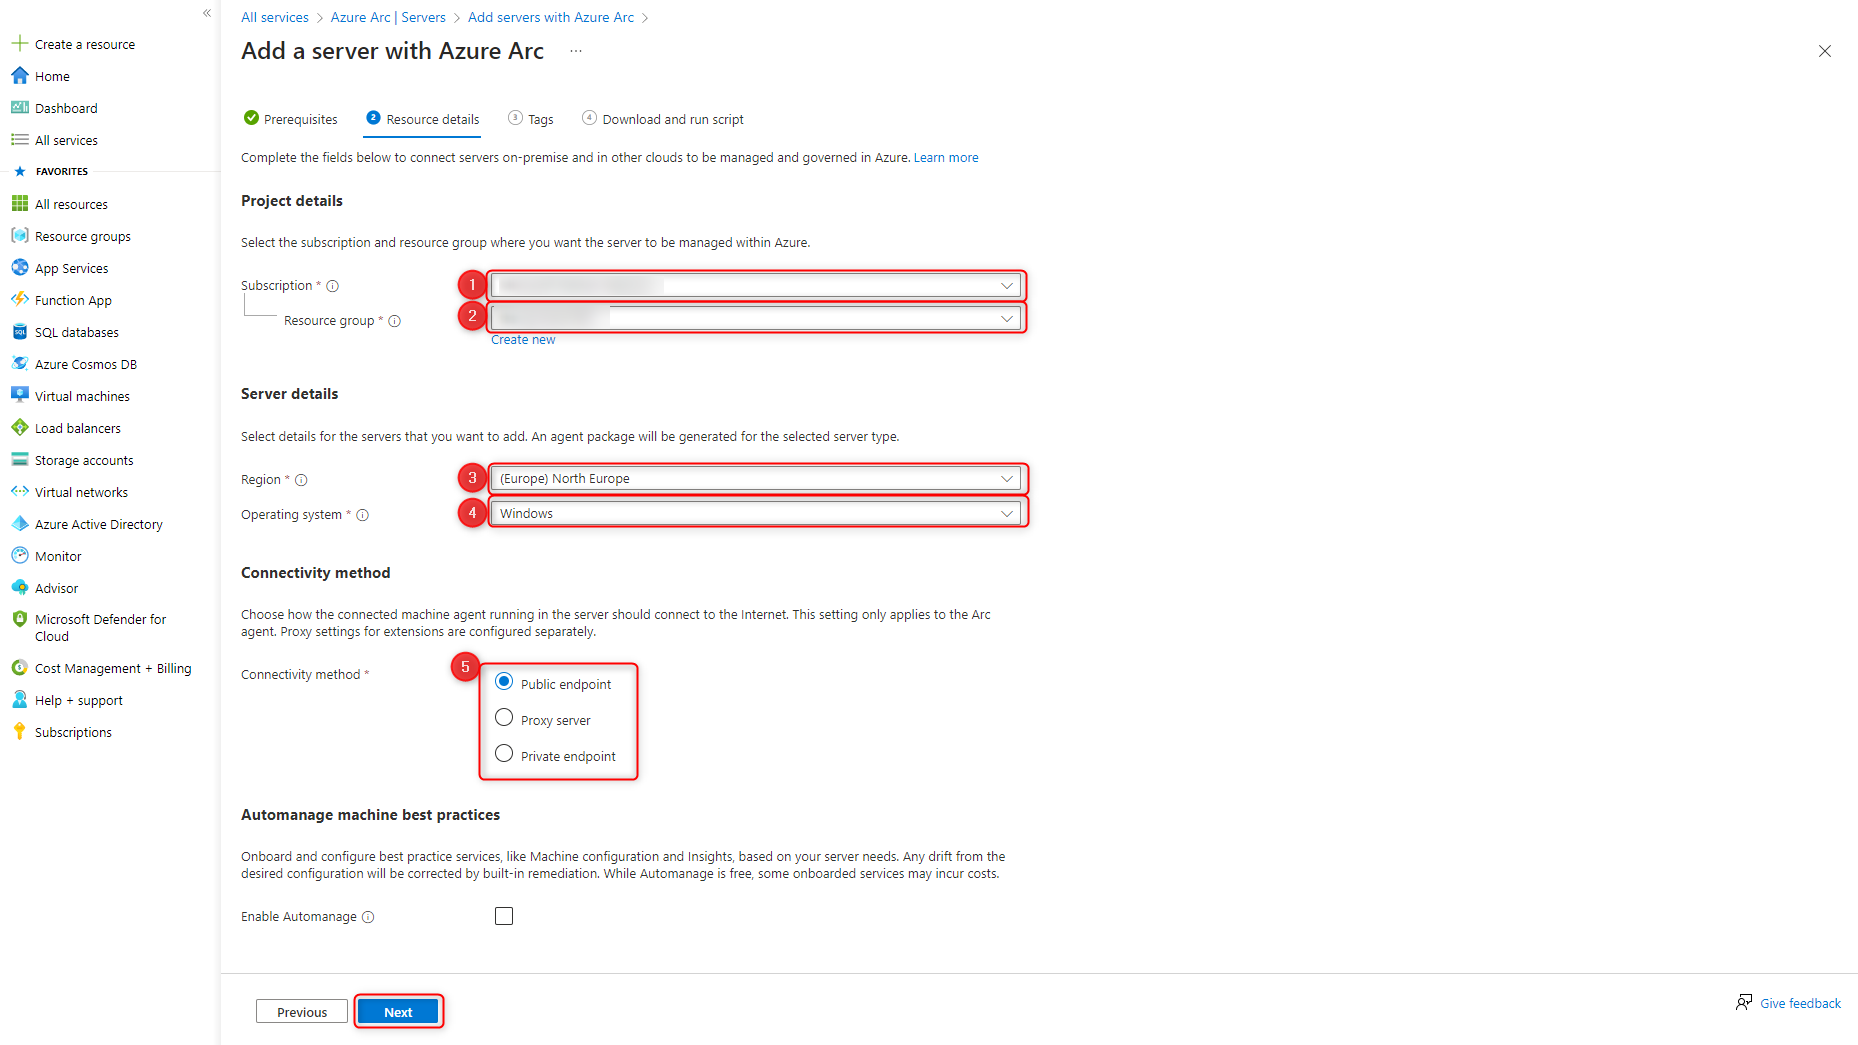
Configure details for the Azure Connected Machine Agent:
- Select Subscription
- Select Resource group
- Select Azure Region, where the meta data will be stored
- Select the operating system on which the agent will later be installed
- Select connectivity method of the on-premises server to Azure
Public endpoint transmits all data encrypted over the Public Internet. No other connection to Azure, such as VPN or Express Route, is required.
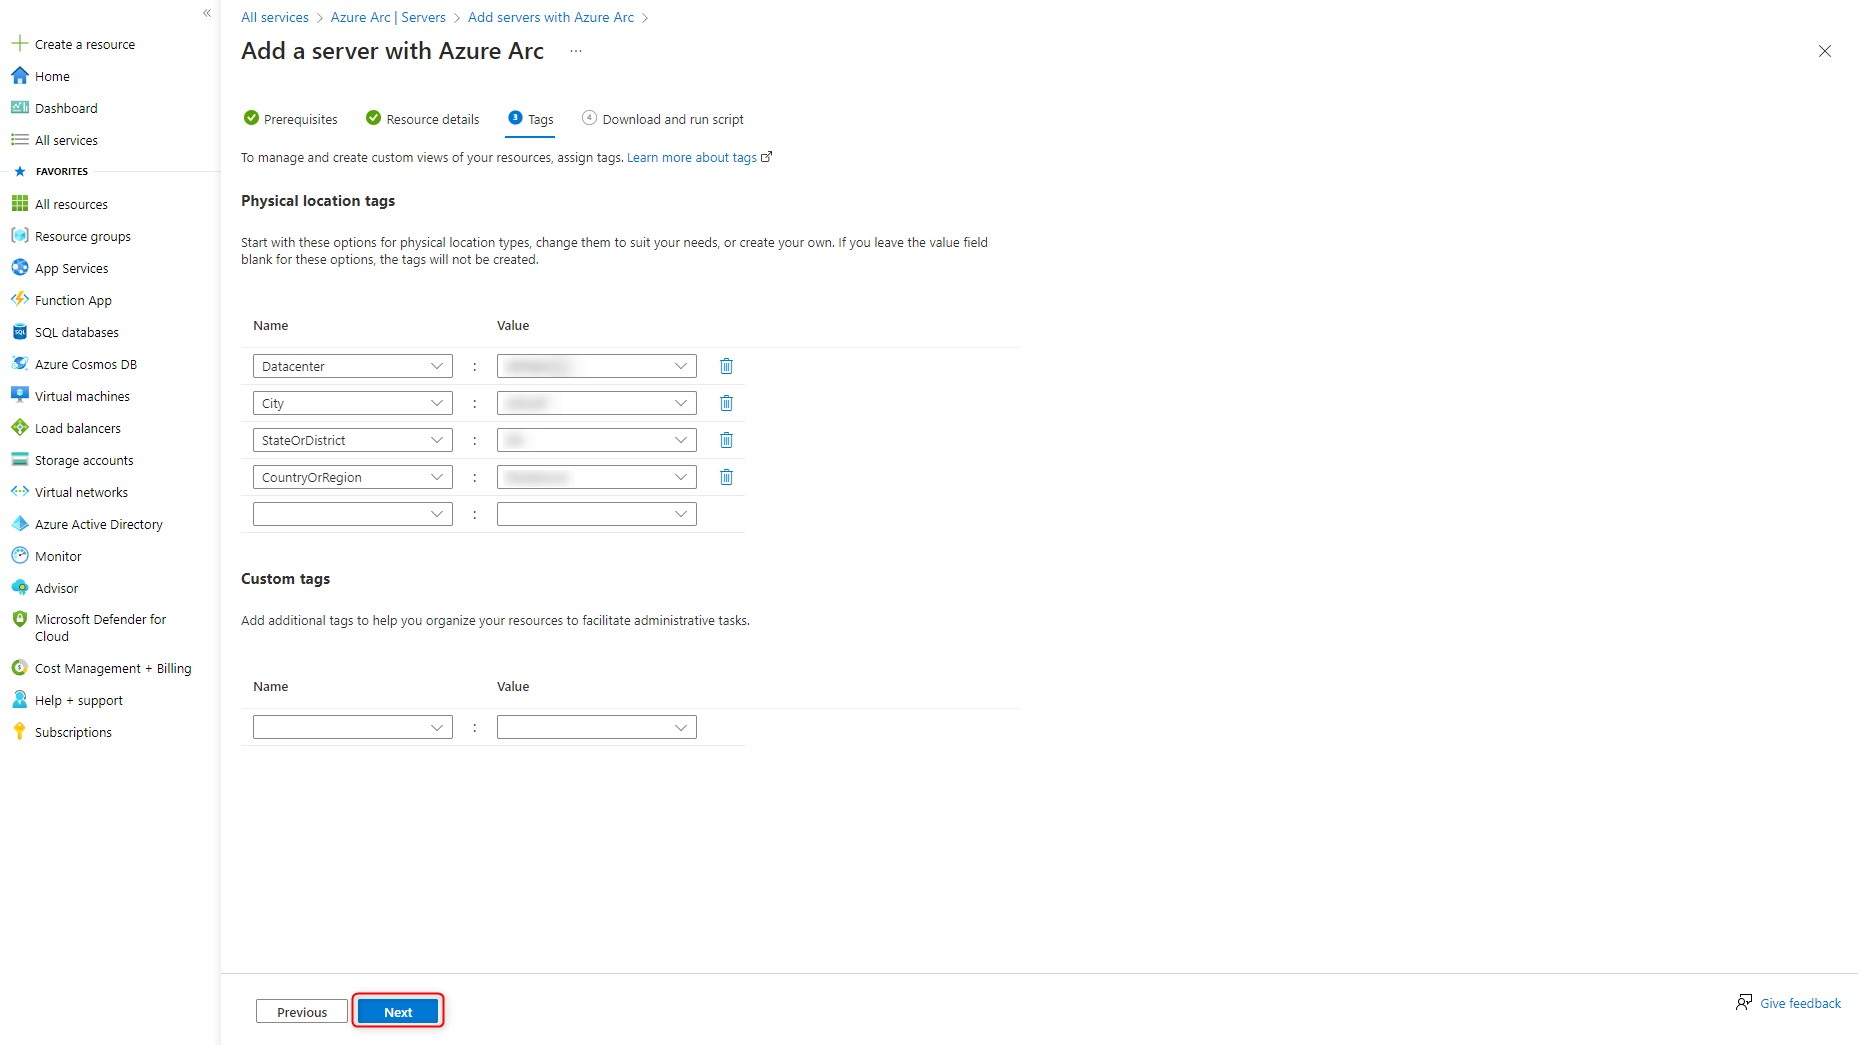
Tags are used to better associate Azure Arc enabled servers.
Edit tags according to your own guidelines.
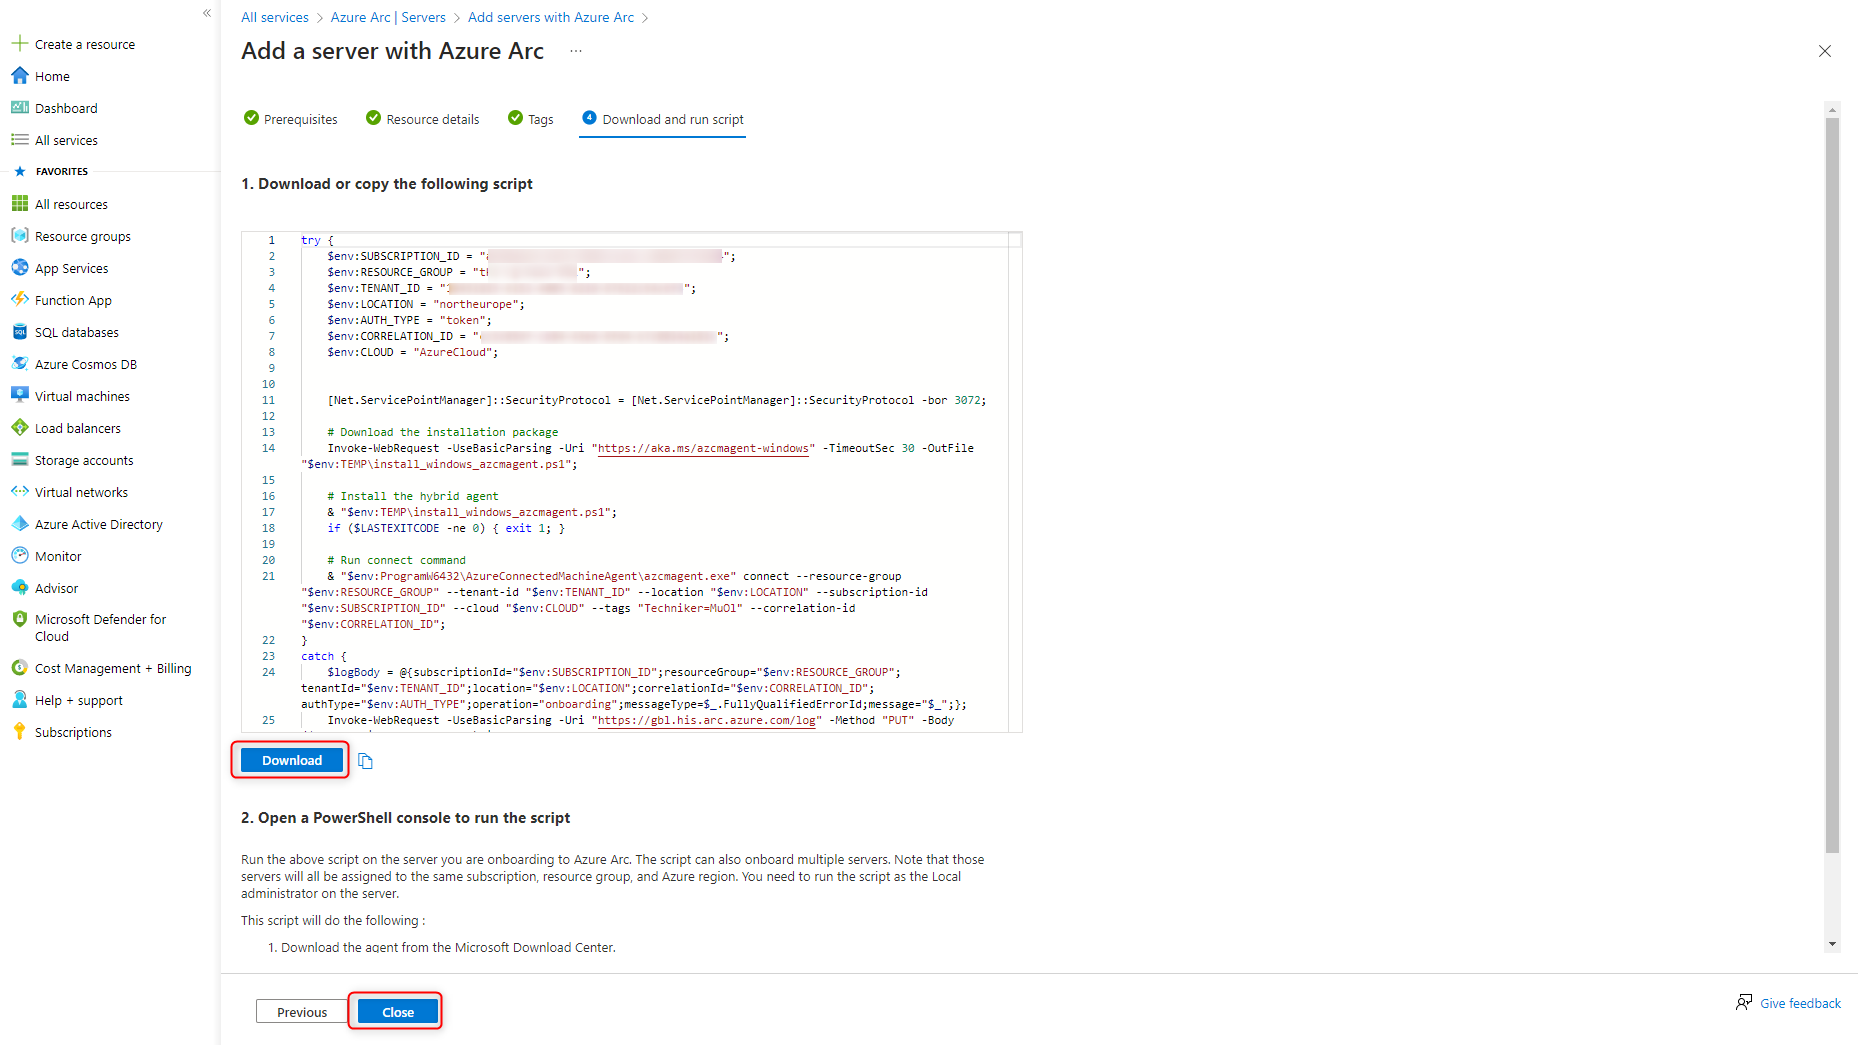
The PowerShell script is created from the information provided.
Download the PowerShell script by clicking Download.
The script will be run on the server in the next step.
The script can be used on multiple servers for deployment in Azure Arc.
A new script is only necessary if the parameters in the script change.
After downloading the PowerShell script, the window can be closed by clicking Close.
Installing Azure Arc Connected Machine Agent on Server
With the created PowerShell script, the server is deployed in Azure Arc.
Login to the server with an administrator account and upload PowerShell script OnboardingScript.ps1.

Run PowerShell with elevated privileges and start script OnboardingScript.ps1.
This script performs the following tasks:
- Downloading the agent from the Microsoft Download Center
- Installing the agent on the server
- Creating the Azure Arc Server resource and linking it to the agent
|
1 |
.\OnboardingScript.ps1 |
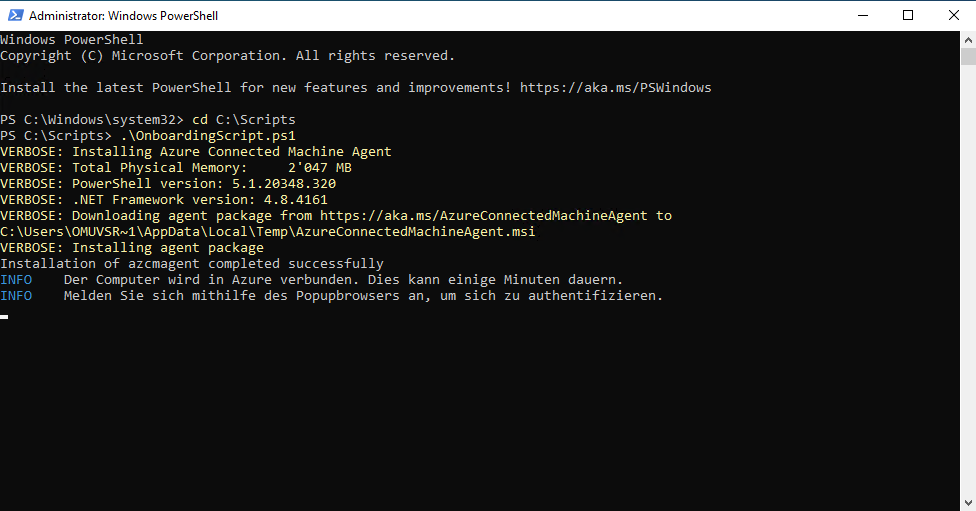
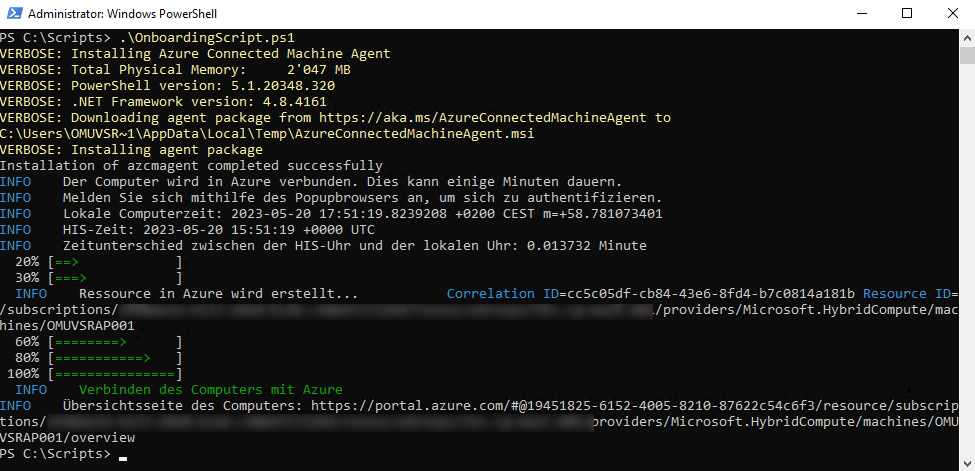
The script prompts to log in to the Microsoft tenant during execution.
The account used requires the Azure Connected Machine Onboarding role on the Azure subscription.
After a few minutes the PowerShell script is successfully executed.
On the server, the Azure Connected Machine Agent is visible under Programs and Features.
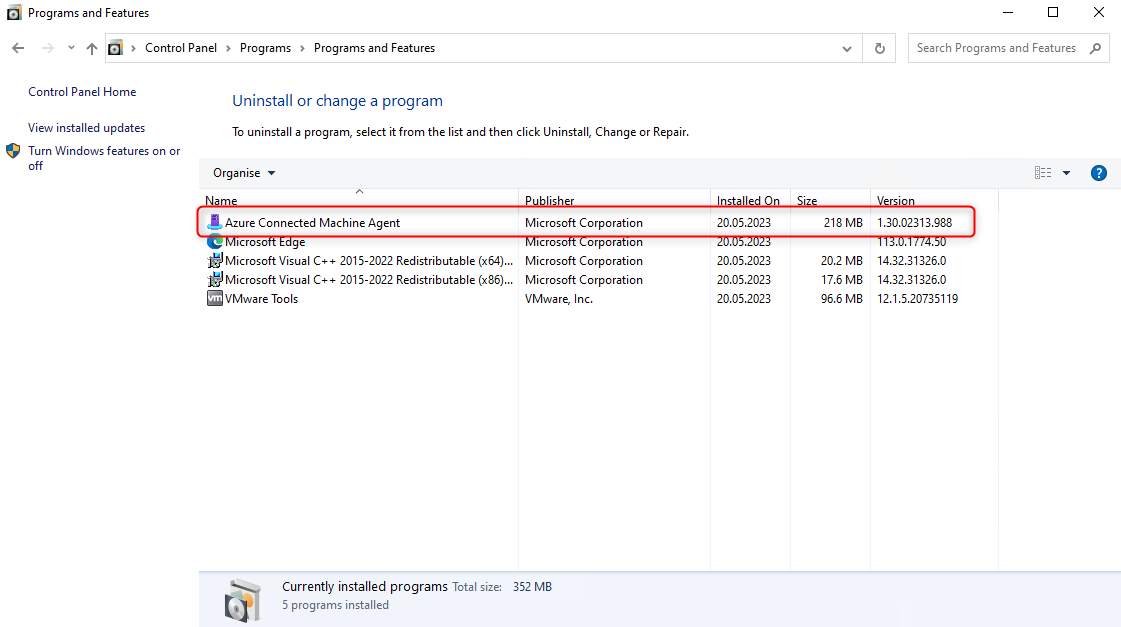
The service Azure Hybrid Instance Metadata Service is on status Running.

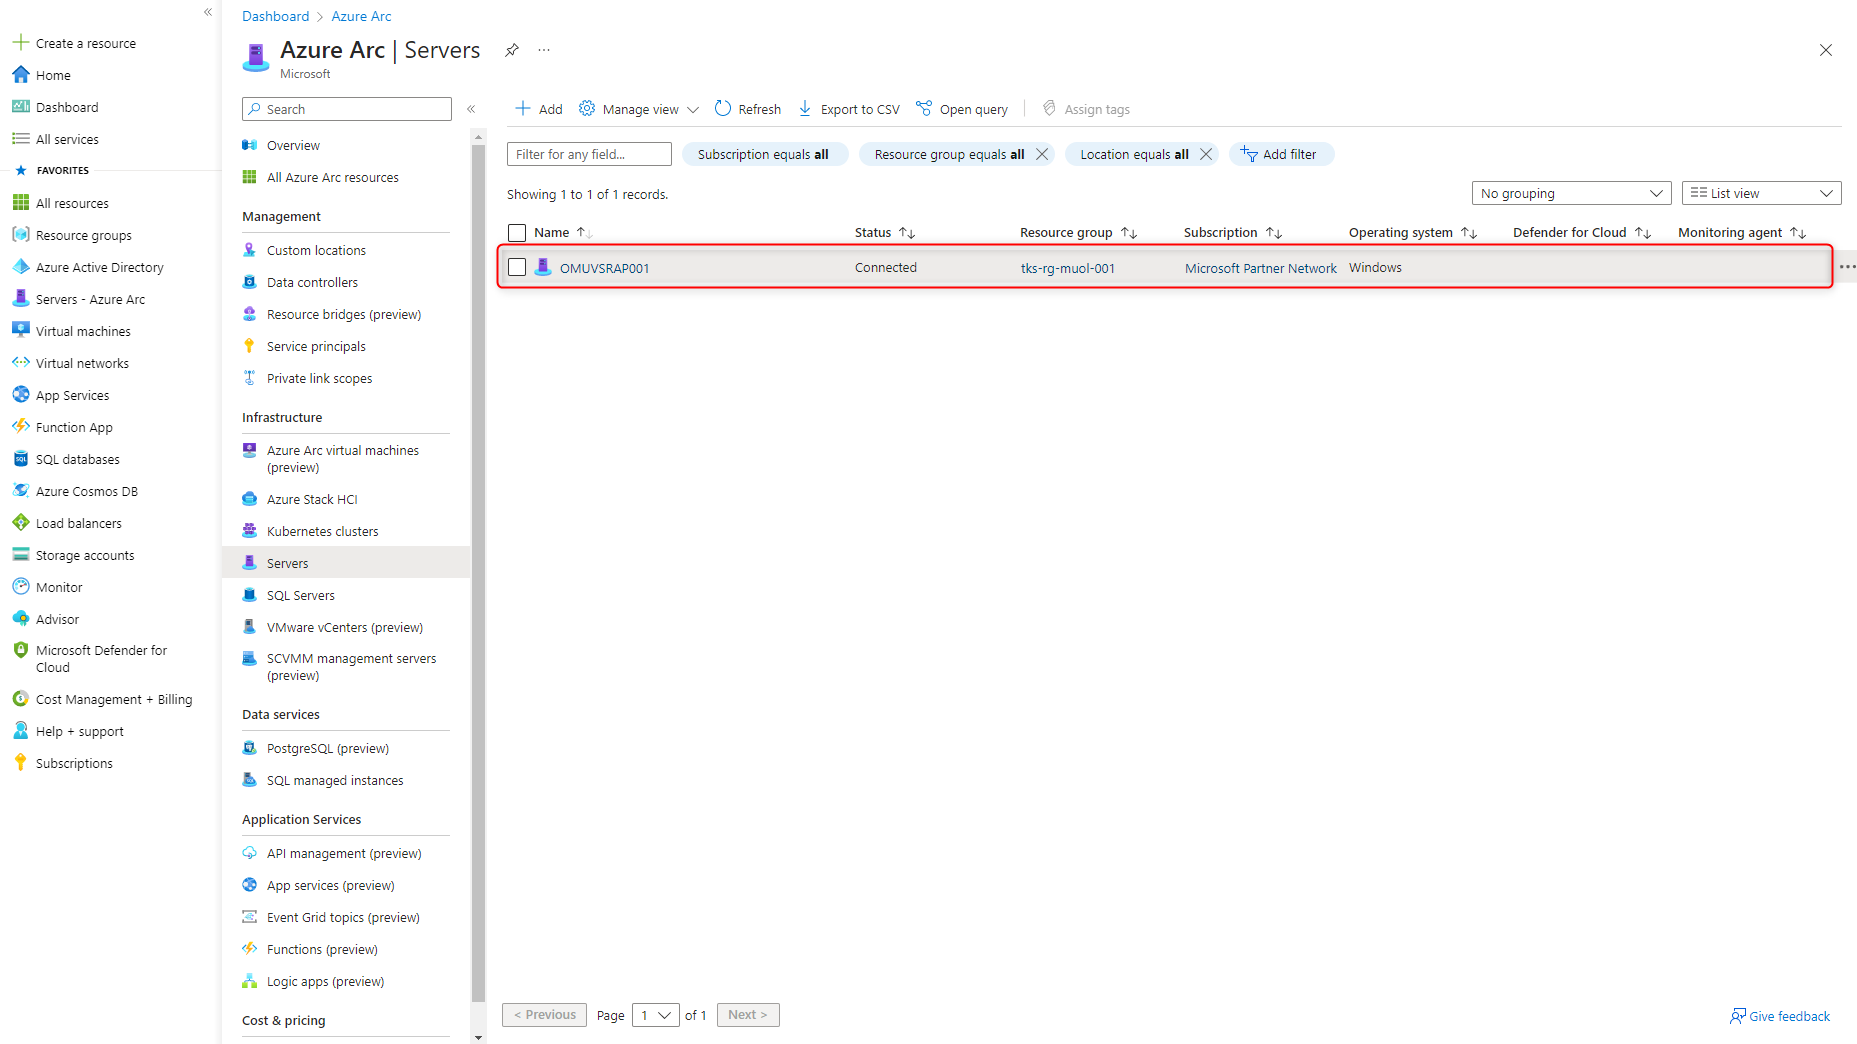
The server is now shown in the Azure Portal under Azure Arc > Servers.
Manage servers with Azure Arc
To manage the server via Azure Portal, Windows Admin Center or Remote Desktop, select the server under Servers – Azure Arc > Servers.
Azure Portal
The local server is shown comparably like a virtual machine resource. For example, the following services can be managed directly from the Azure portal:
- Updates
- Change Tracking
- Invetory
- and many more

Windows Admin Center
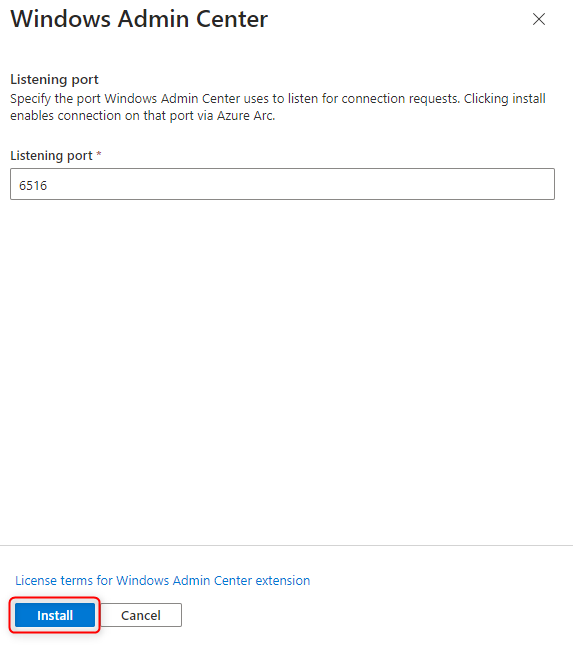
Select the Windows Admin Center and click on Setup.
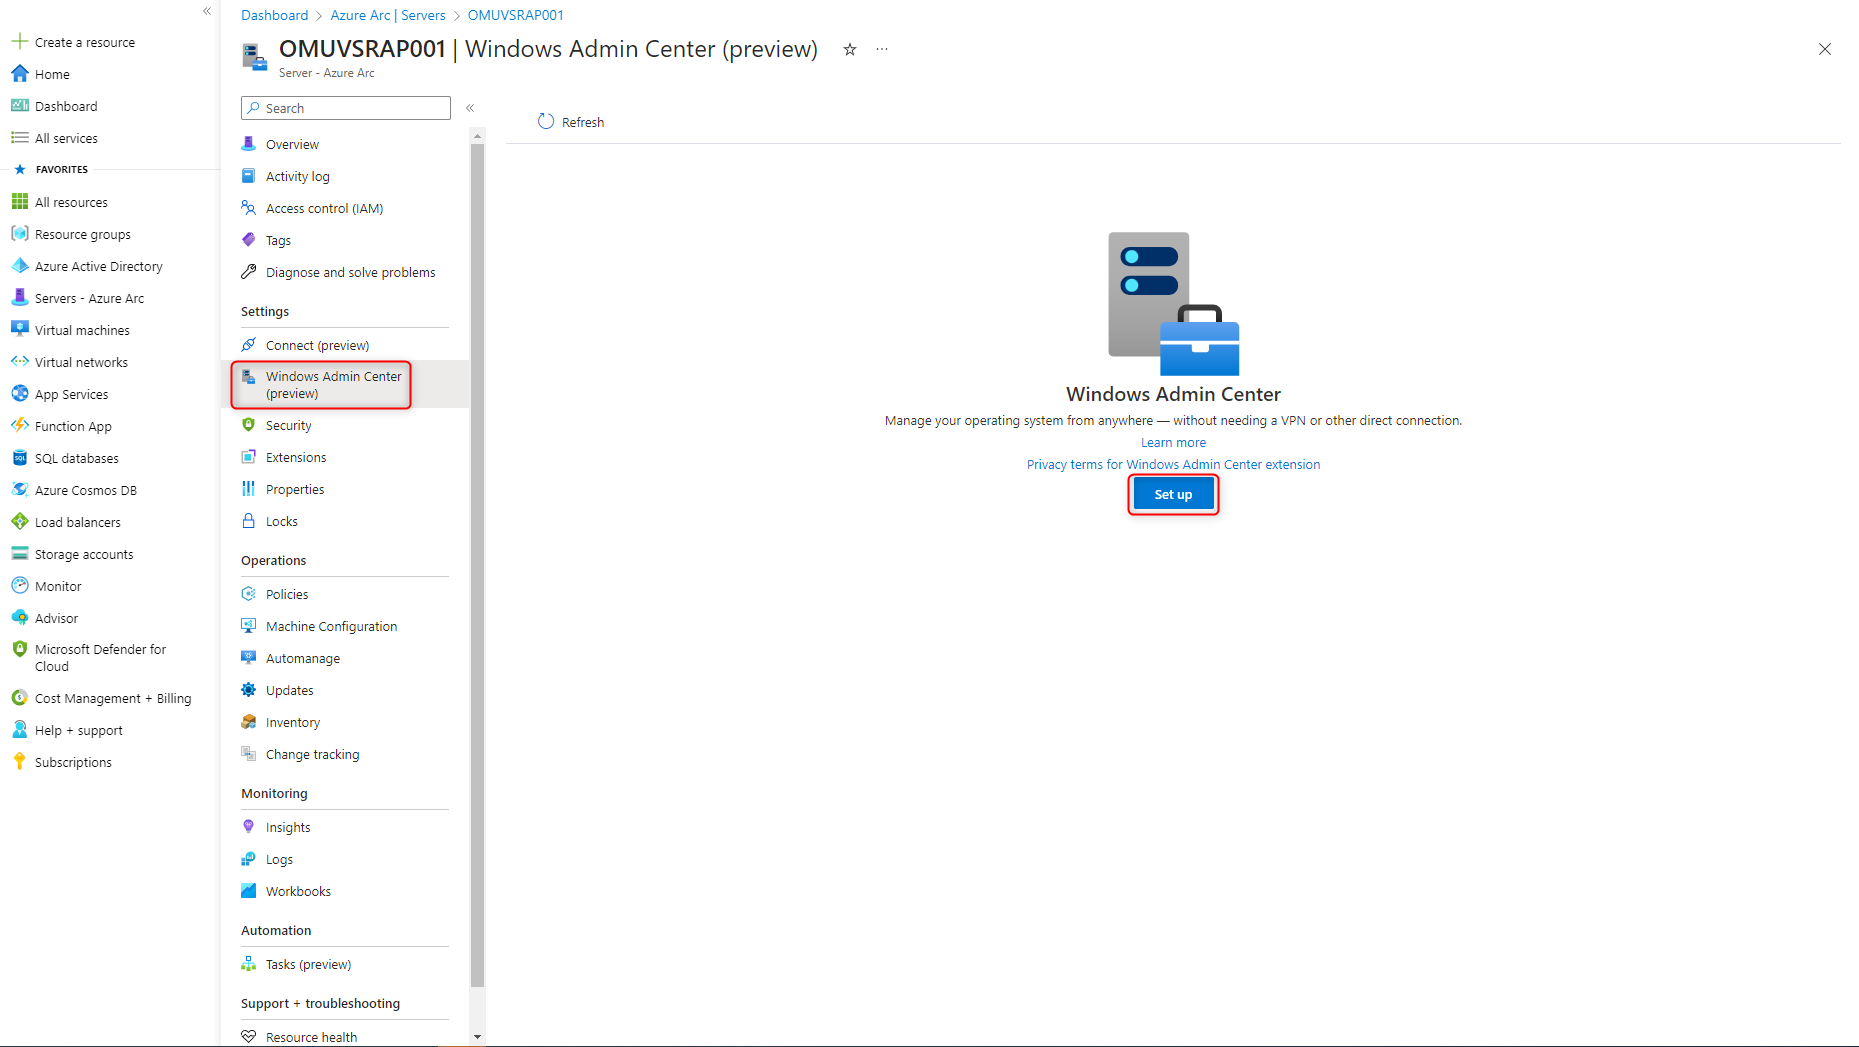
Start installation of the Windows Admin Center on TCP port 6516 by clicking Install.
Azure Arc now installs the Windows Admin Center Extension on the server.
The process takes a few minutes.
After the installation is complete, the Windows Admin Center is visible on the server under Programs and Features.

Connect can now be used to establish a connection with the Windows Admin Center to the server.
If the Connect button is grayed out, the user account lacks the necessary role permissions. Possible solution see Troubleshooting.
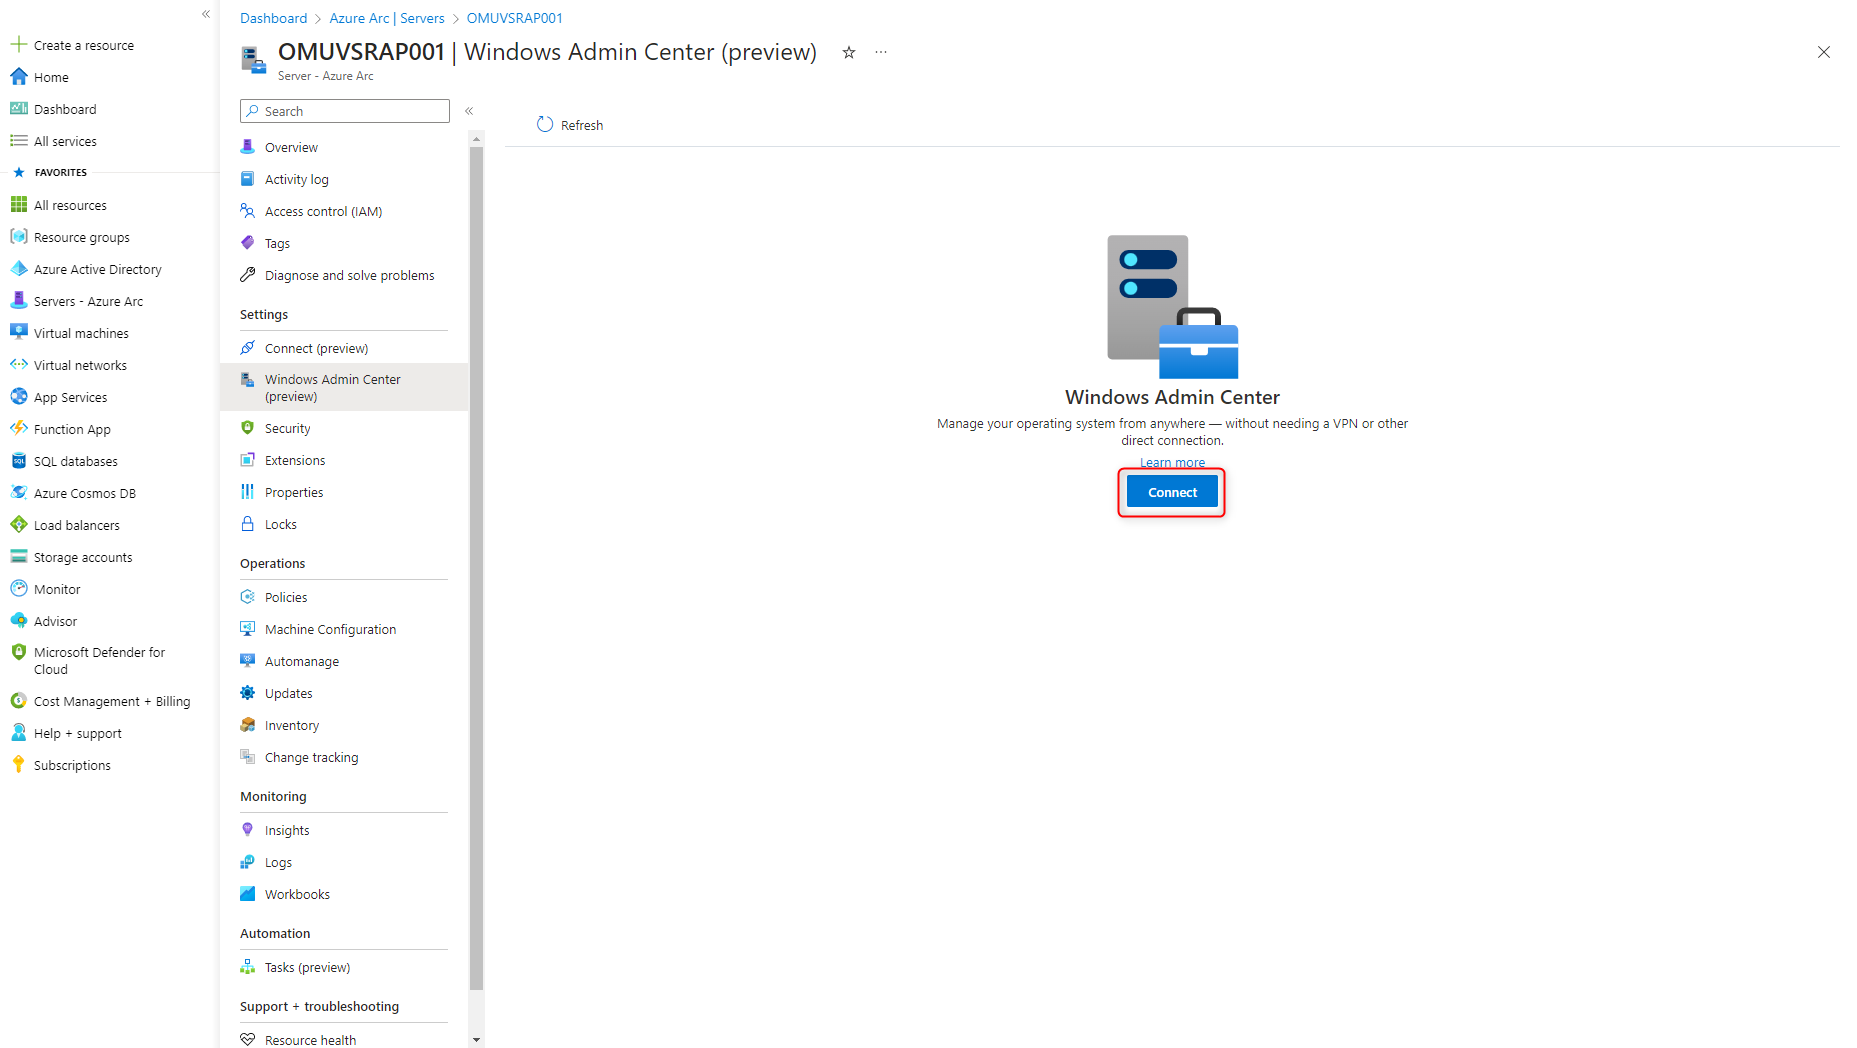
The Windows Admin Center session is established and is ready shortly afterwards.

Remote Desktop
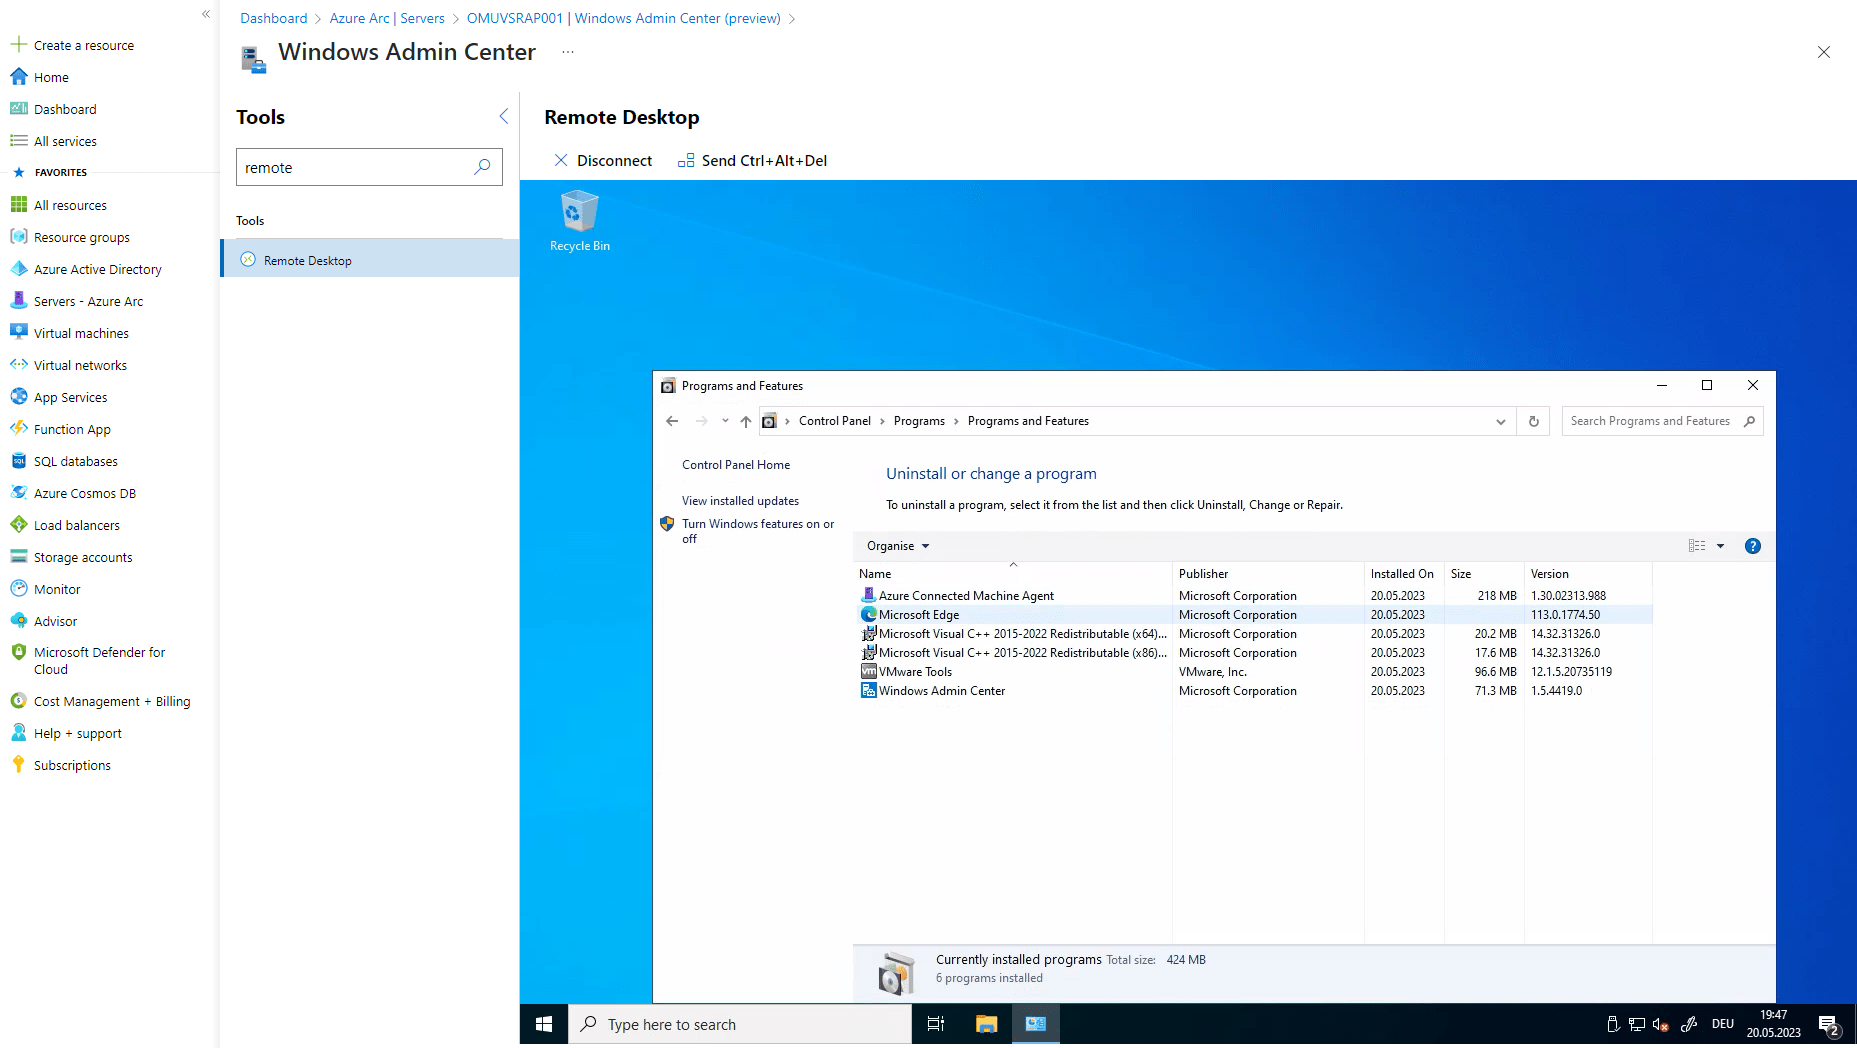
With the Windows Admin Center, a remote desktop session can be opened in the browser to manage the local server from the Azure portal.
Select Windows Admin Center > Connect > Remote Desktop and use credentials of the server for login.

The remote desktop session is established for the administration of the server.
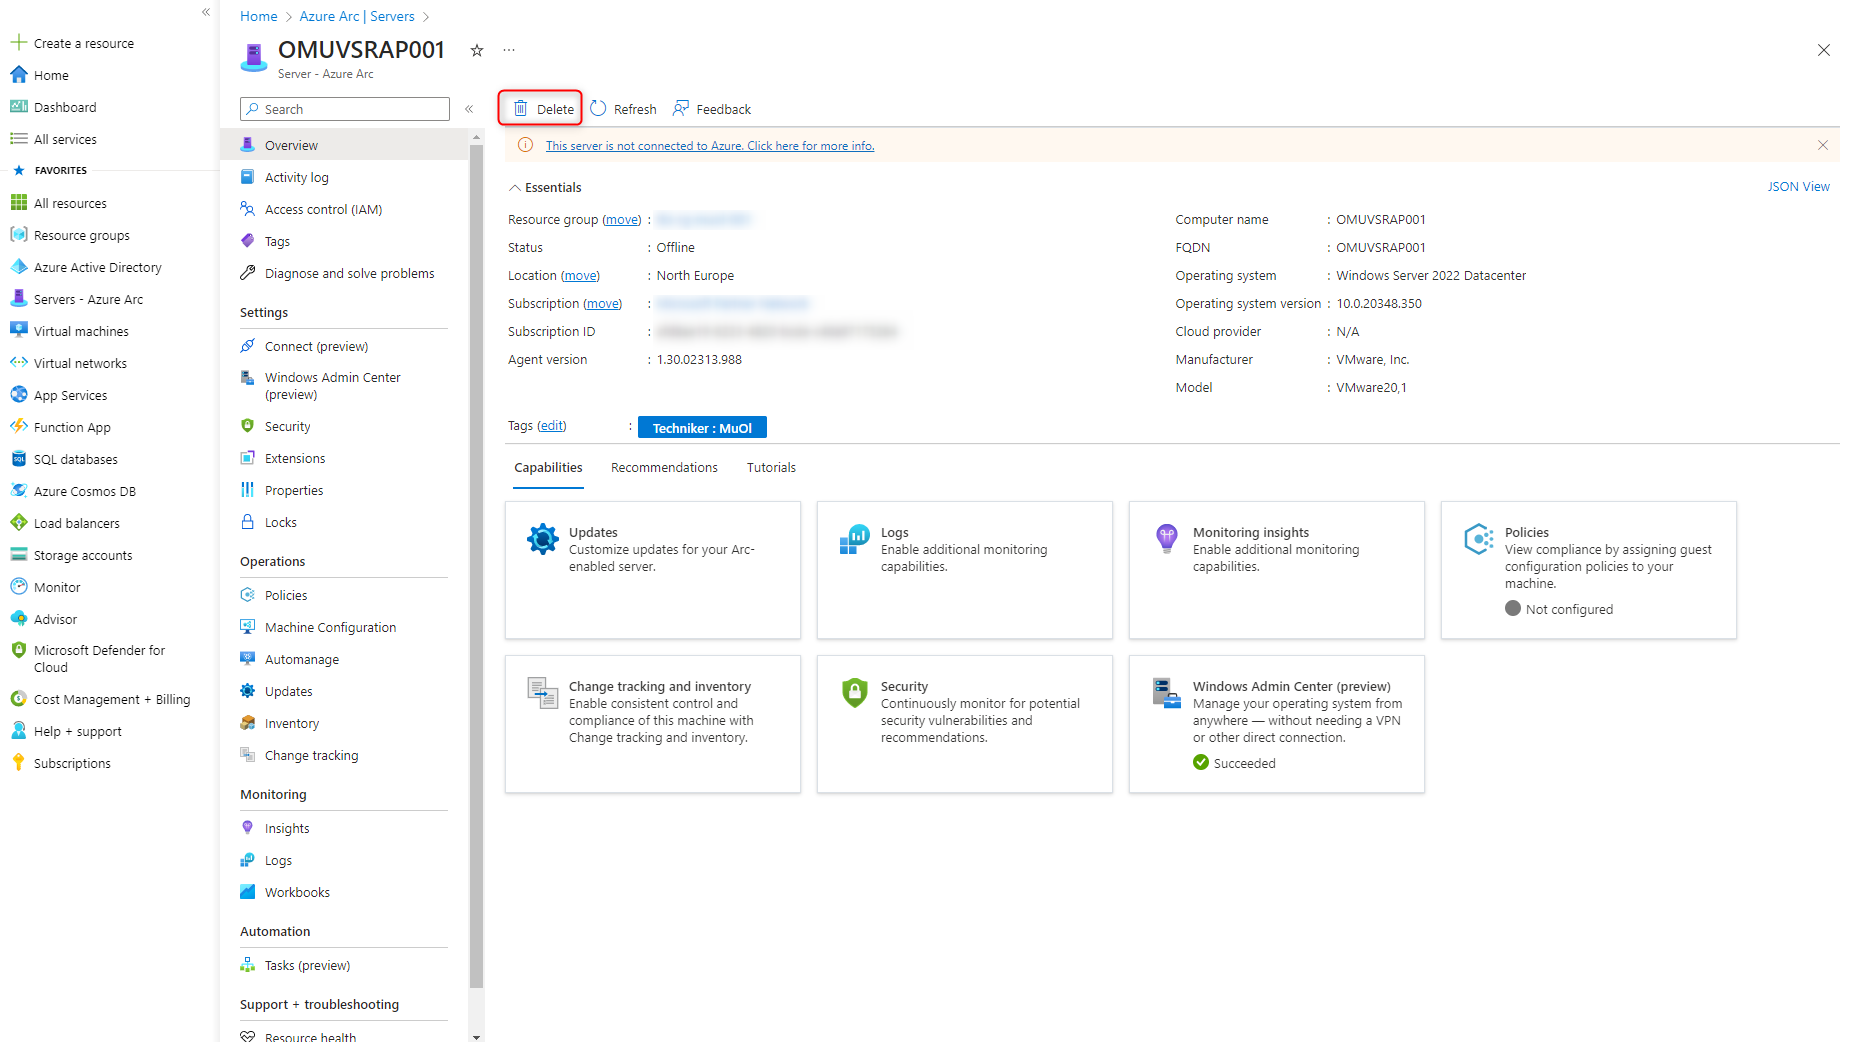
Offboarding Azure Arc
Offboarding a server from Azure Arc does not delete the server itself. The server is removed only from the Azure Arc management console and is no longer visible there.
Uninstall Azure Connected Machine Arc Agent
Uninstall the Azure Connected Machine Agent software on the server.

Remove Azure Arc Server from Management Console
Select Server under Servers – Azure Arc > Servers.
Click Delete
Troubleshooting
When trying to connect to the Windows Admin Center, the Connect button is grayed out.

To connect through the Windows Admin Center, the user account must be a member of the Windows Admin Center Administrator Login group.

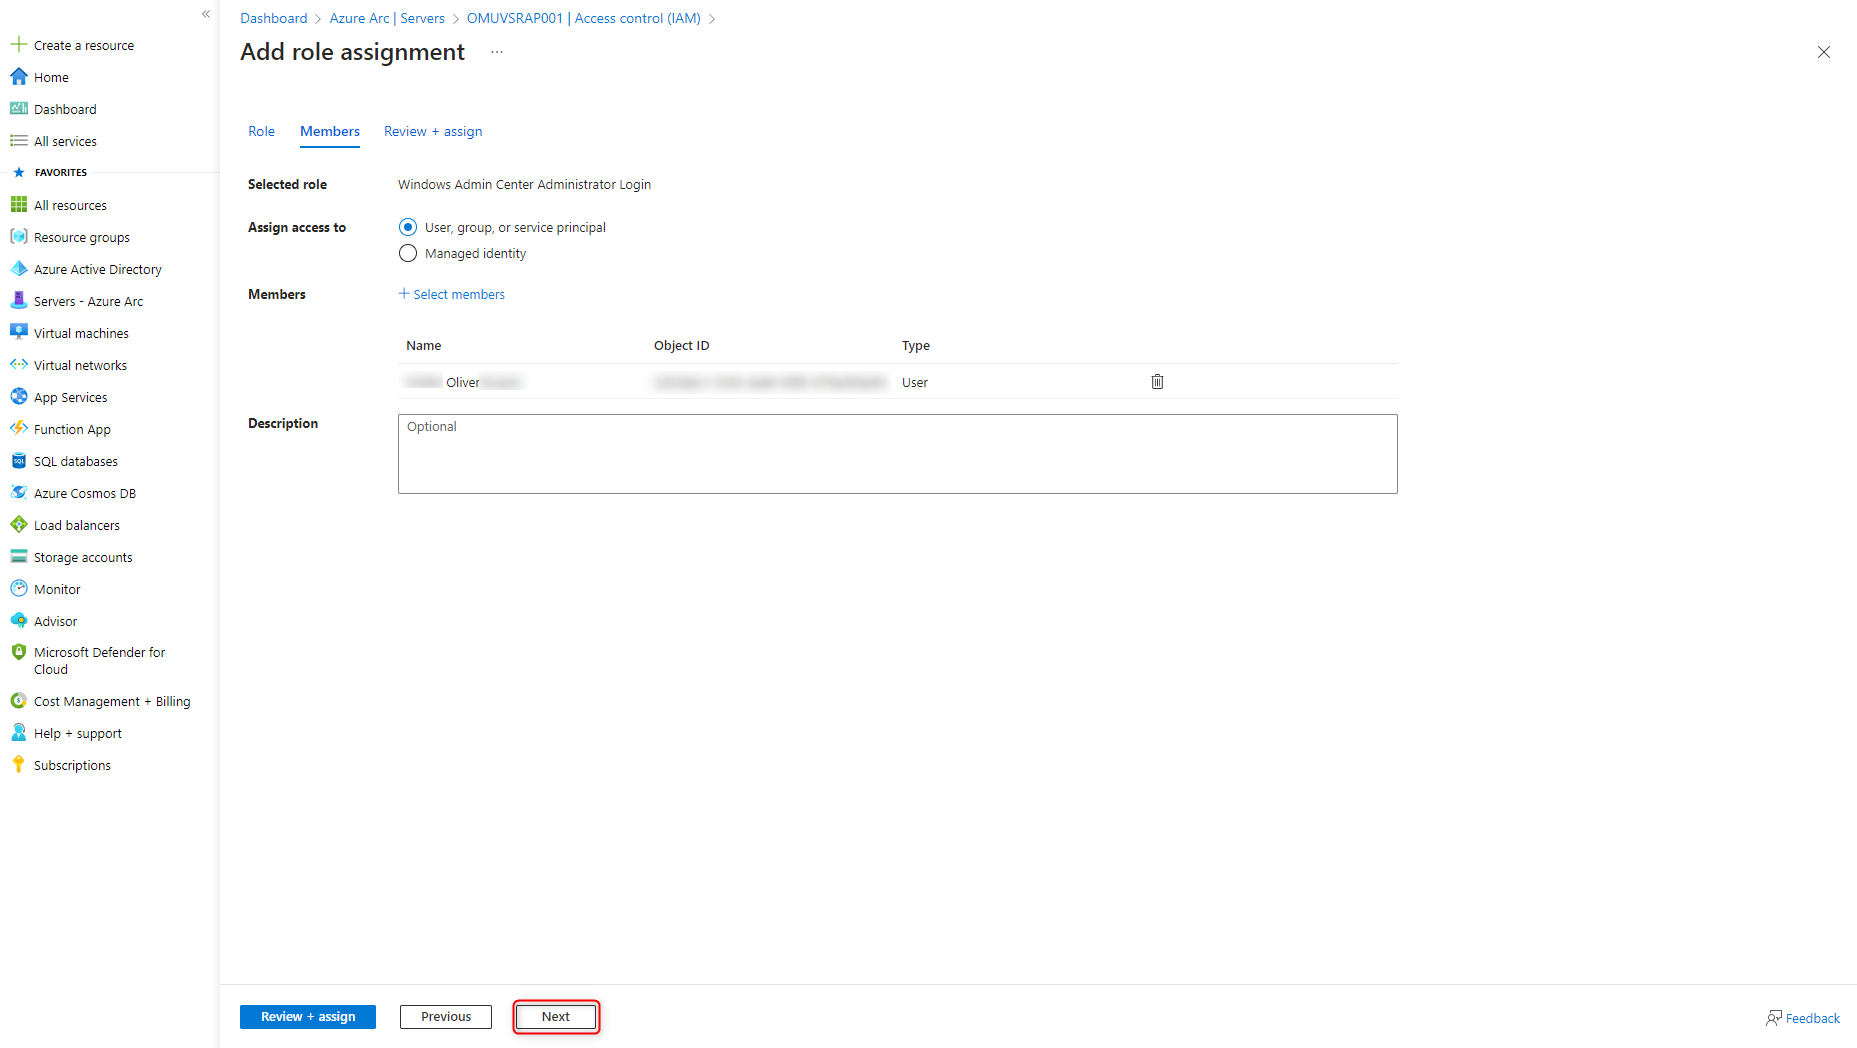
Open Access control (IAM) and select Add > Add role assignment.

Choose the role Windows Admin Center Administrator Login and click Next.

Add all authorized accounts to the role and click Next.
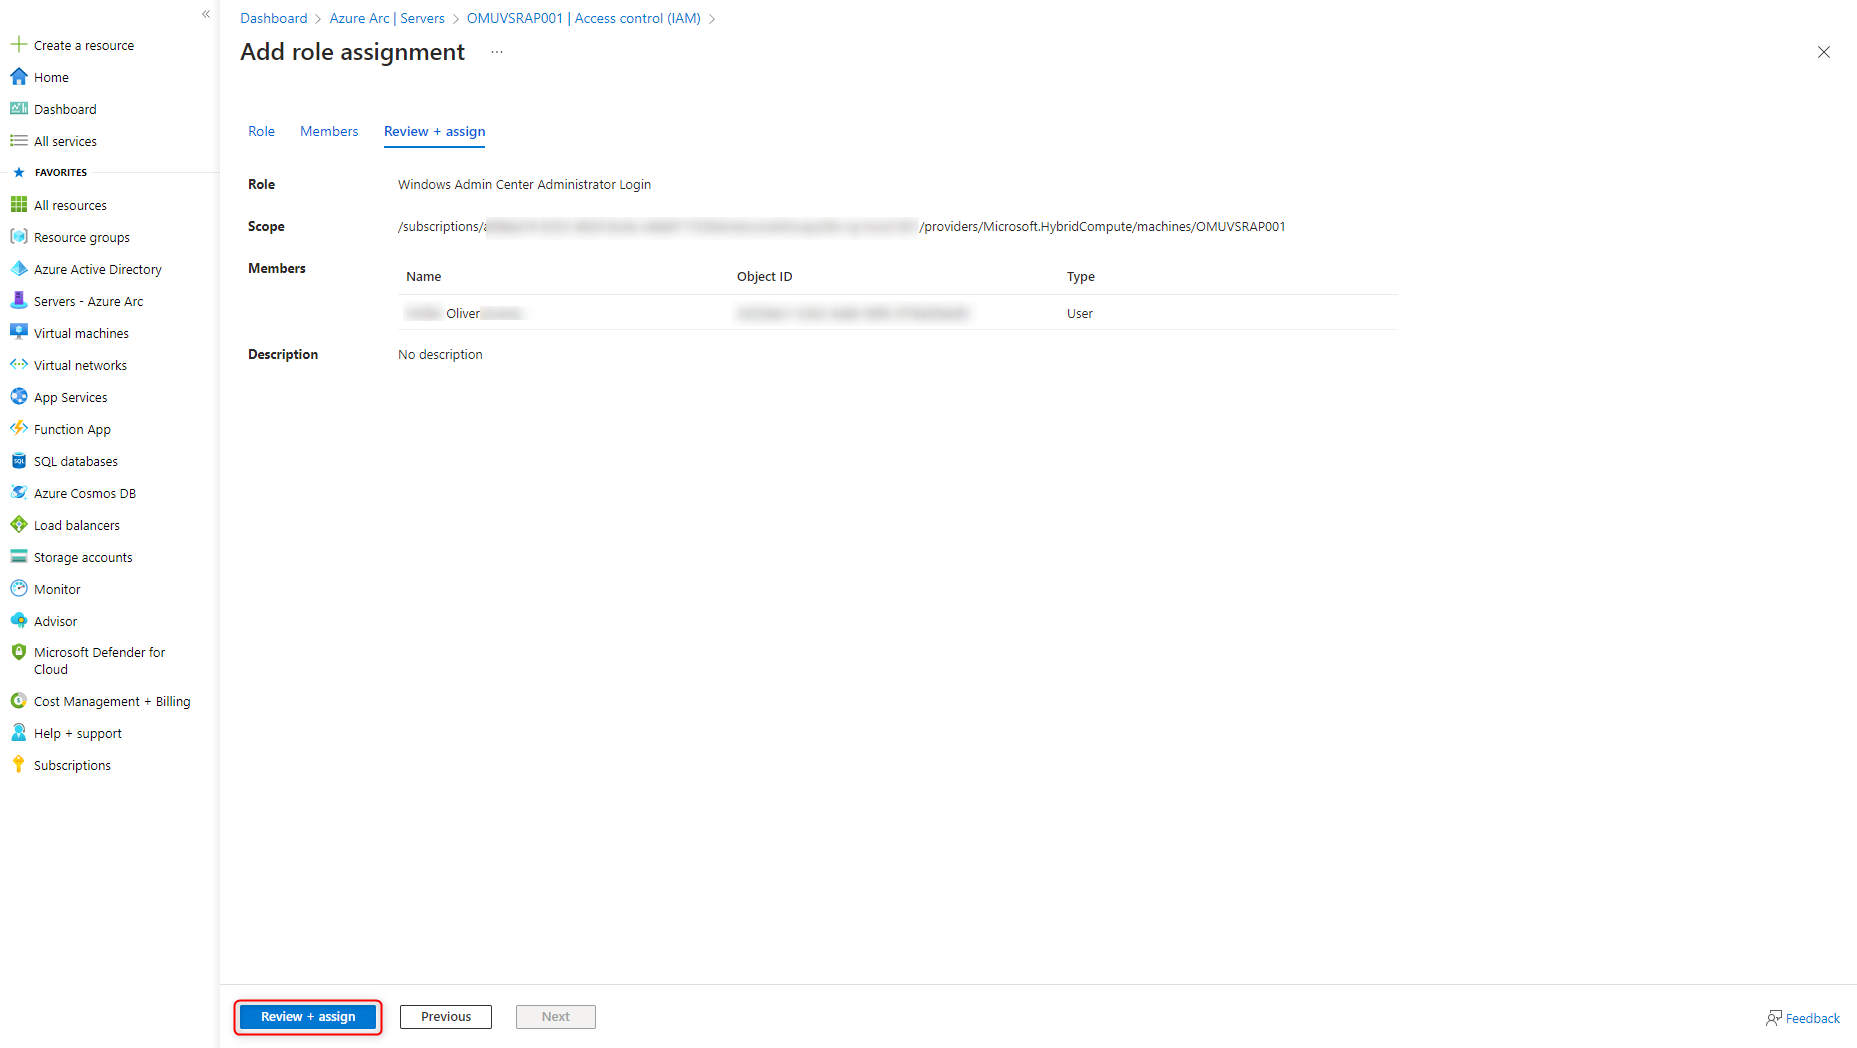
Save configuration with Review + assign.
Fresh content, explained with practical relevance. Stay up to date via LinkedIn and Bluesky.


No marketing. No noise. Just content.
If this post was helpful, a coffee brings back the rich aroma behind the writing.